
Introduction
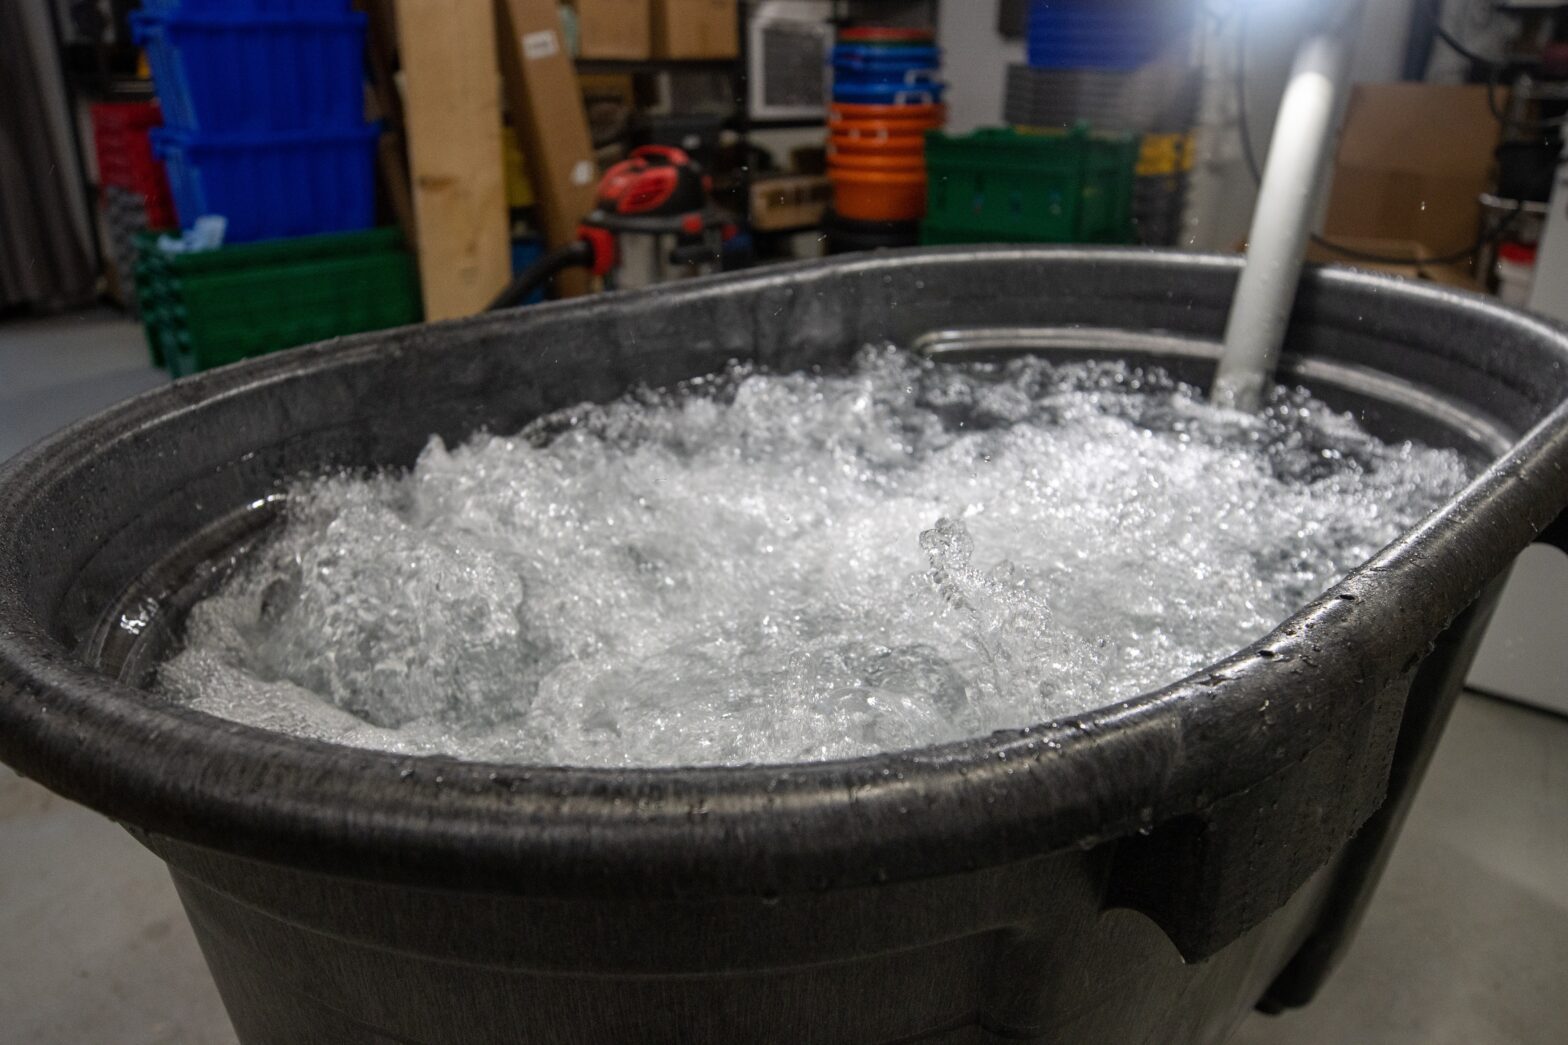
Leafy greens are a popular crop among consumers seeking a healthy and nutritious diet year-round. As a crop that is grown close to the ground in a variety of systems, often it is important to remove soil from the leaves before marketing. A relatively high volume dunk tank with several, typically lower volume, follow-on tanks is a common setup for achieving this. In the first dunk tank, some gentle agitation is often desired to ensure water contact with all parts of the leaves, provide some active “scrubbing”, and to flip leaves allowing soil to drop off. While this can be done by hand or using a hand-held tool, many growers find an air bubbler to work well for this need. In this guide, some of the best practices and experiences of growers are captured along with some guidance on cleaning and sanitization to improve produce safety.
A PDF version of this blog post can be downloaded here.
Table of Contents
Off the Shelf Options
Design for Quality & Safety
Design for Crew Safety
Design for Gentle Agitation and Water Containment
Design for Cleaning and Produce Safety
Build Guidance (with videos)
Bill of Materials
Farmer Bubbler Examples
How to Clean a Bubbler
Bubblers Webinar
Off The Shelf Options
Farmer’s are a creative type, but sometimes lacks in the time to figure things out from scratch. If you’re not interested in building a bubbler from the ground up as outlined below, there are a few options that you can purchase, that are pretty much ready to to use.
Greens Bubbler from Neversink Tools – $489
- Stainless steel construction
- EASY Cleaning
- Easy to “remote mount” blower away from tank if desired
Quick-Clean Greens Bubbler From Farmer’s Friend – $375
- Compact design
- Electrical-free button
- Includes fast drain valve
Designing for Quality and Safety
Greens have a large amount of surface area and often have a surface that can be hard to wash. We want to construct a bubbler that provides enough agitation without damaging the crop or splashing water everywhere. When we build a bubbler we also need to pay close attention to its hygienic design so that it can be adequately cleaned and sanitized between uses. Below are the key design features to consider as you start to build.
Design for Crew Safety
Use waterproof electrical connections, ground fault interrupt circuit protection and hire in this help if you are not comfortable doing electrical work.
Size the entire assembly to fit snugly in the tank so it is secure while avoiding the need to add fasteners inside the tank which introduce cleaning challenges.
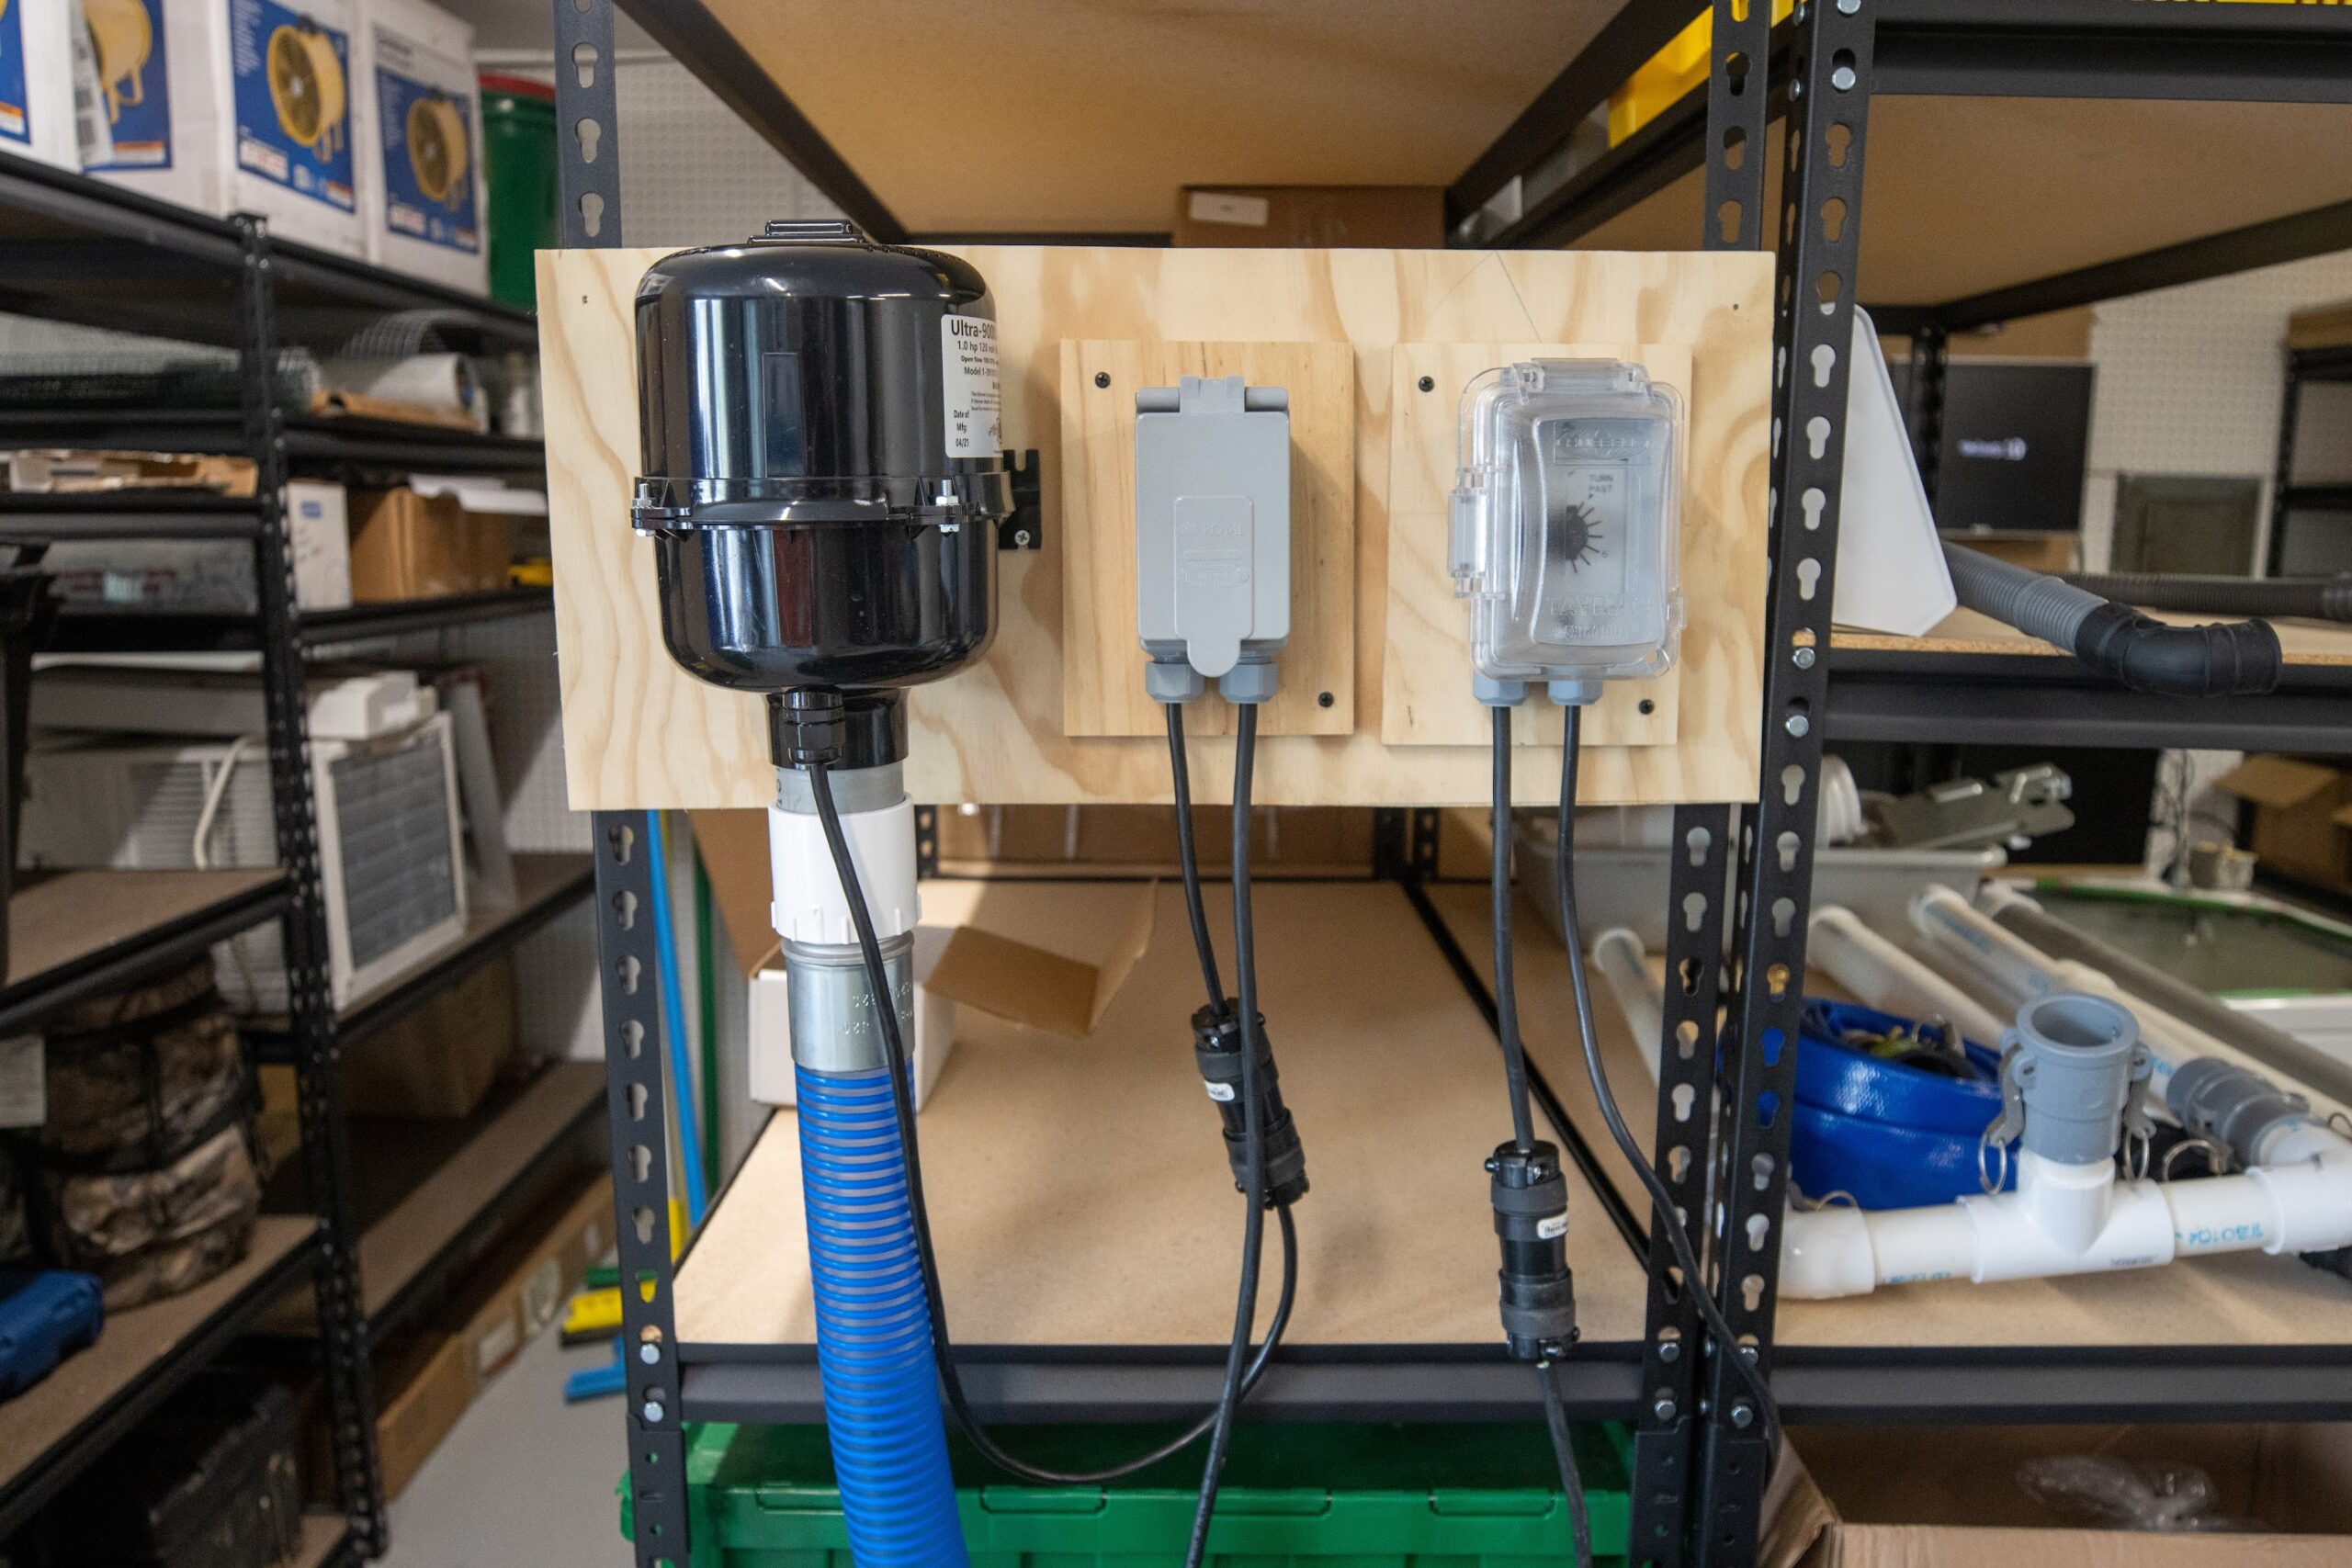
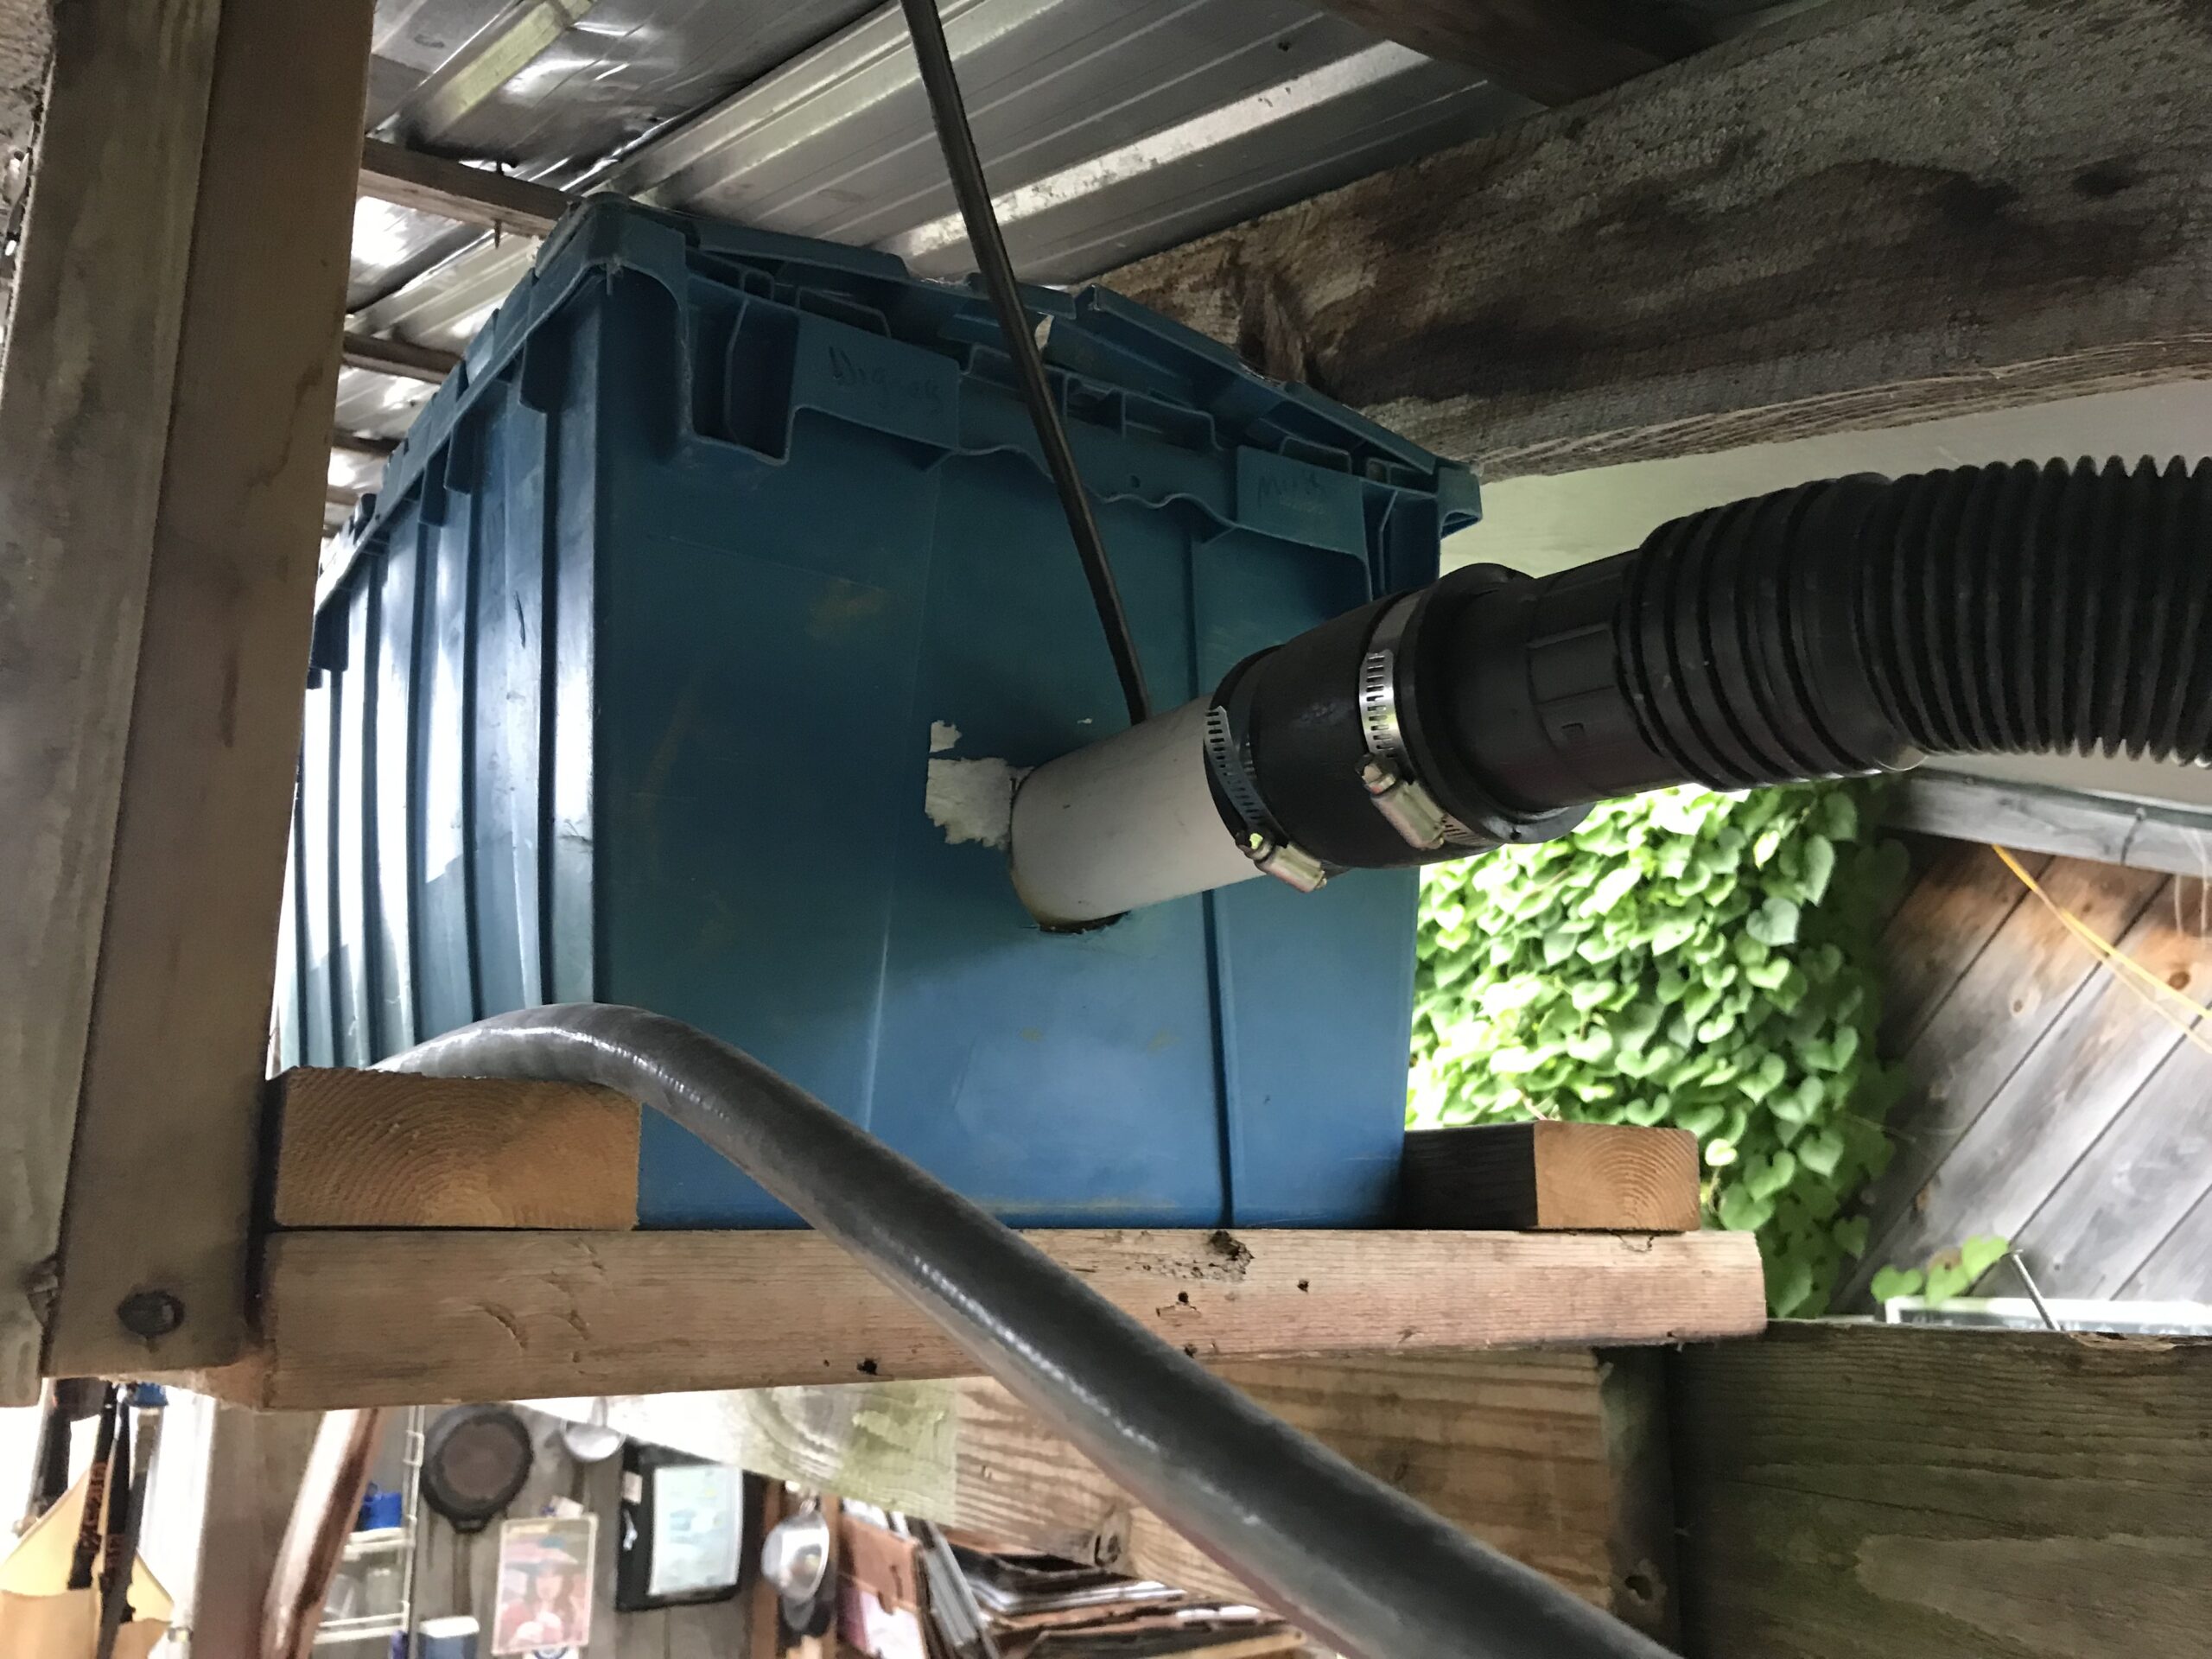
Consider remote, permanent installation of the blower to reduce the noise level in the packshed and separate the electrical power source from the area with water.
Route electrical connections away from water and walking areas to reduce the risk of electrocution and trip hazards.
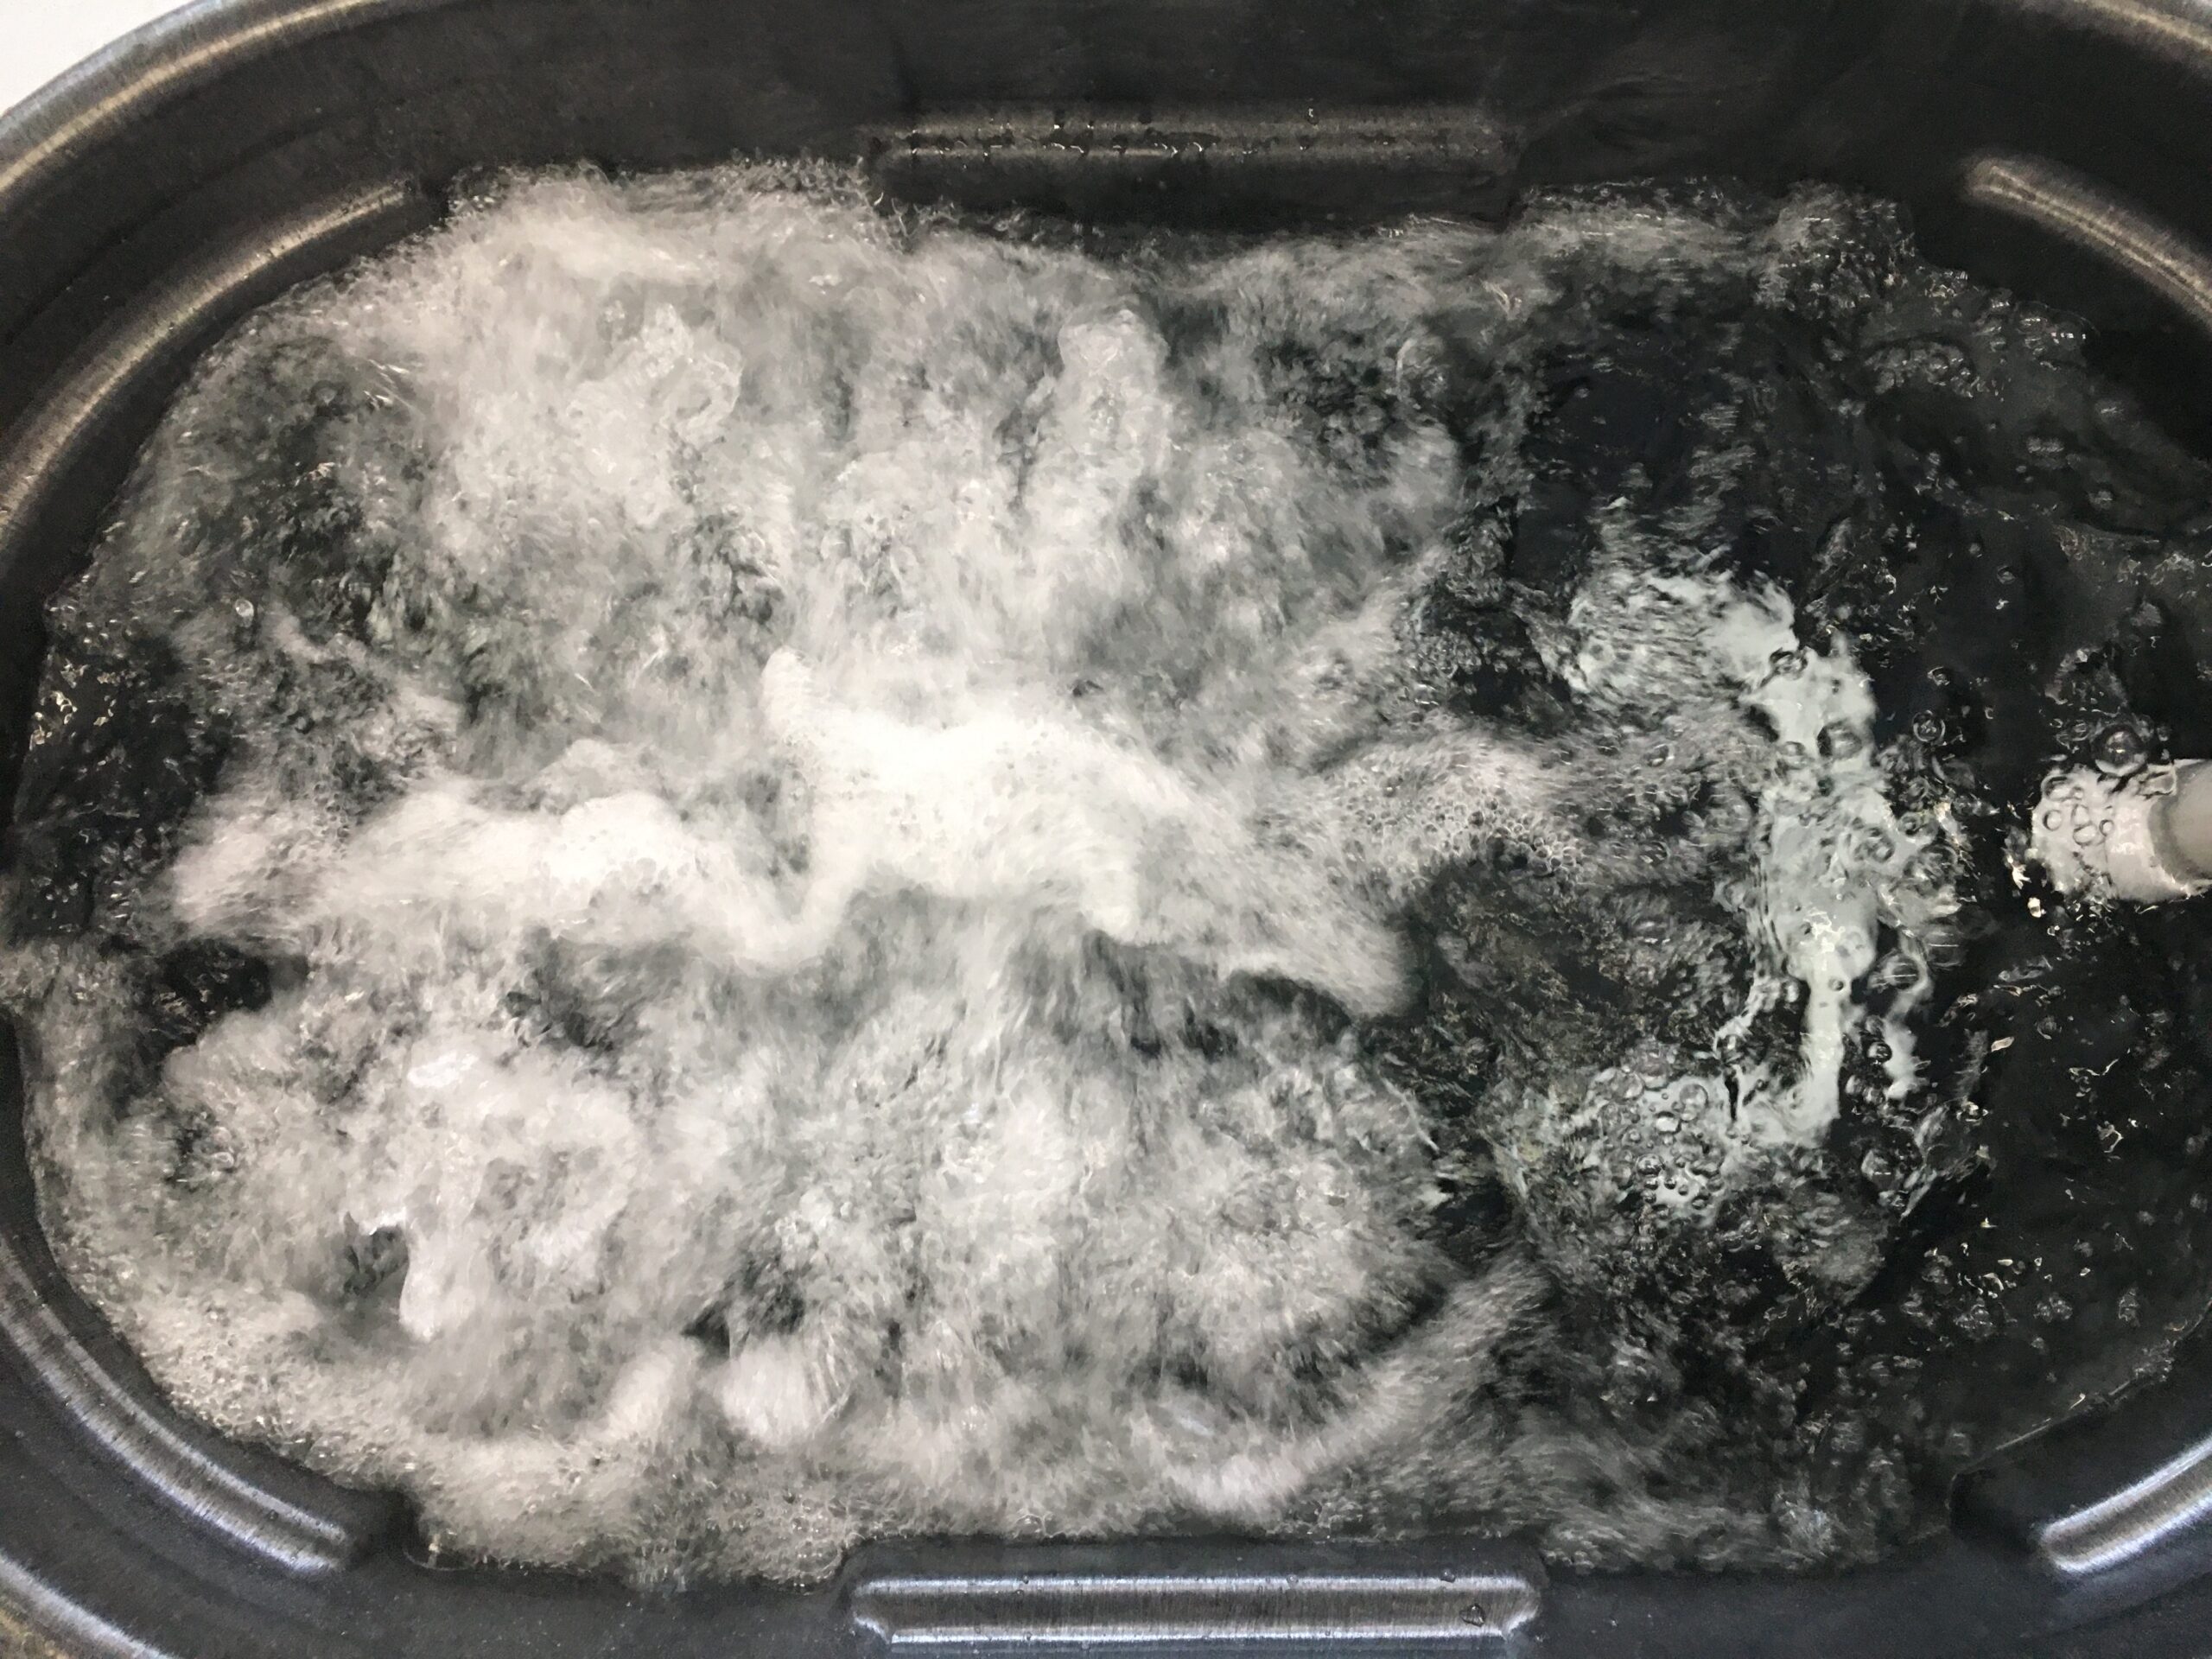
Design for Gentle Agitation and Water Containment
Select a well-sized blower with enough flow for your needs.
Technical info on selecting a blower: The most common 1 hp jacuzzi blowers can provide 110 CFM maximum flow (at zero pressure) and 75 inch water column (inch wc) static pressure head (at 0 CFM flow). Blowers operate somewhere in between these two extreme conditions, for example 60 CFM at 30 inch wc back pressure. The back pressure is the combination of the water level (in inches) plus the pressure loss due to friction from air flow in the piping between the blower and the air holes (at 60 CFM in 2” Sch 40 PVC, this loss is 1 inch wc per 10 feet of pipe length). So with 24” of water level in the tank a typical blower can easily be placed 60 feet away using 2” PVC to bring the air to the bubbler.
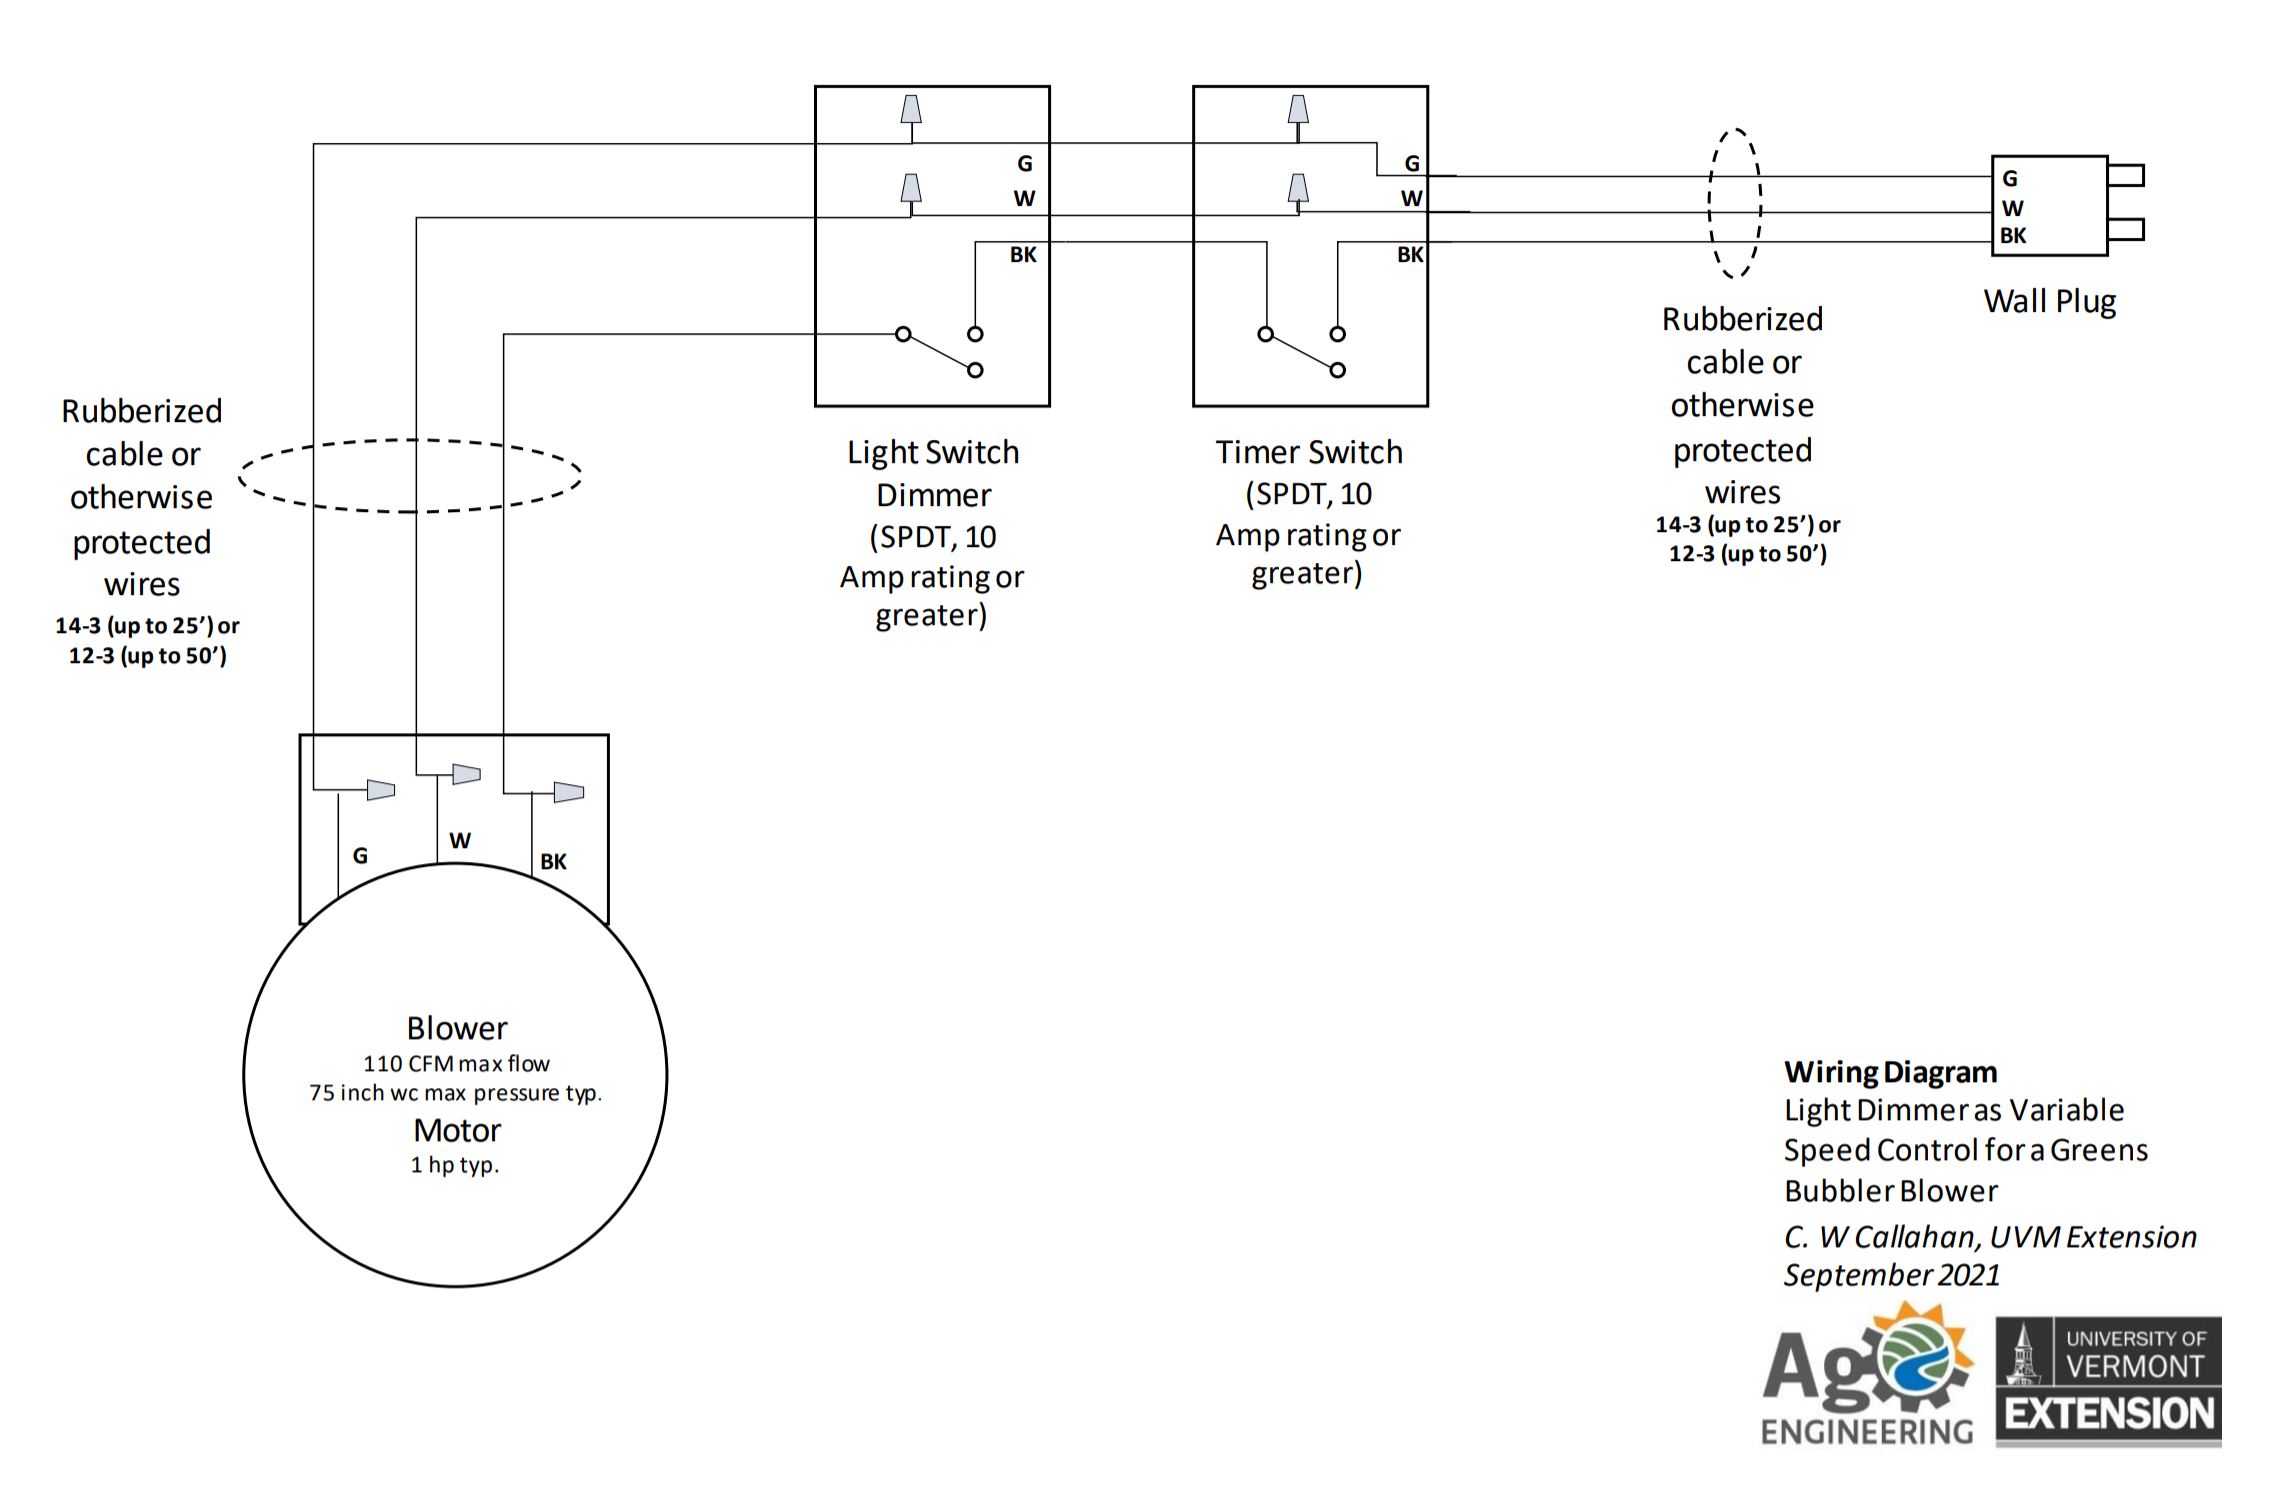
Include a dimmer switch in the power supply to allow easy adjustment of blower speed for just the right amount of bubble agitation. This also allows you to agitate the greens without overpowering the tank with air and splashing water all over the packshed.
Use a permanent marker and/or label maker to mark the dimmer switch for the speeds desired for specific crops, e.g. lower speed for microgreens and higher speed for kale and other hardy crops.
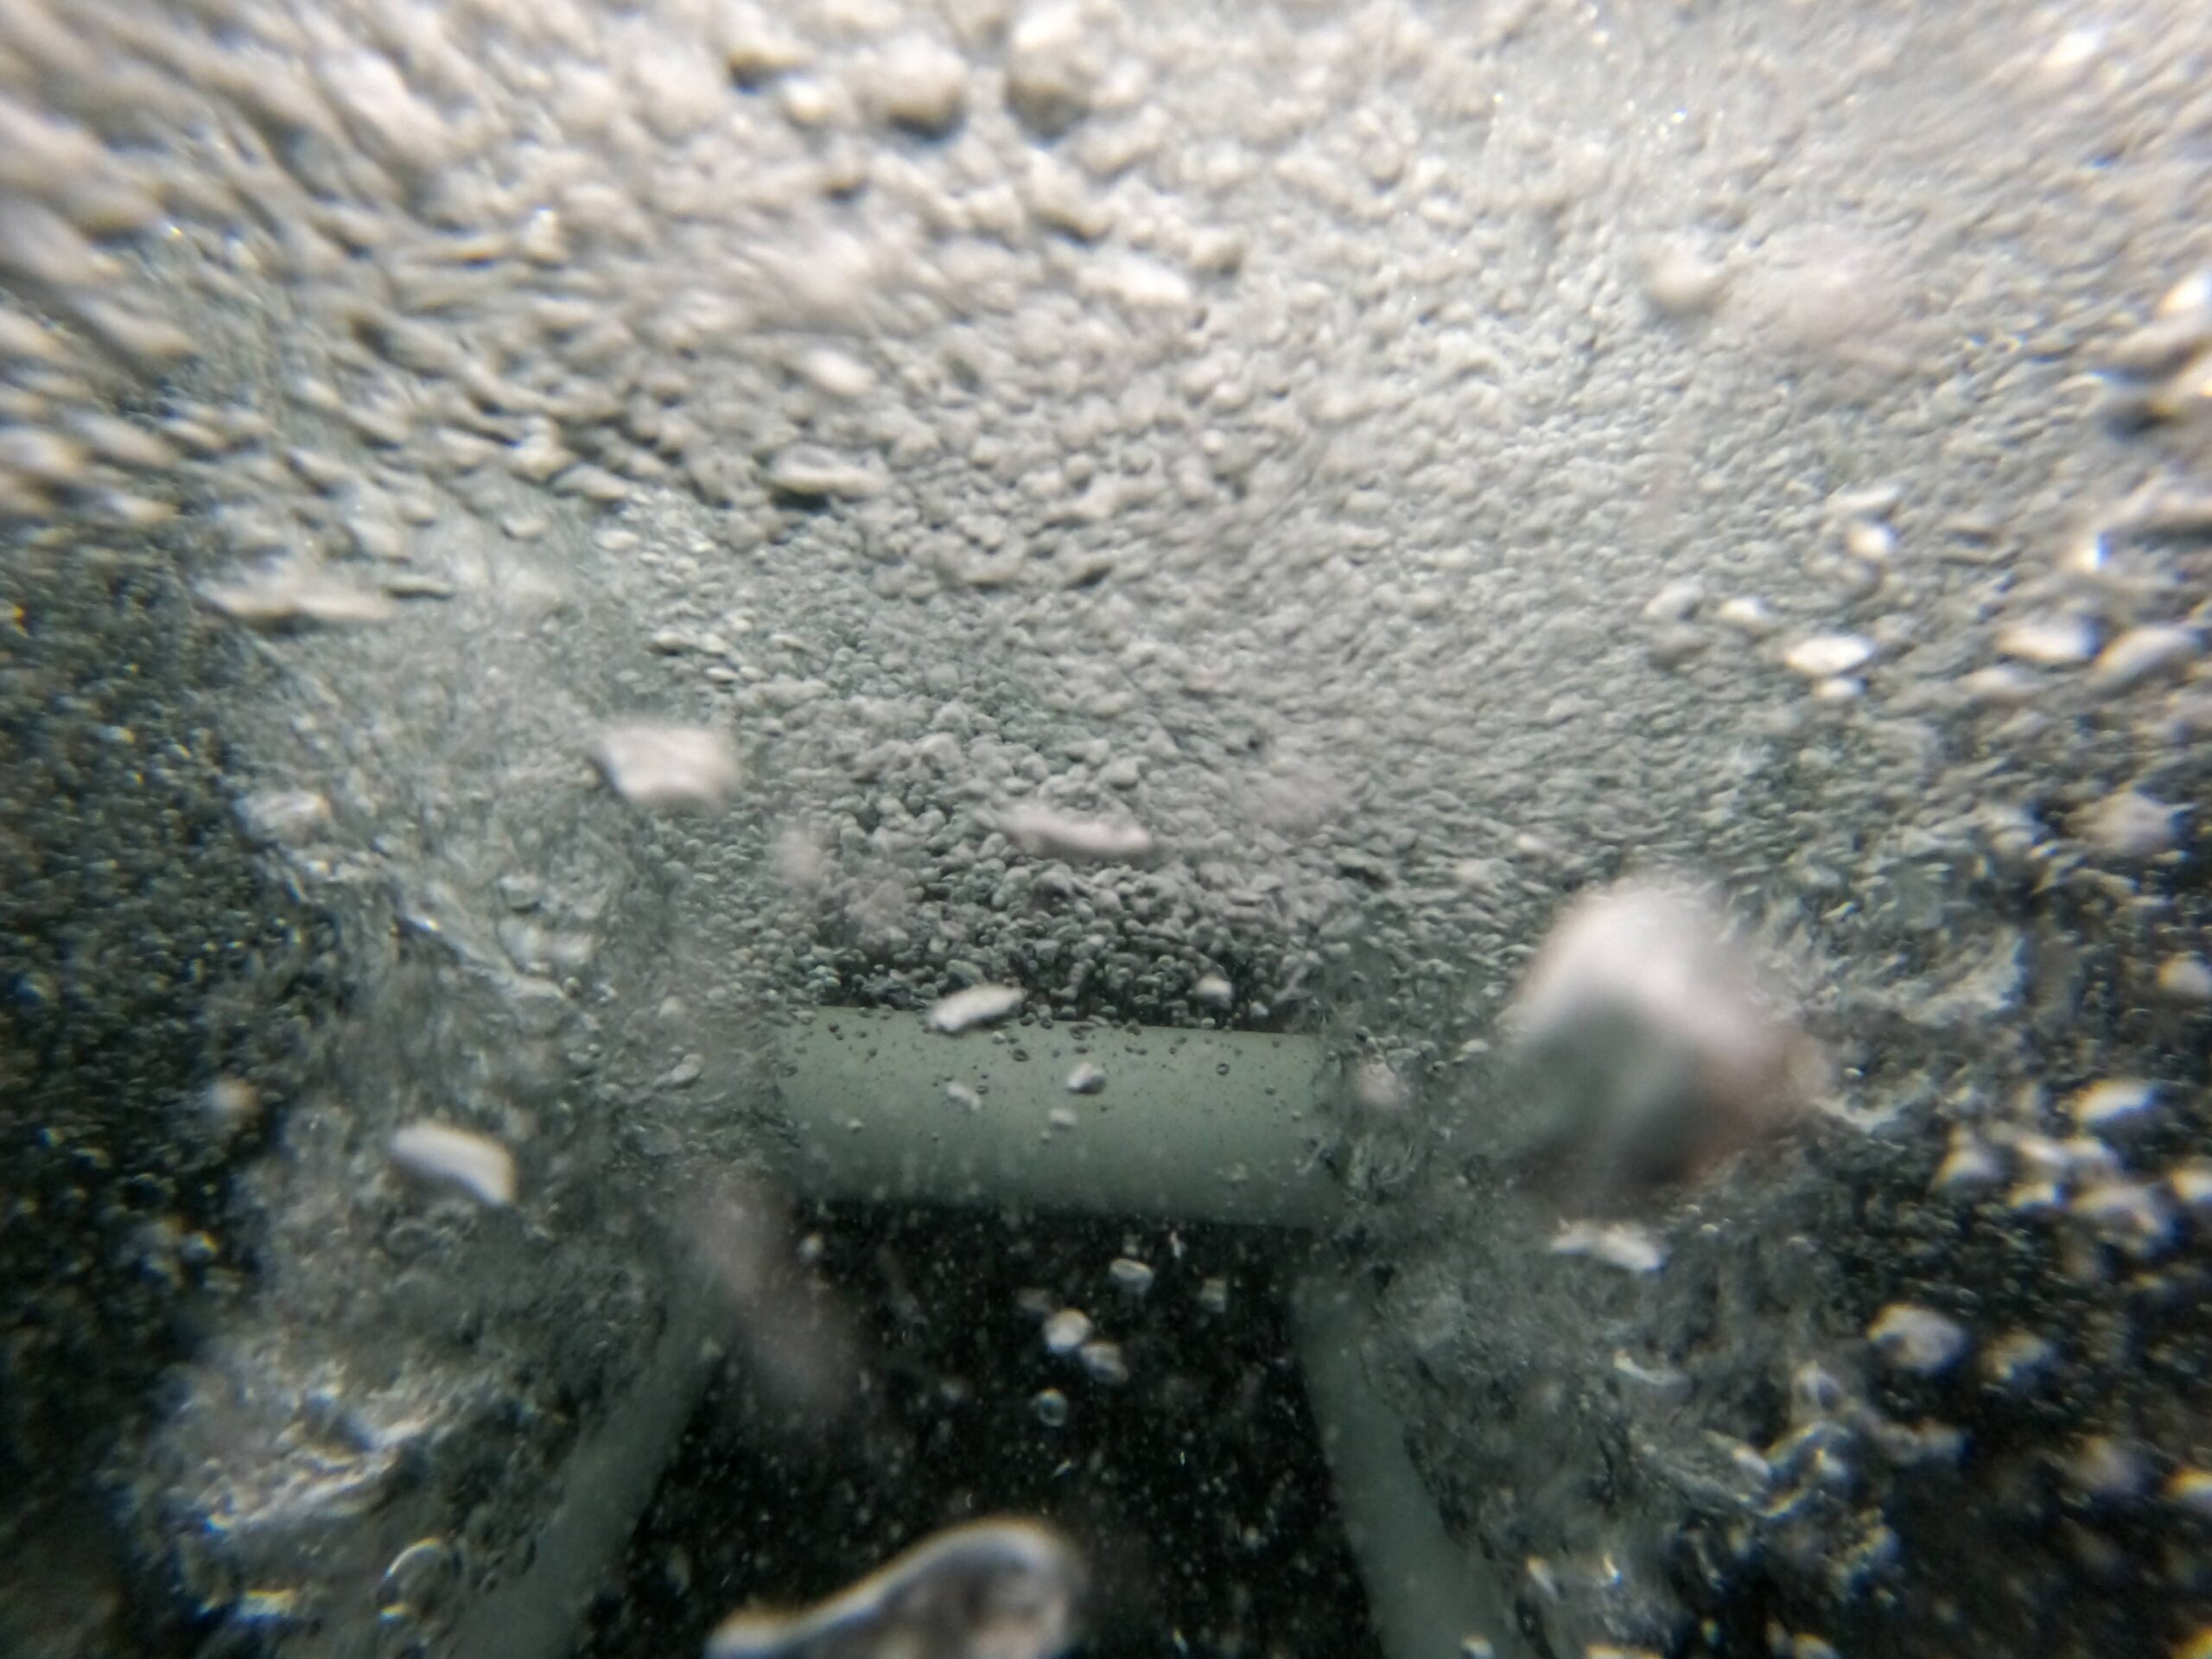
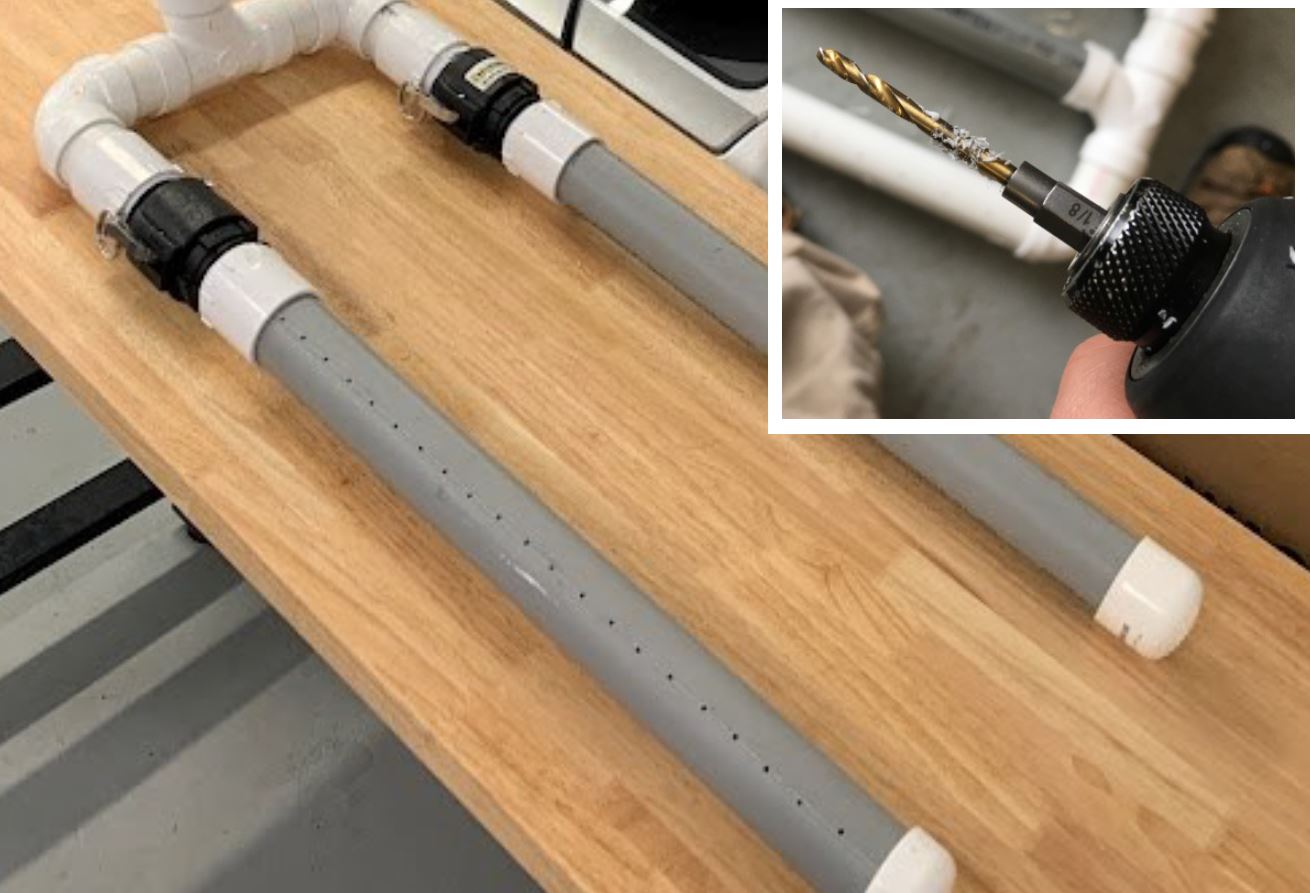
Based on our experimentation, a hole size of 1/16-1/4” diameter, spaced at 1 hole per inch should work well.
Smaller, 1/16” holes result in smaller bubbles and provide more gentle agitation which may be good for more sensitive crops.
Larger, ¼” result in aggressive agitation which may be fine for hardier crops.
Medium sized, ⅛” holes are likely best unless you want pipes with holes of different sizes for different crops.
Medium diameter, 1/8” holes spaced at 1 hole per inch seems to be a reasonable compromise for most applications.
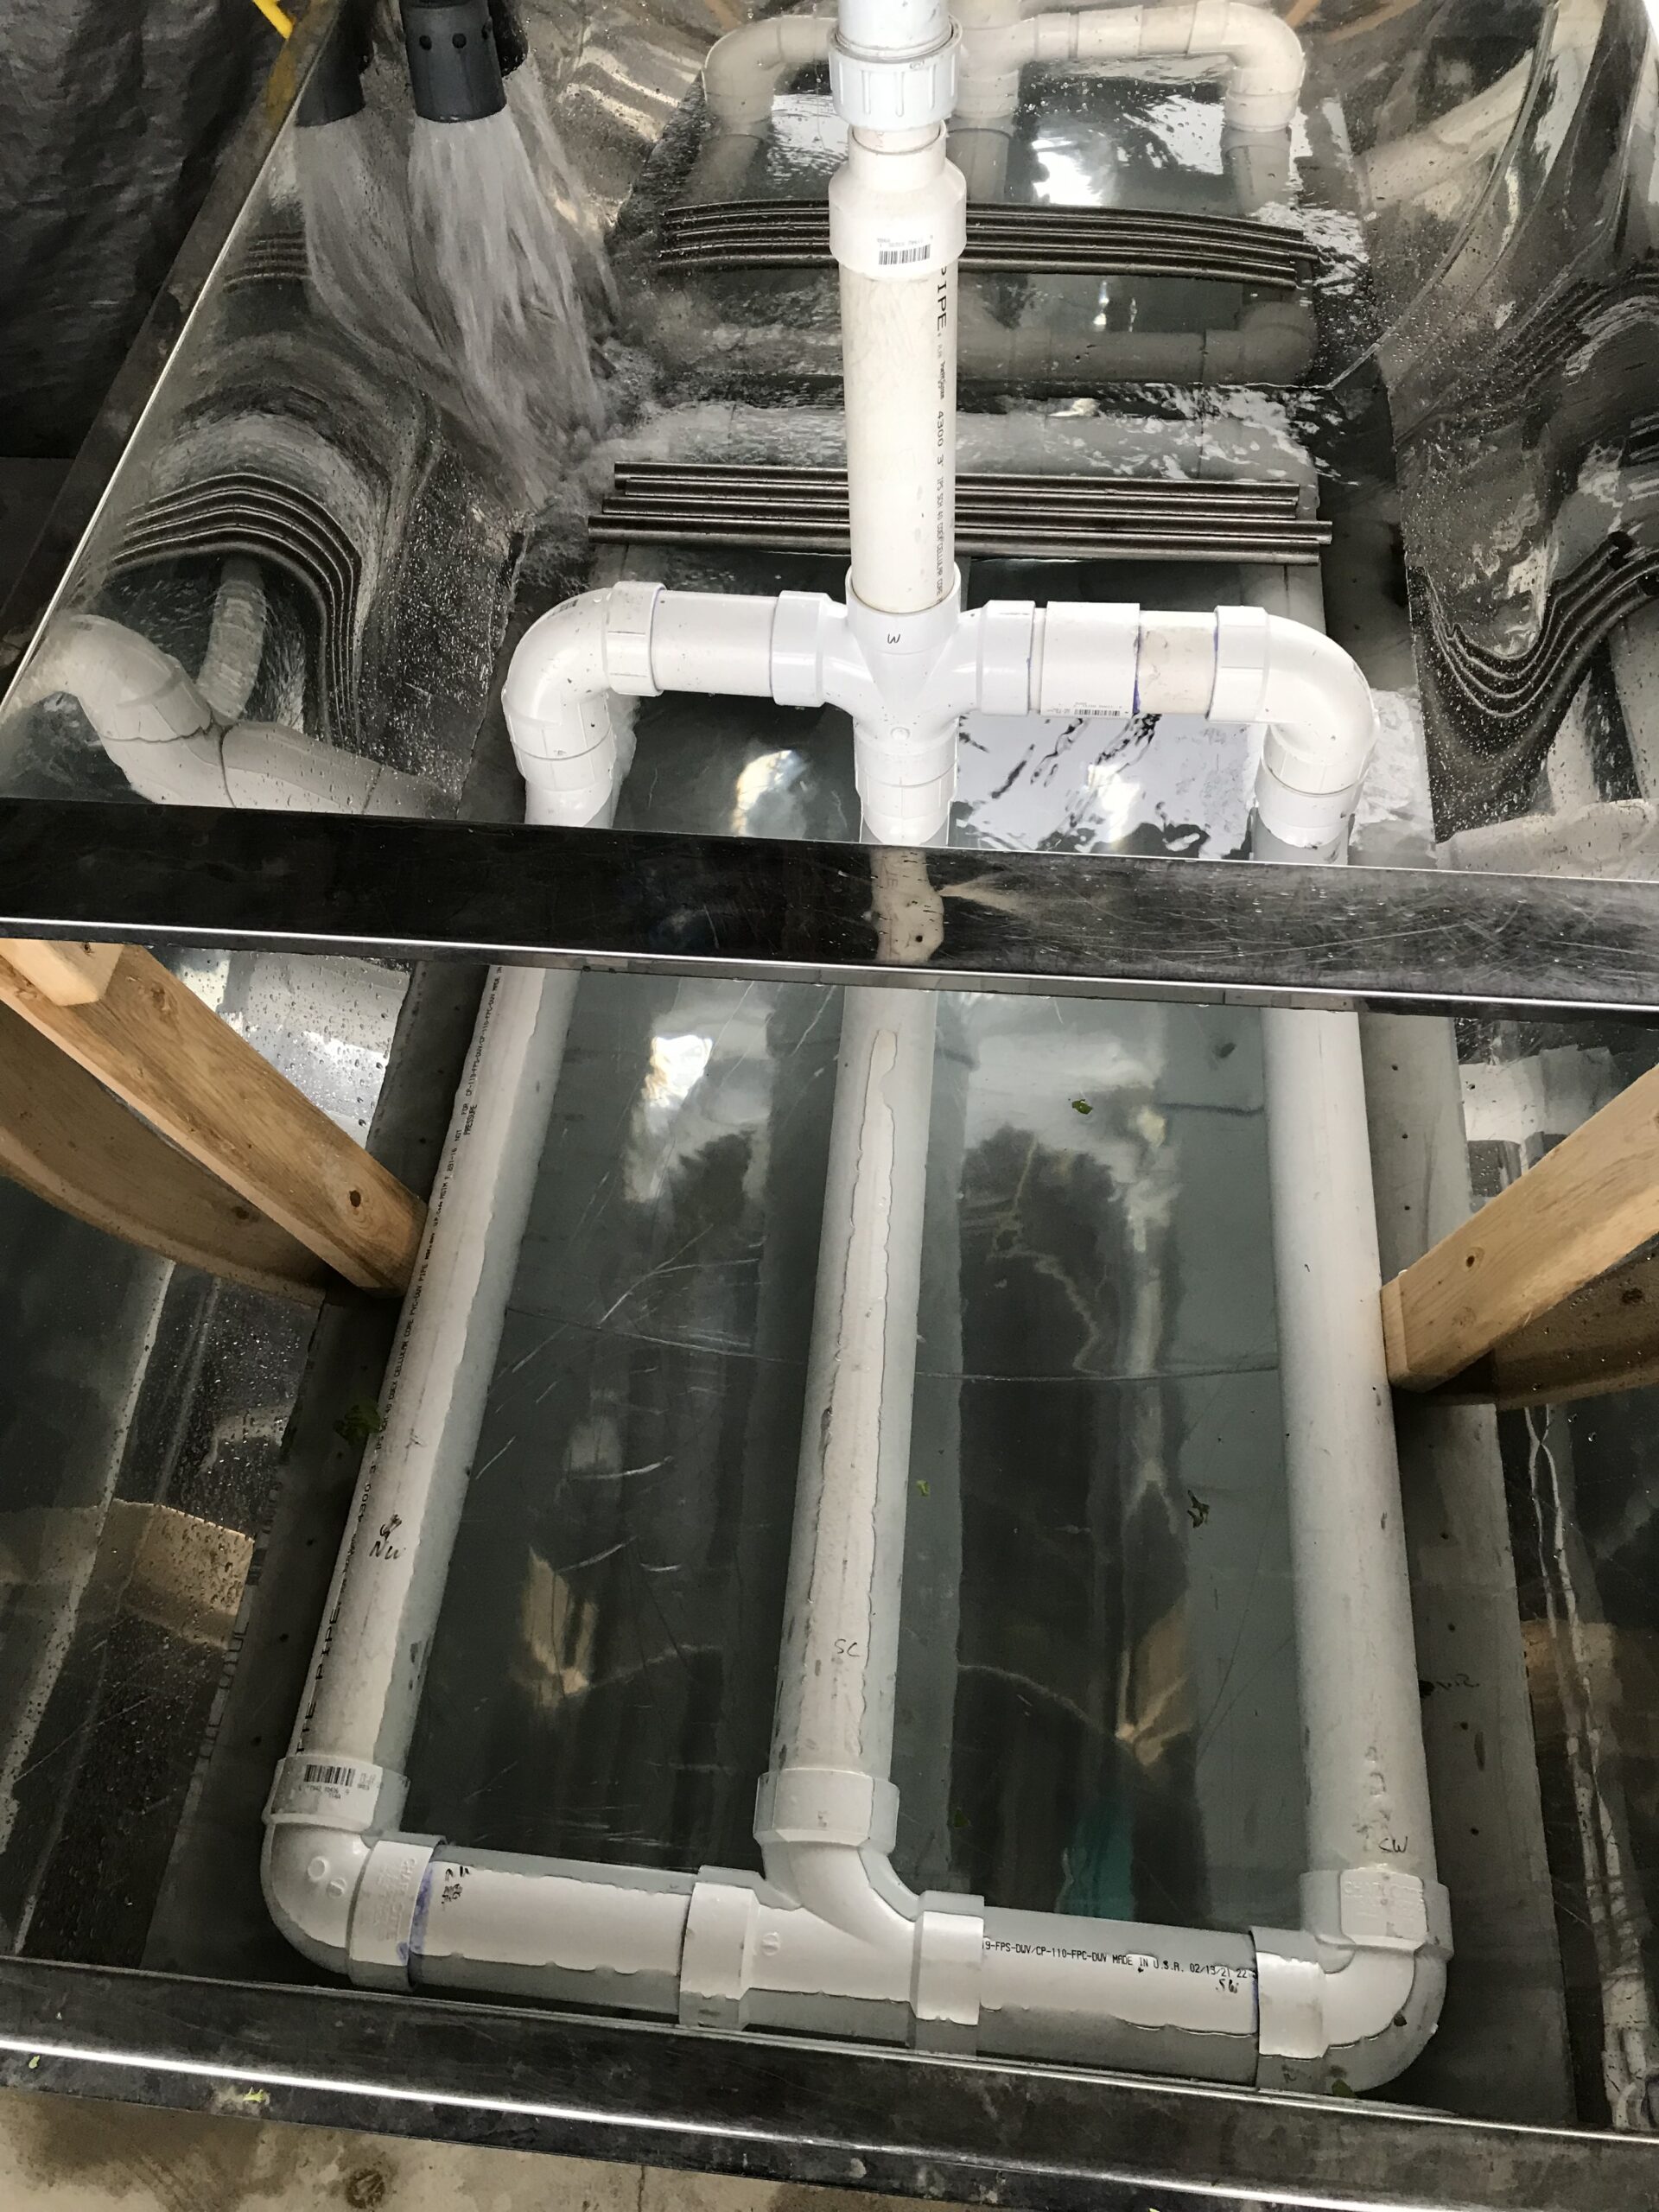
Leave the long lengths of PVC pipe unglued to allow for rotation of the holes to adjust the resulting air/bubble movement.
Design for Cleaning and Produce Safety
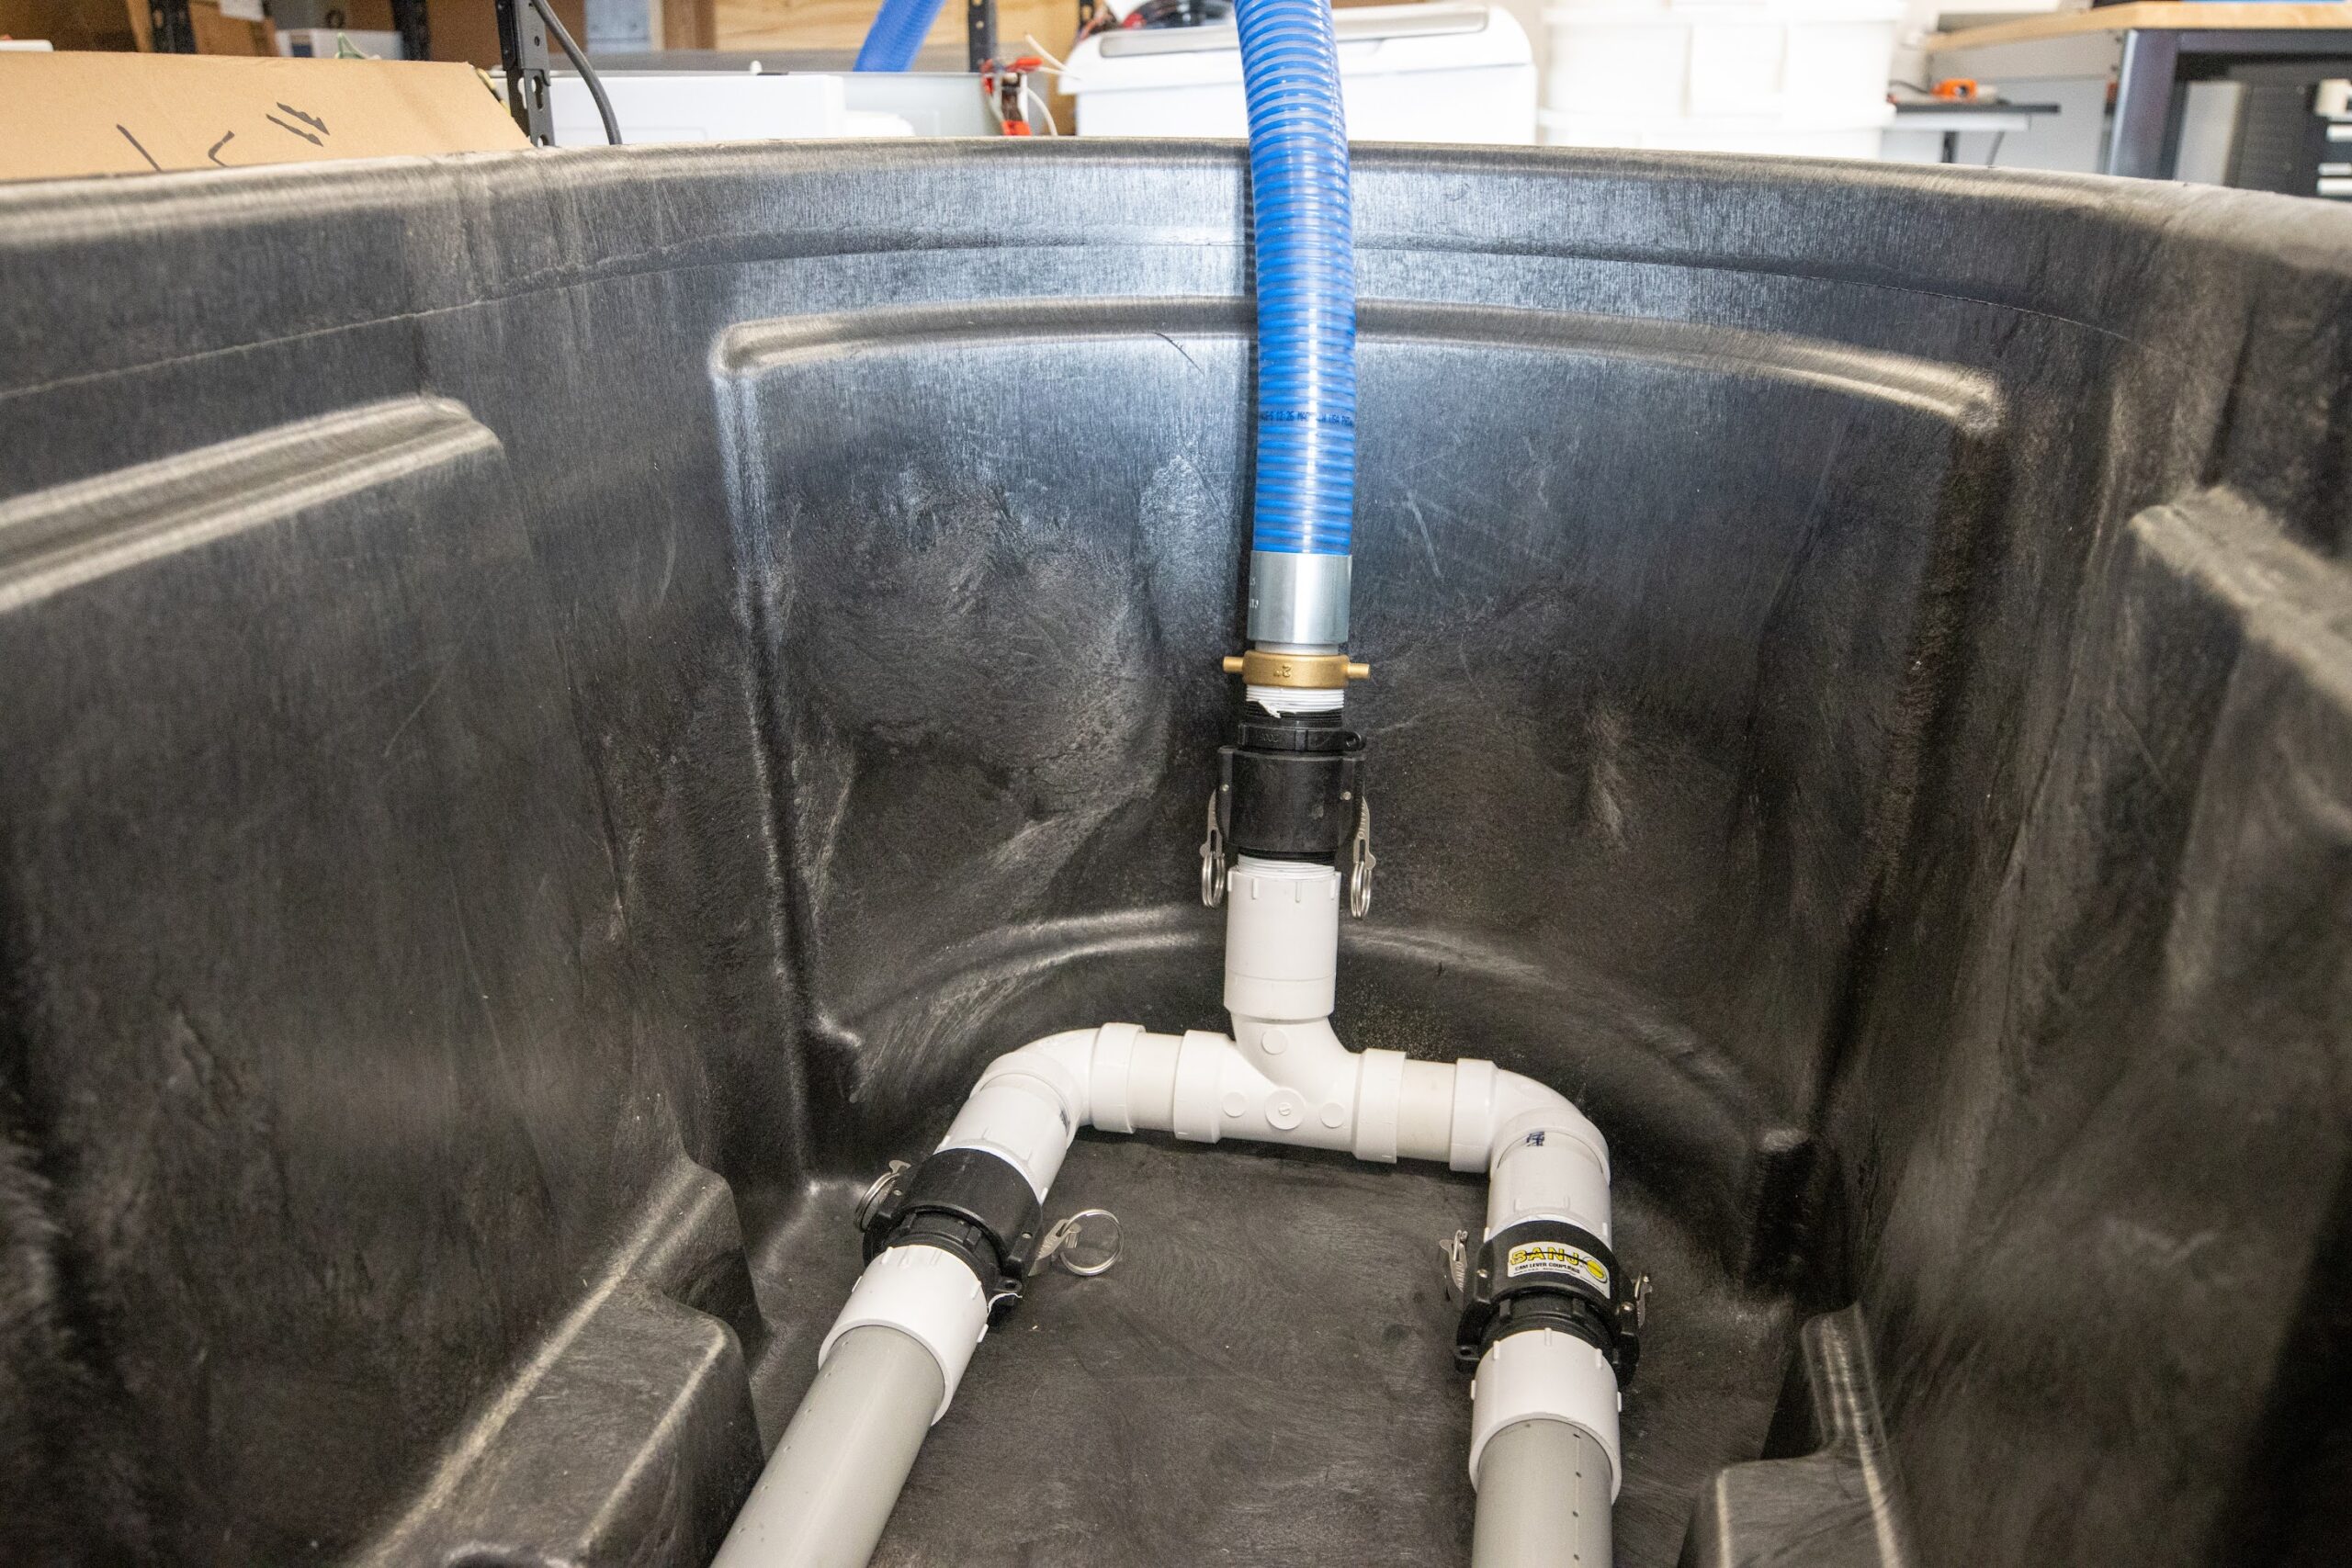
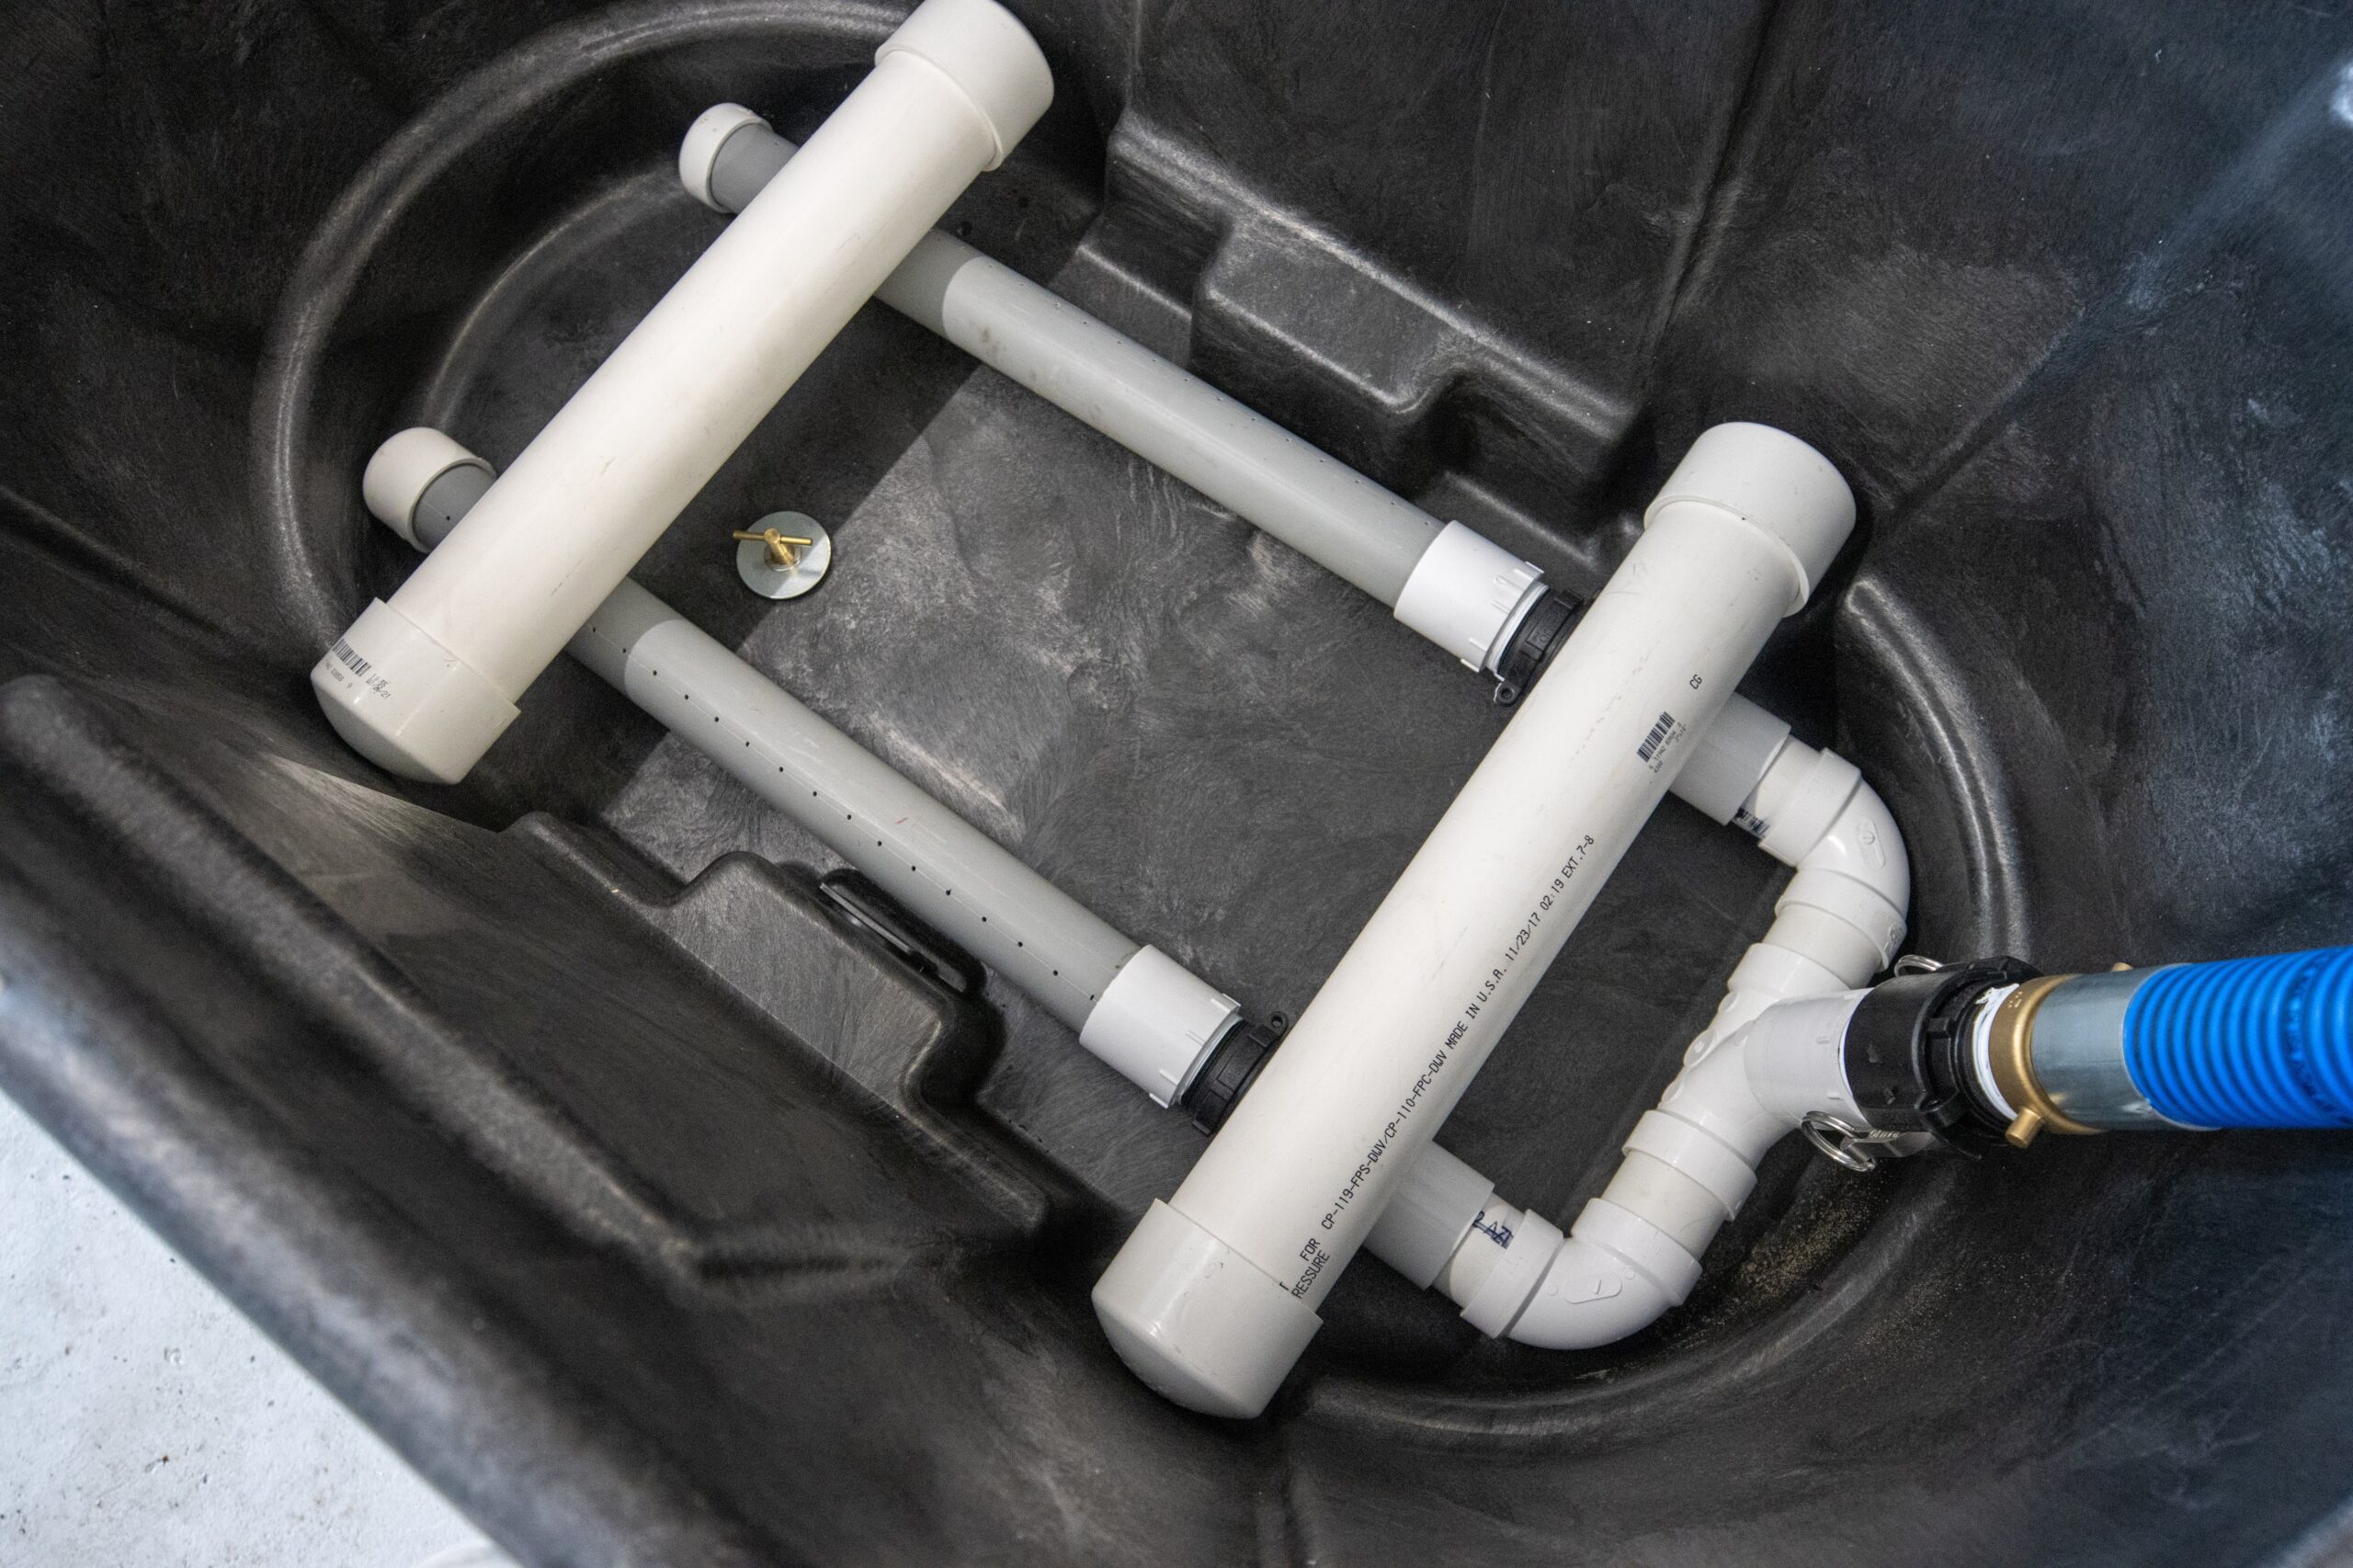
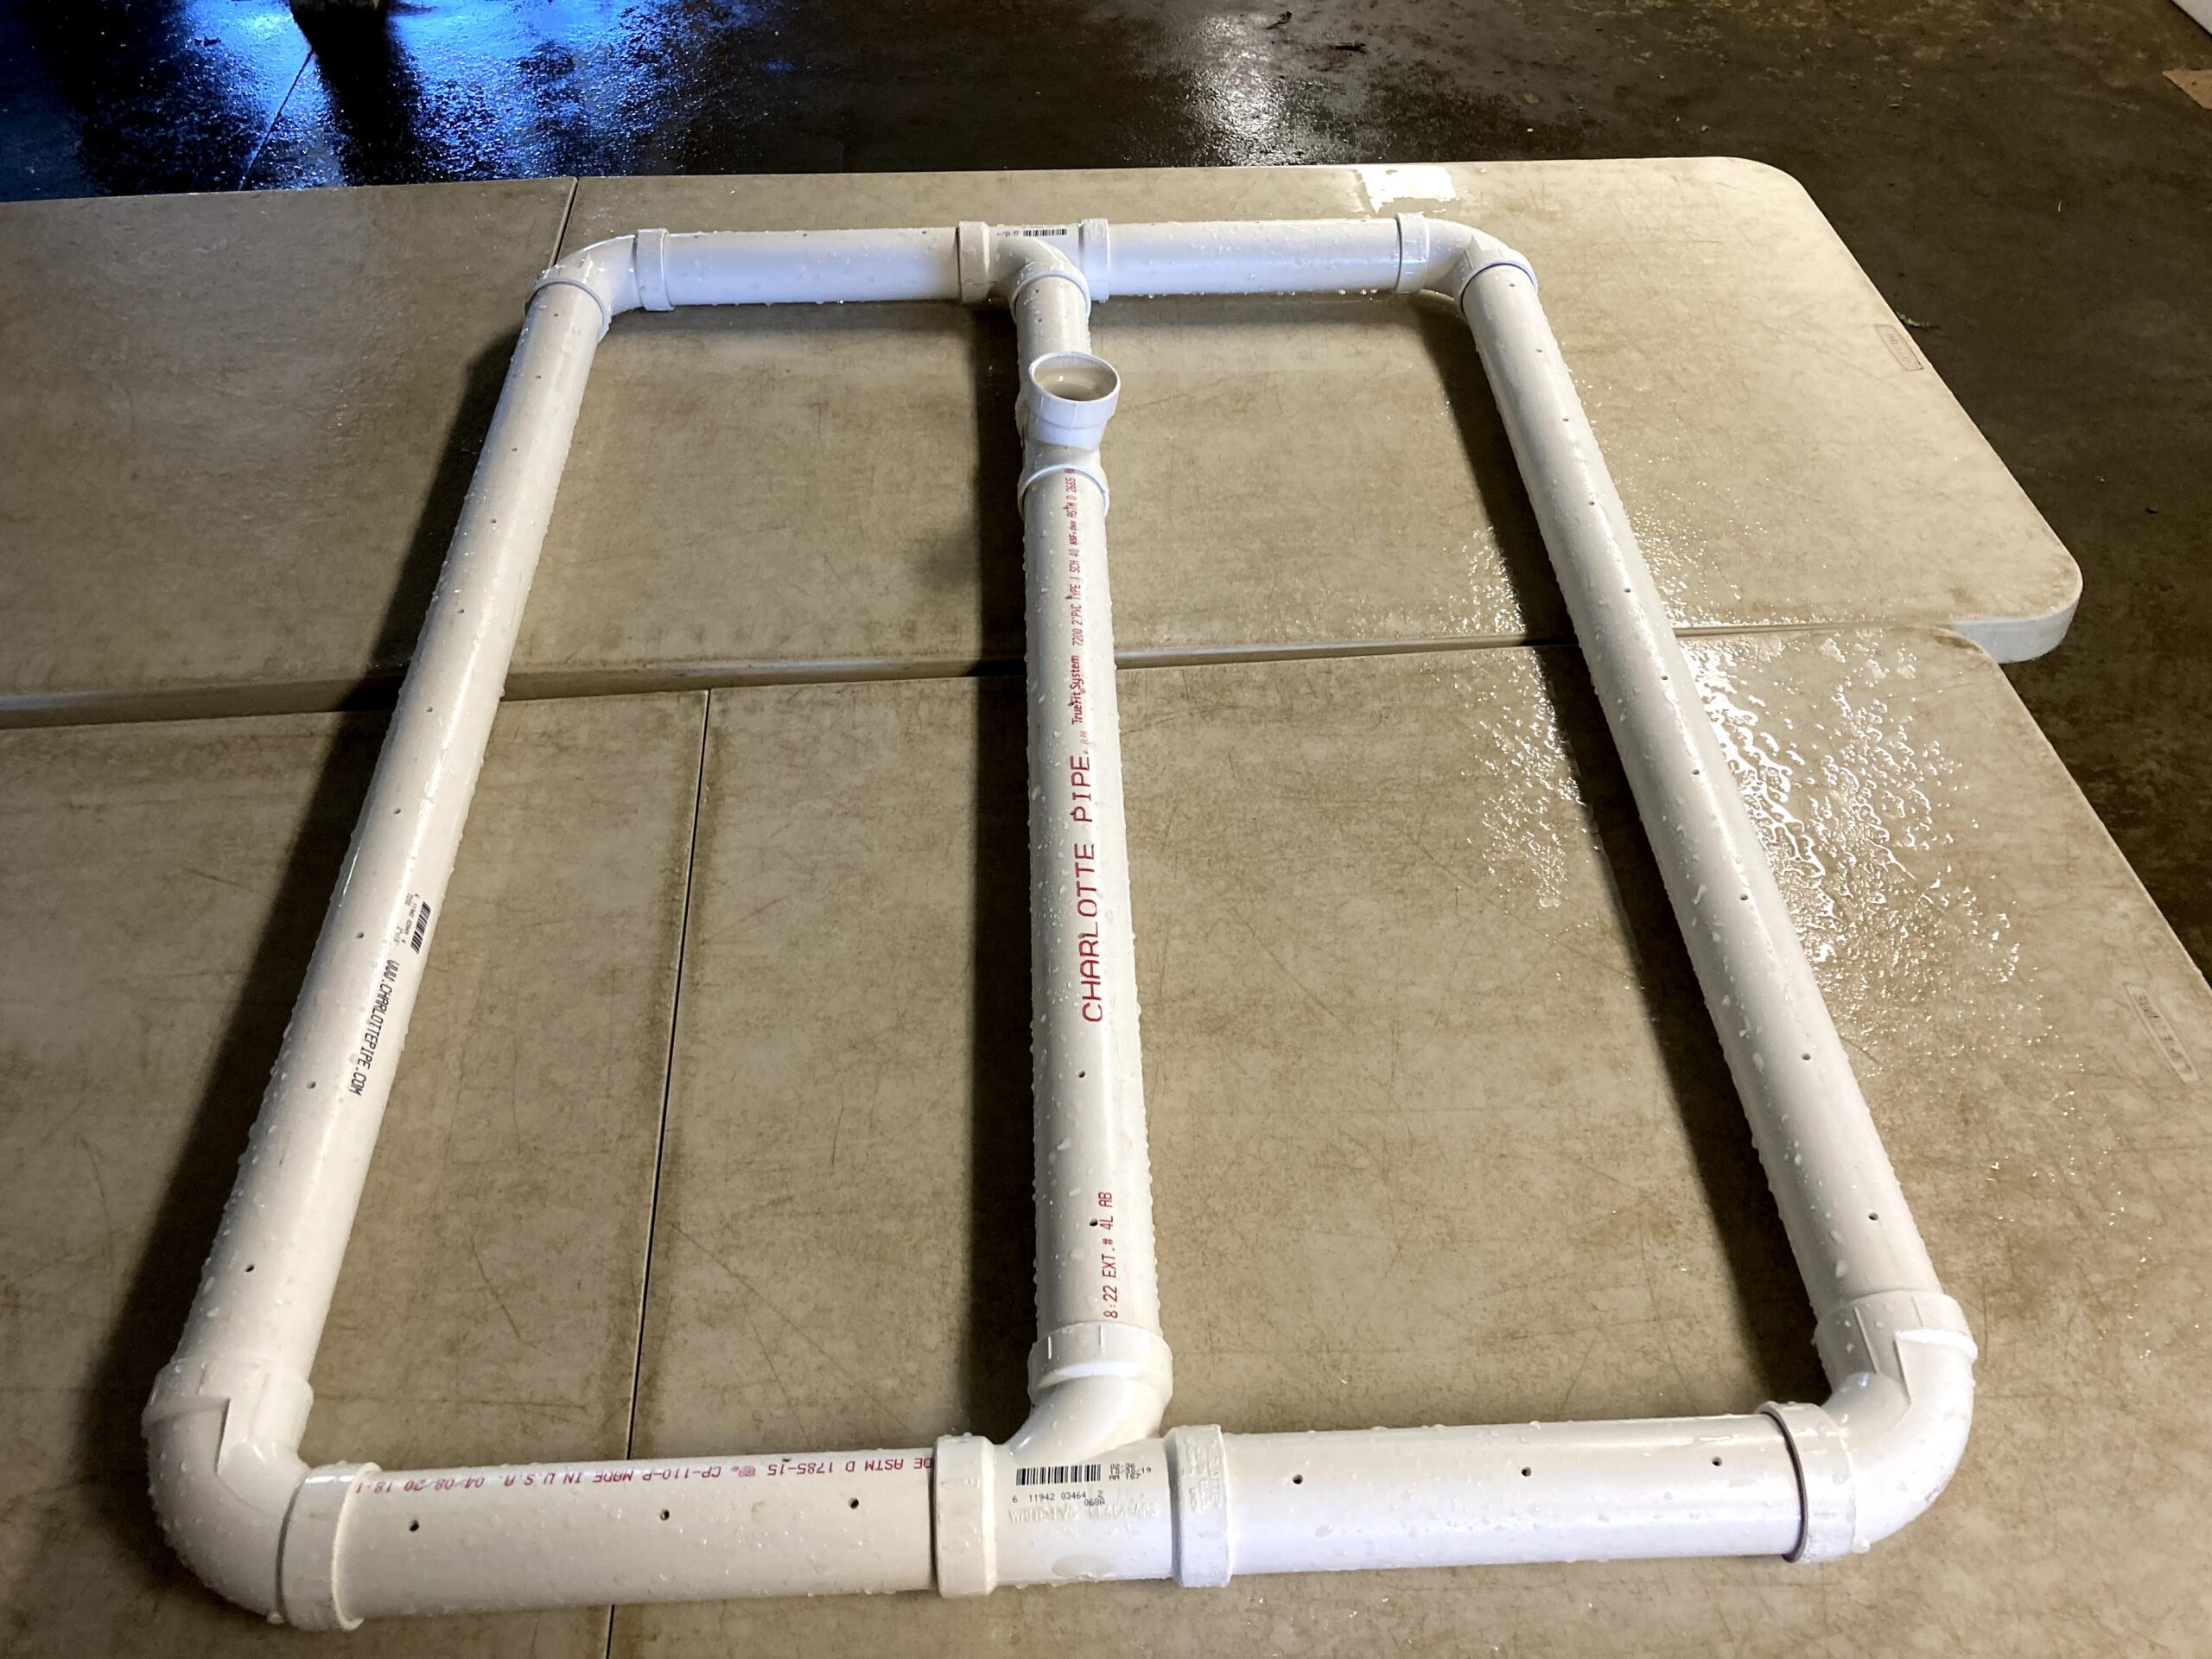
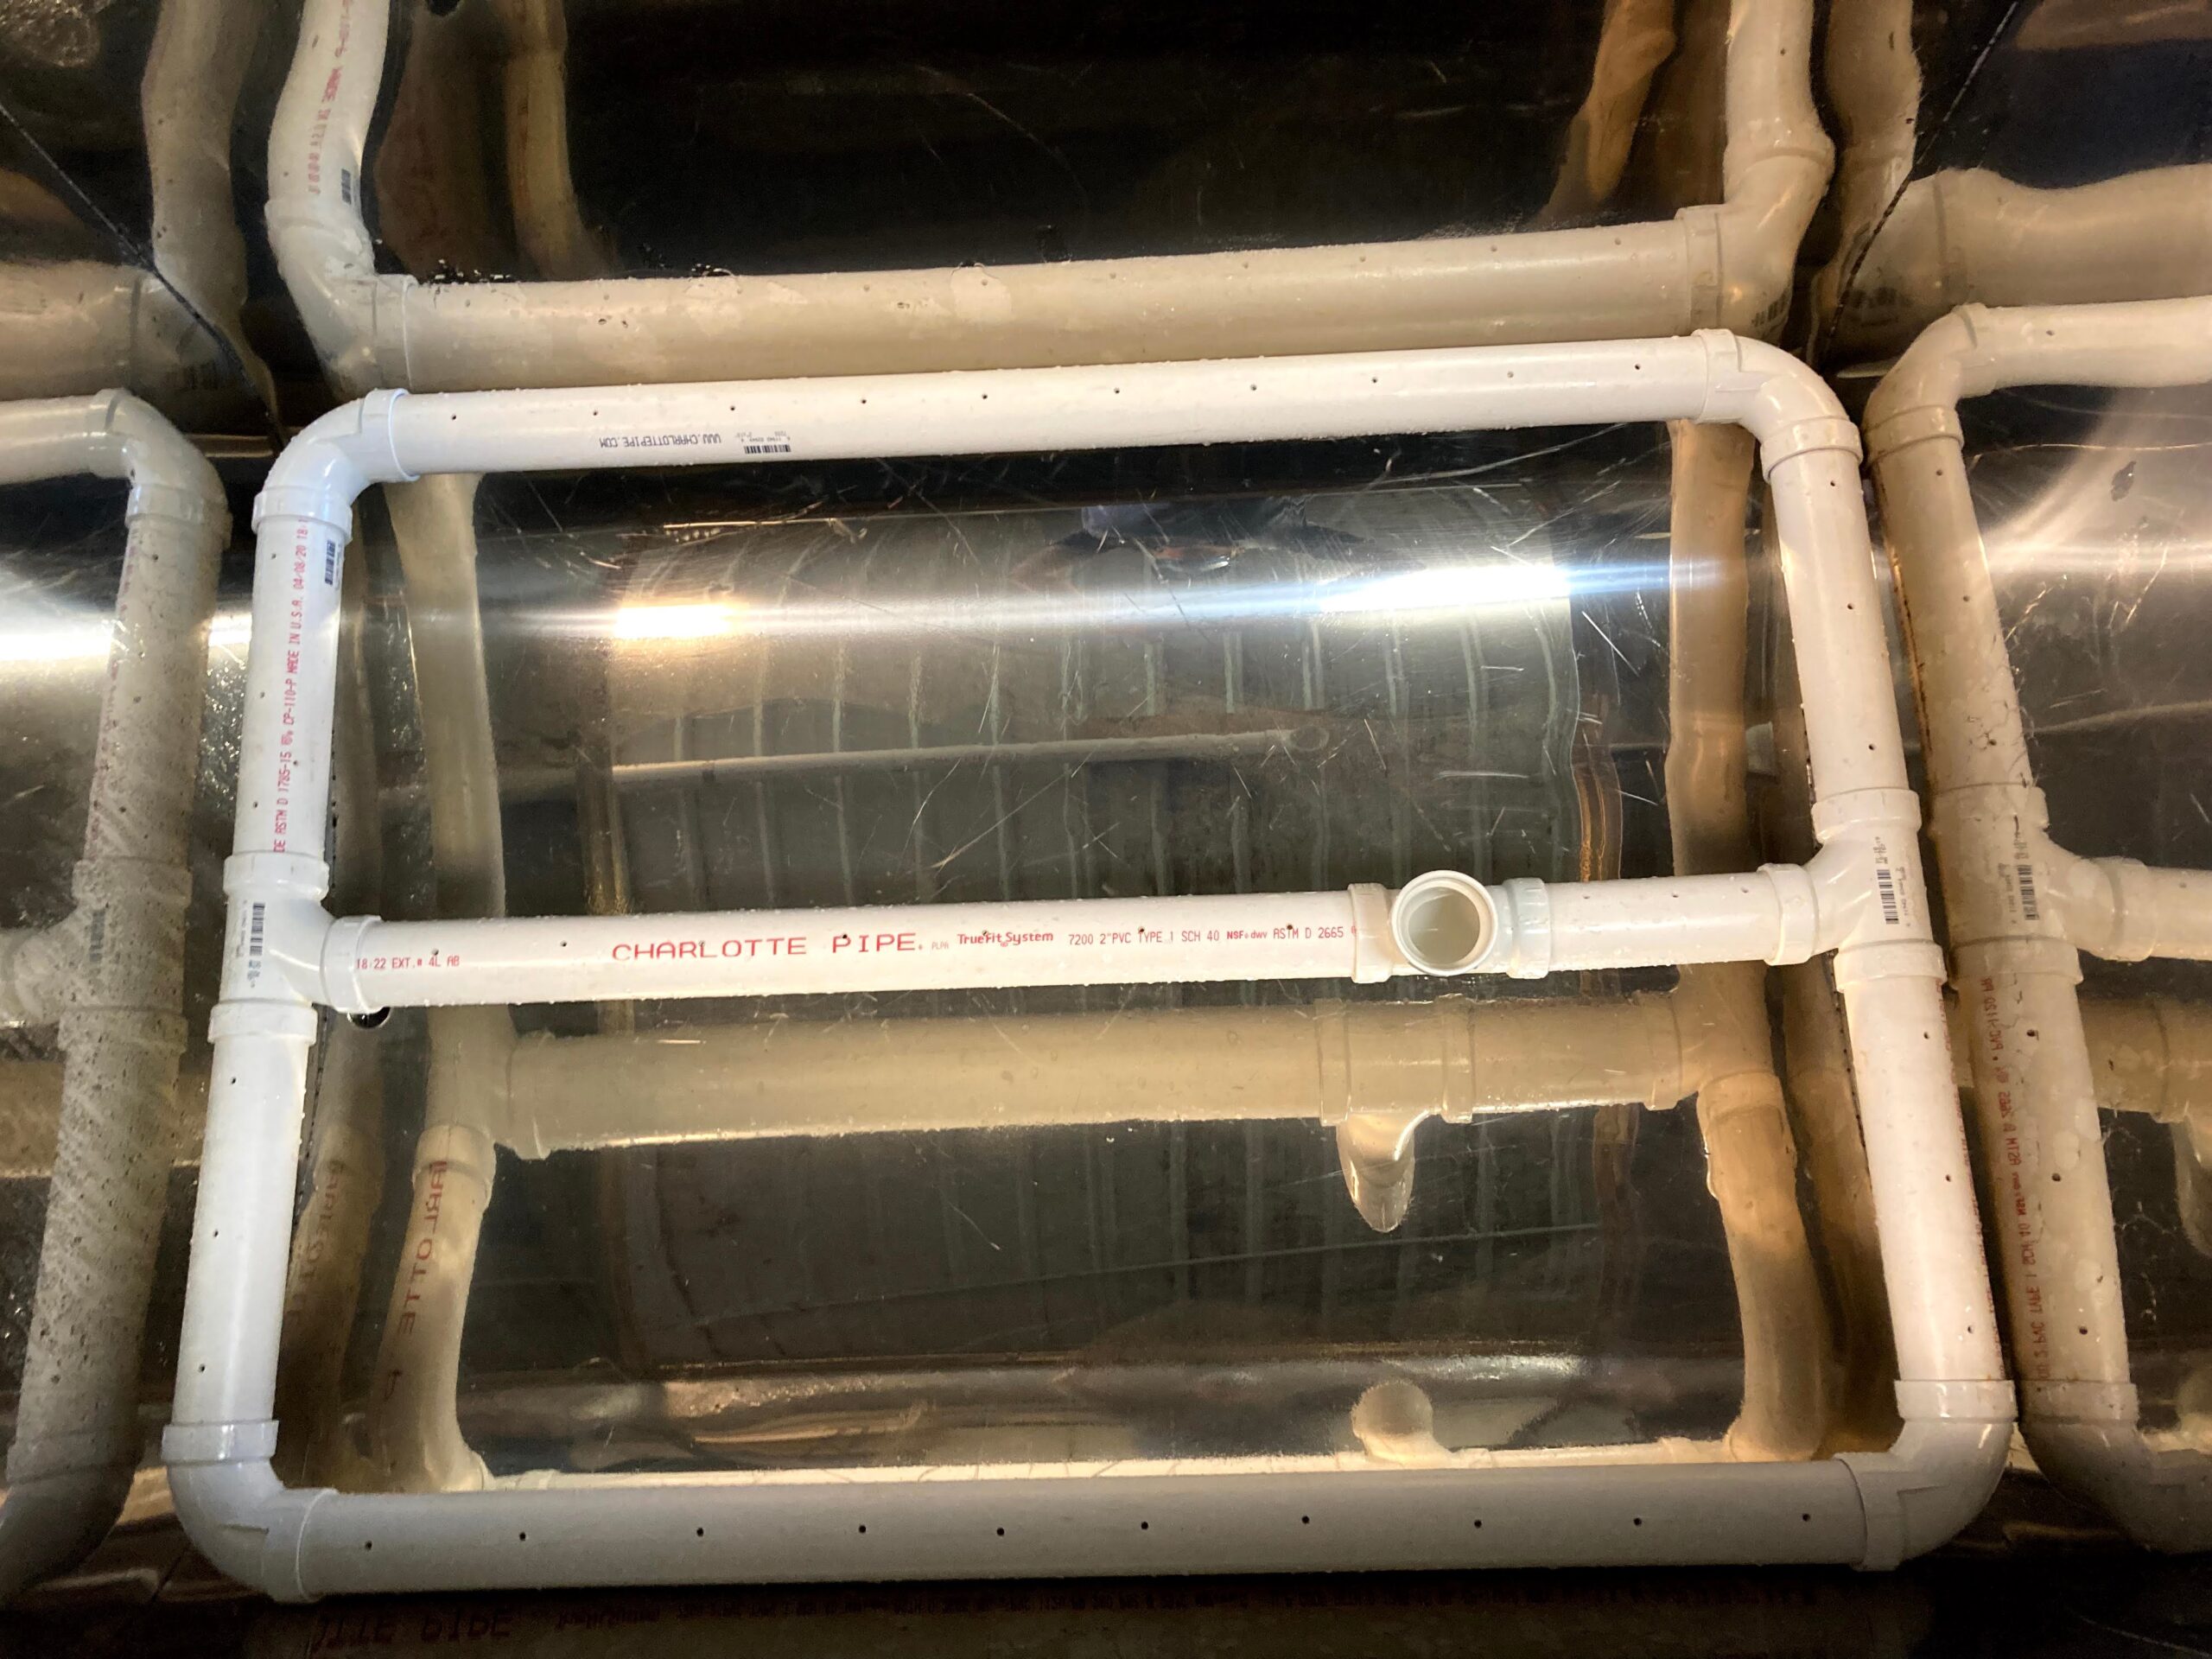
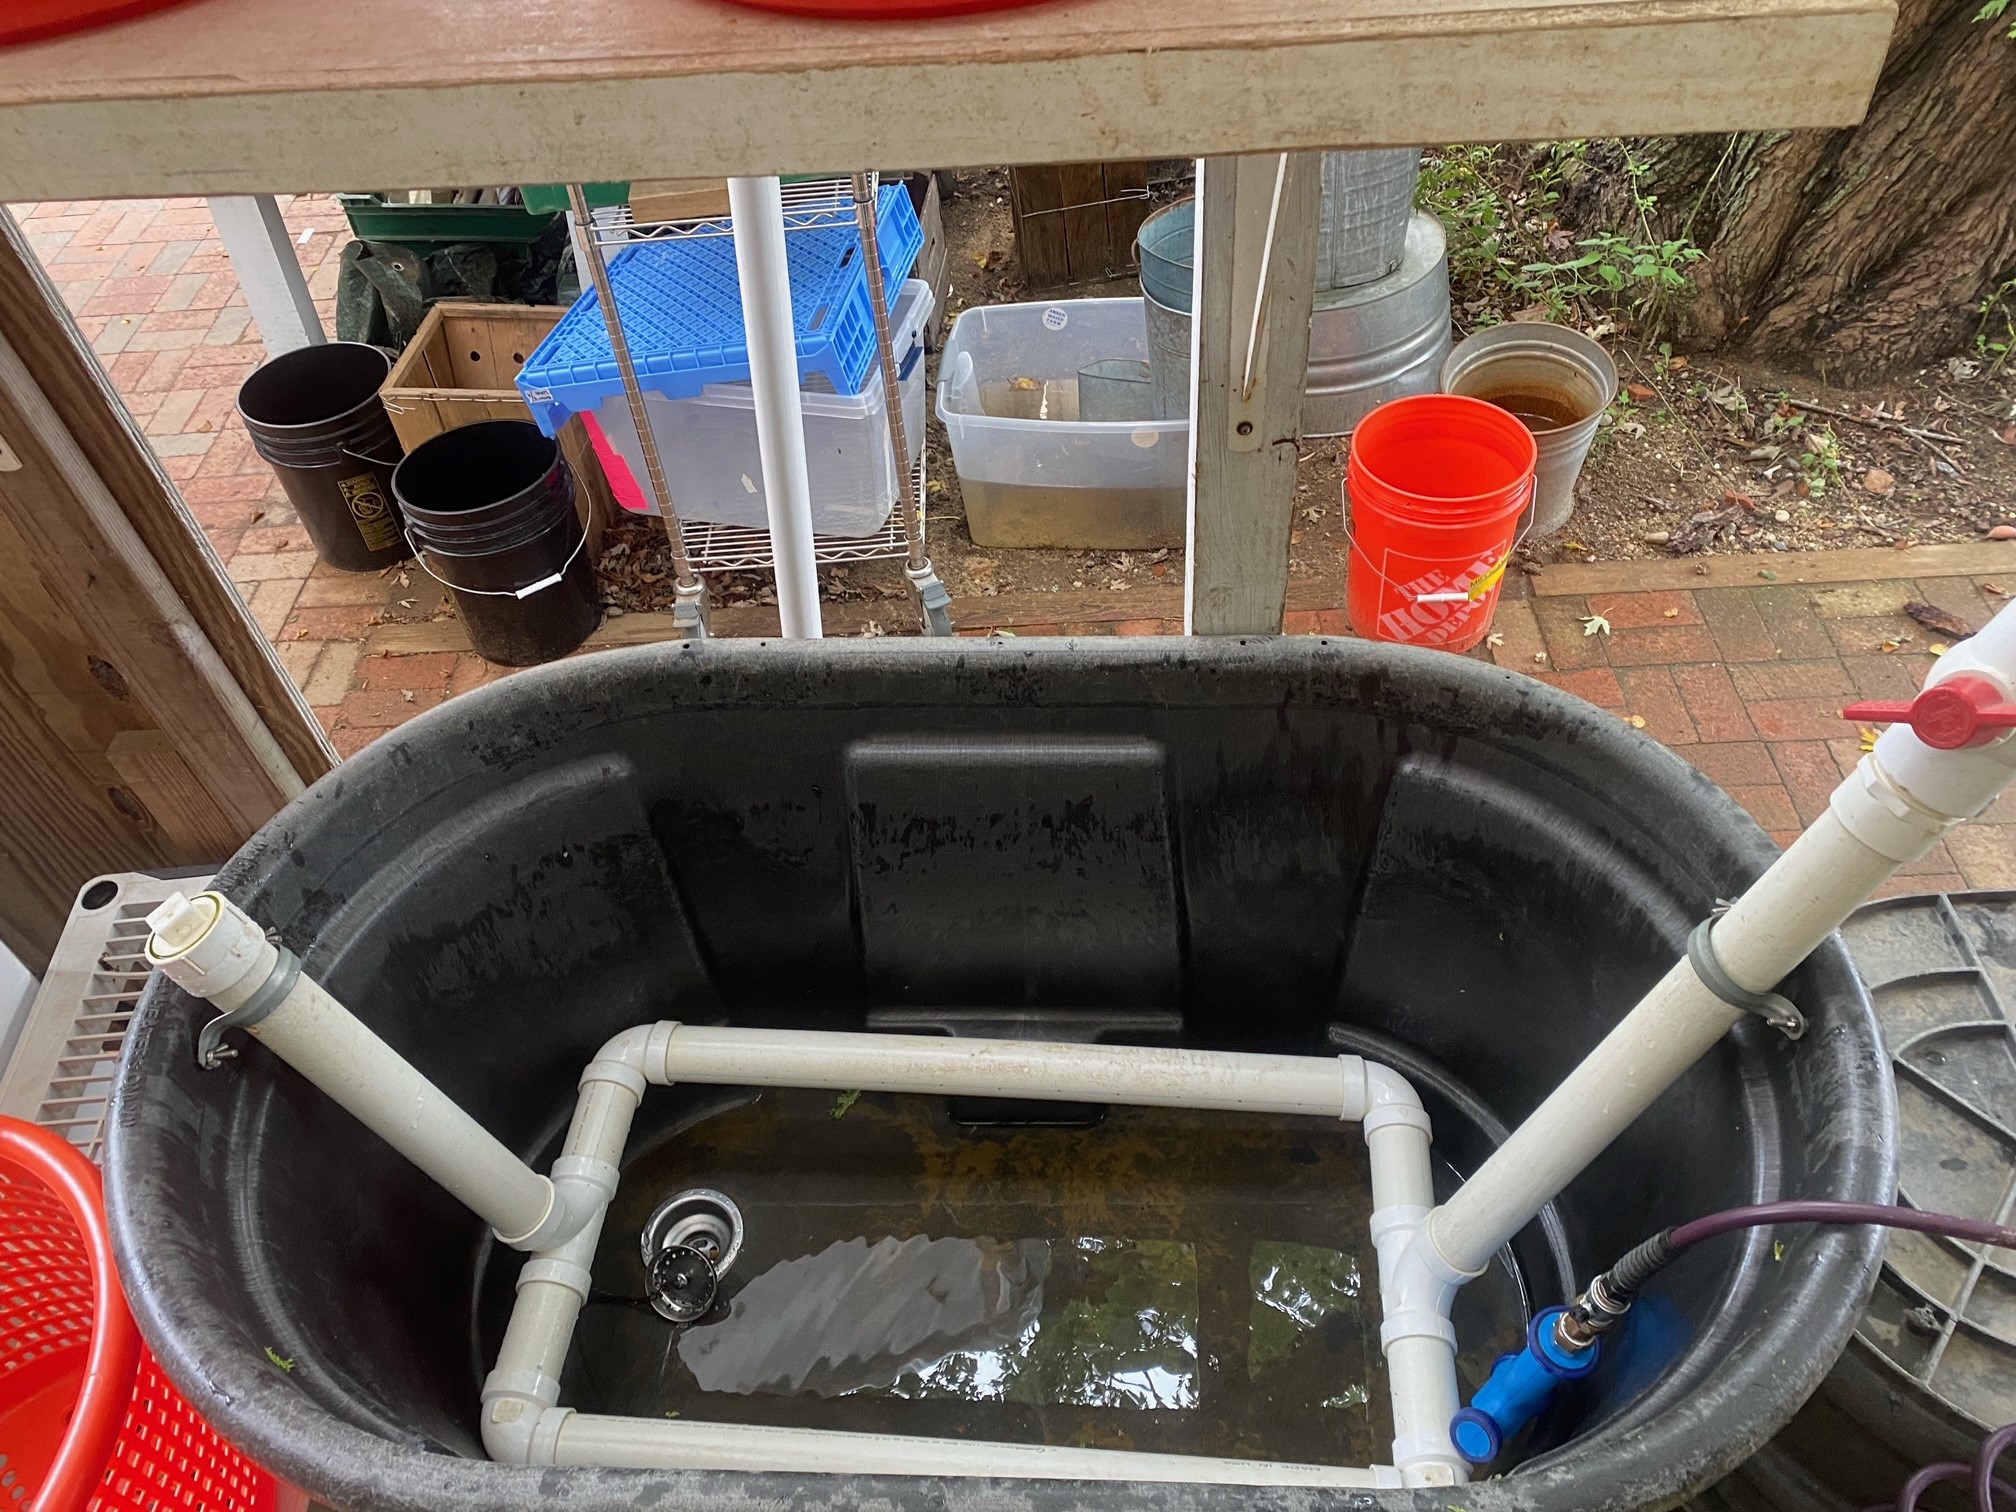
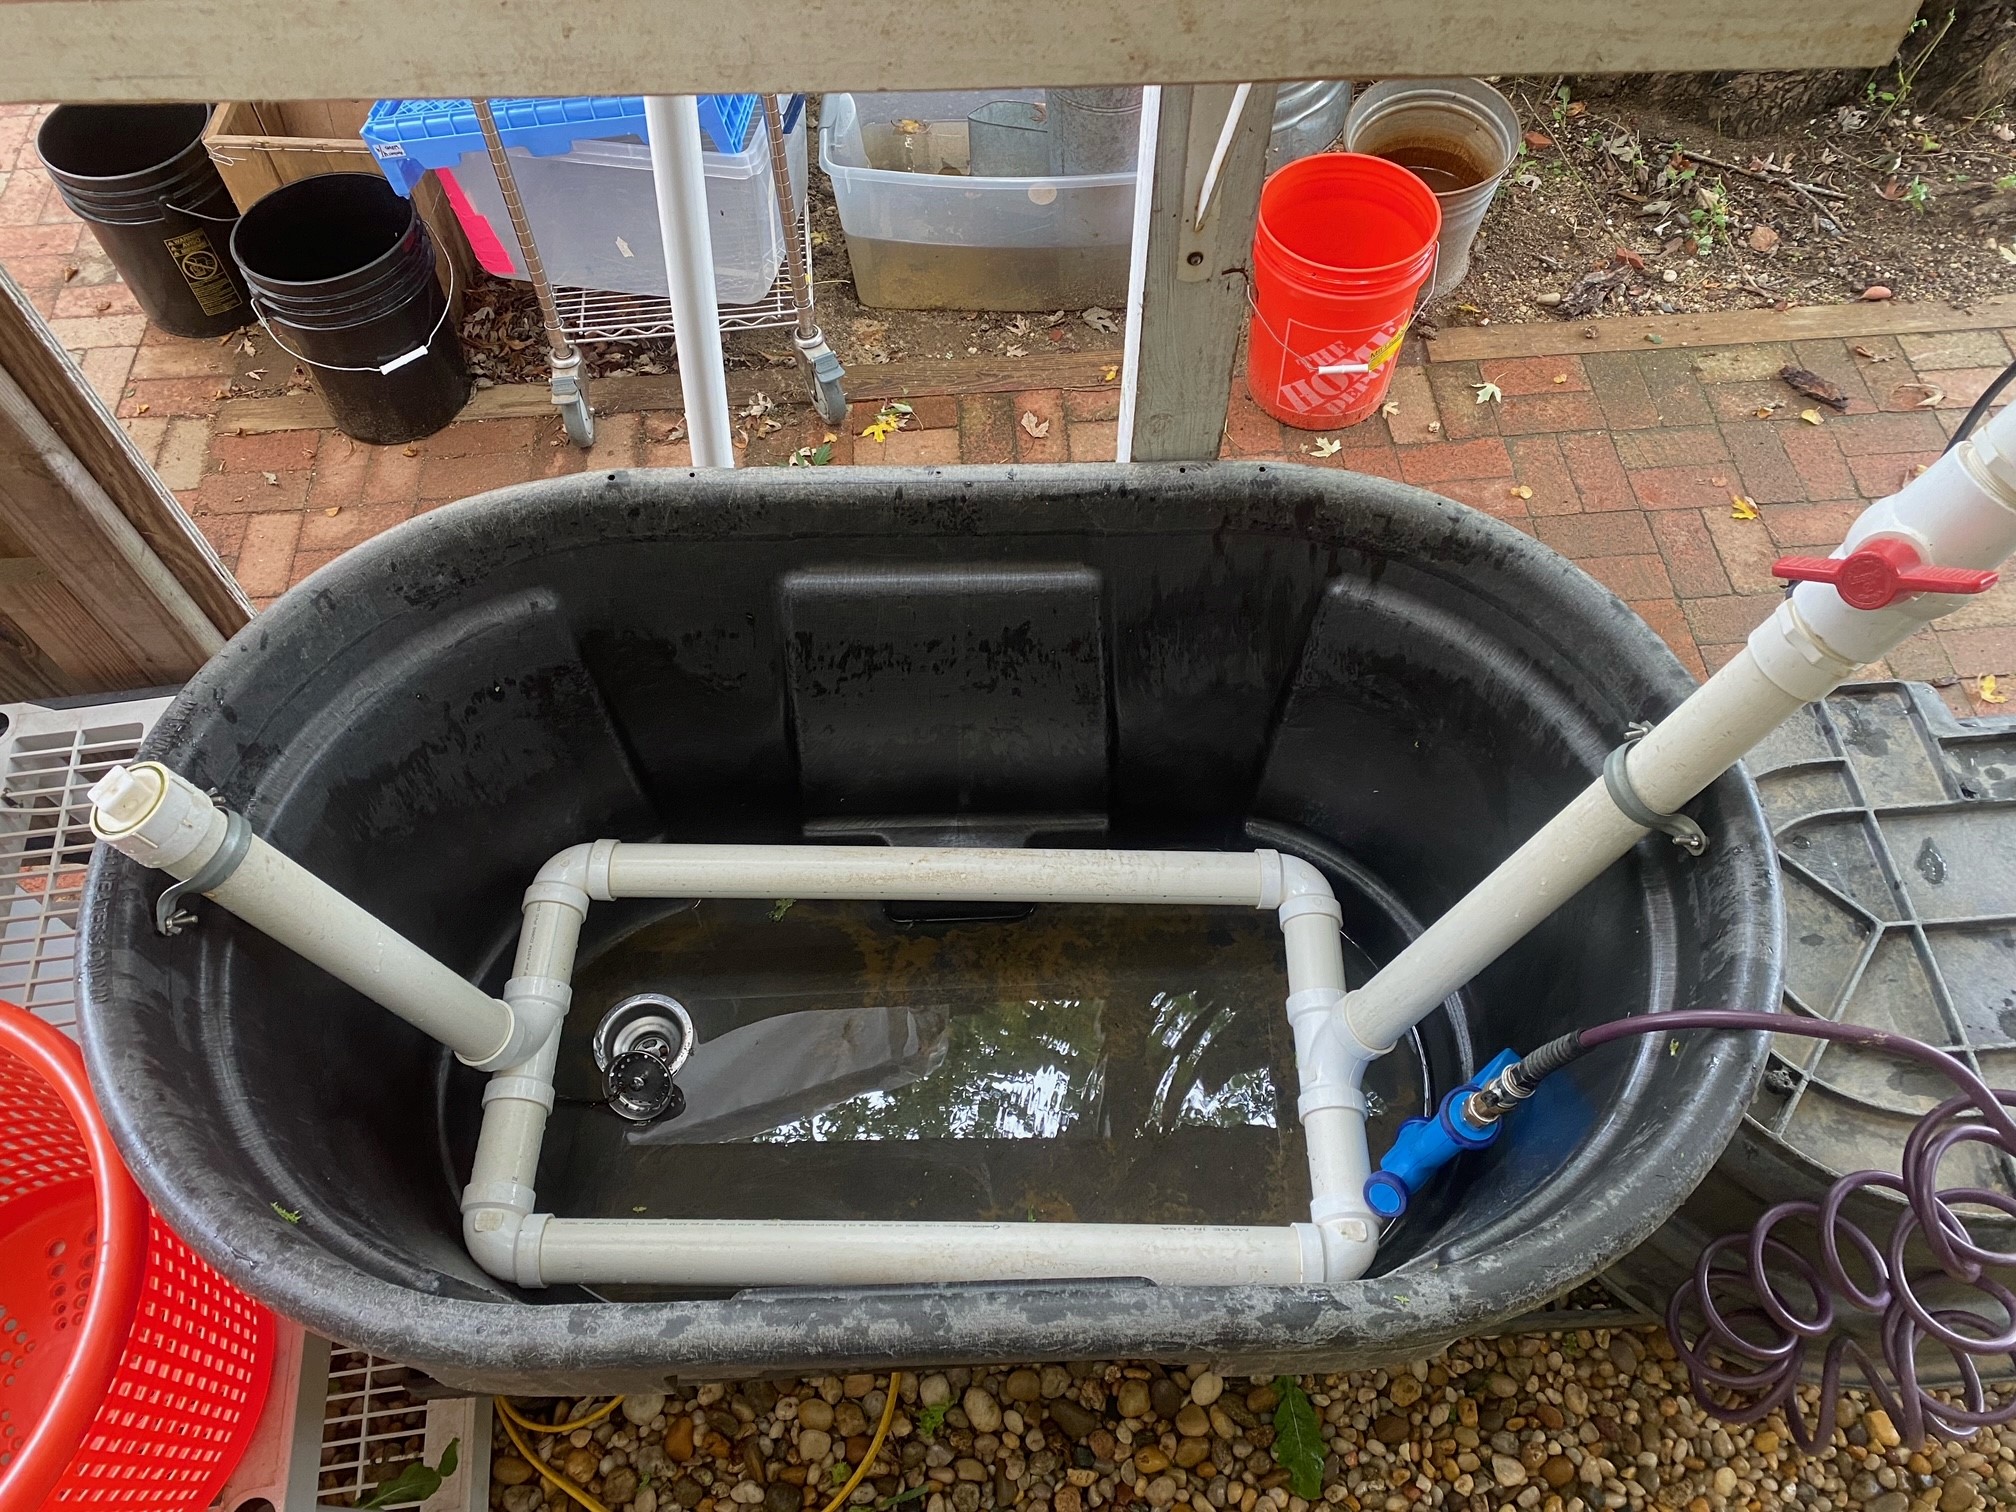
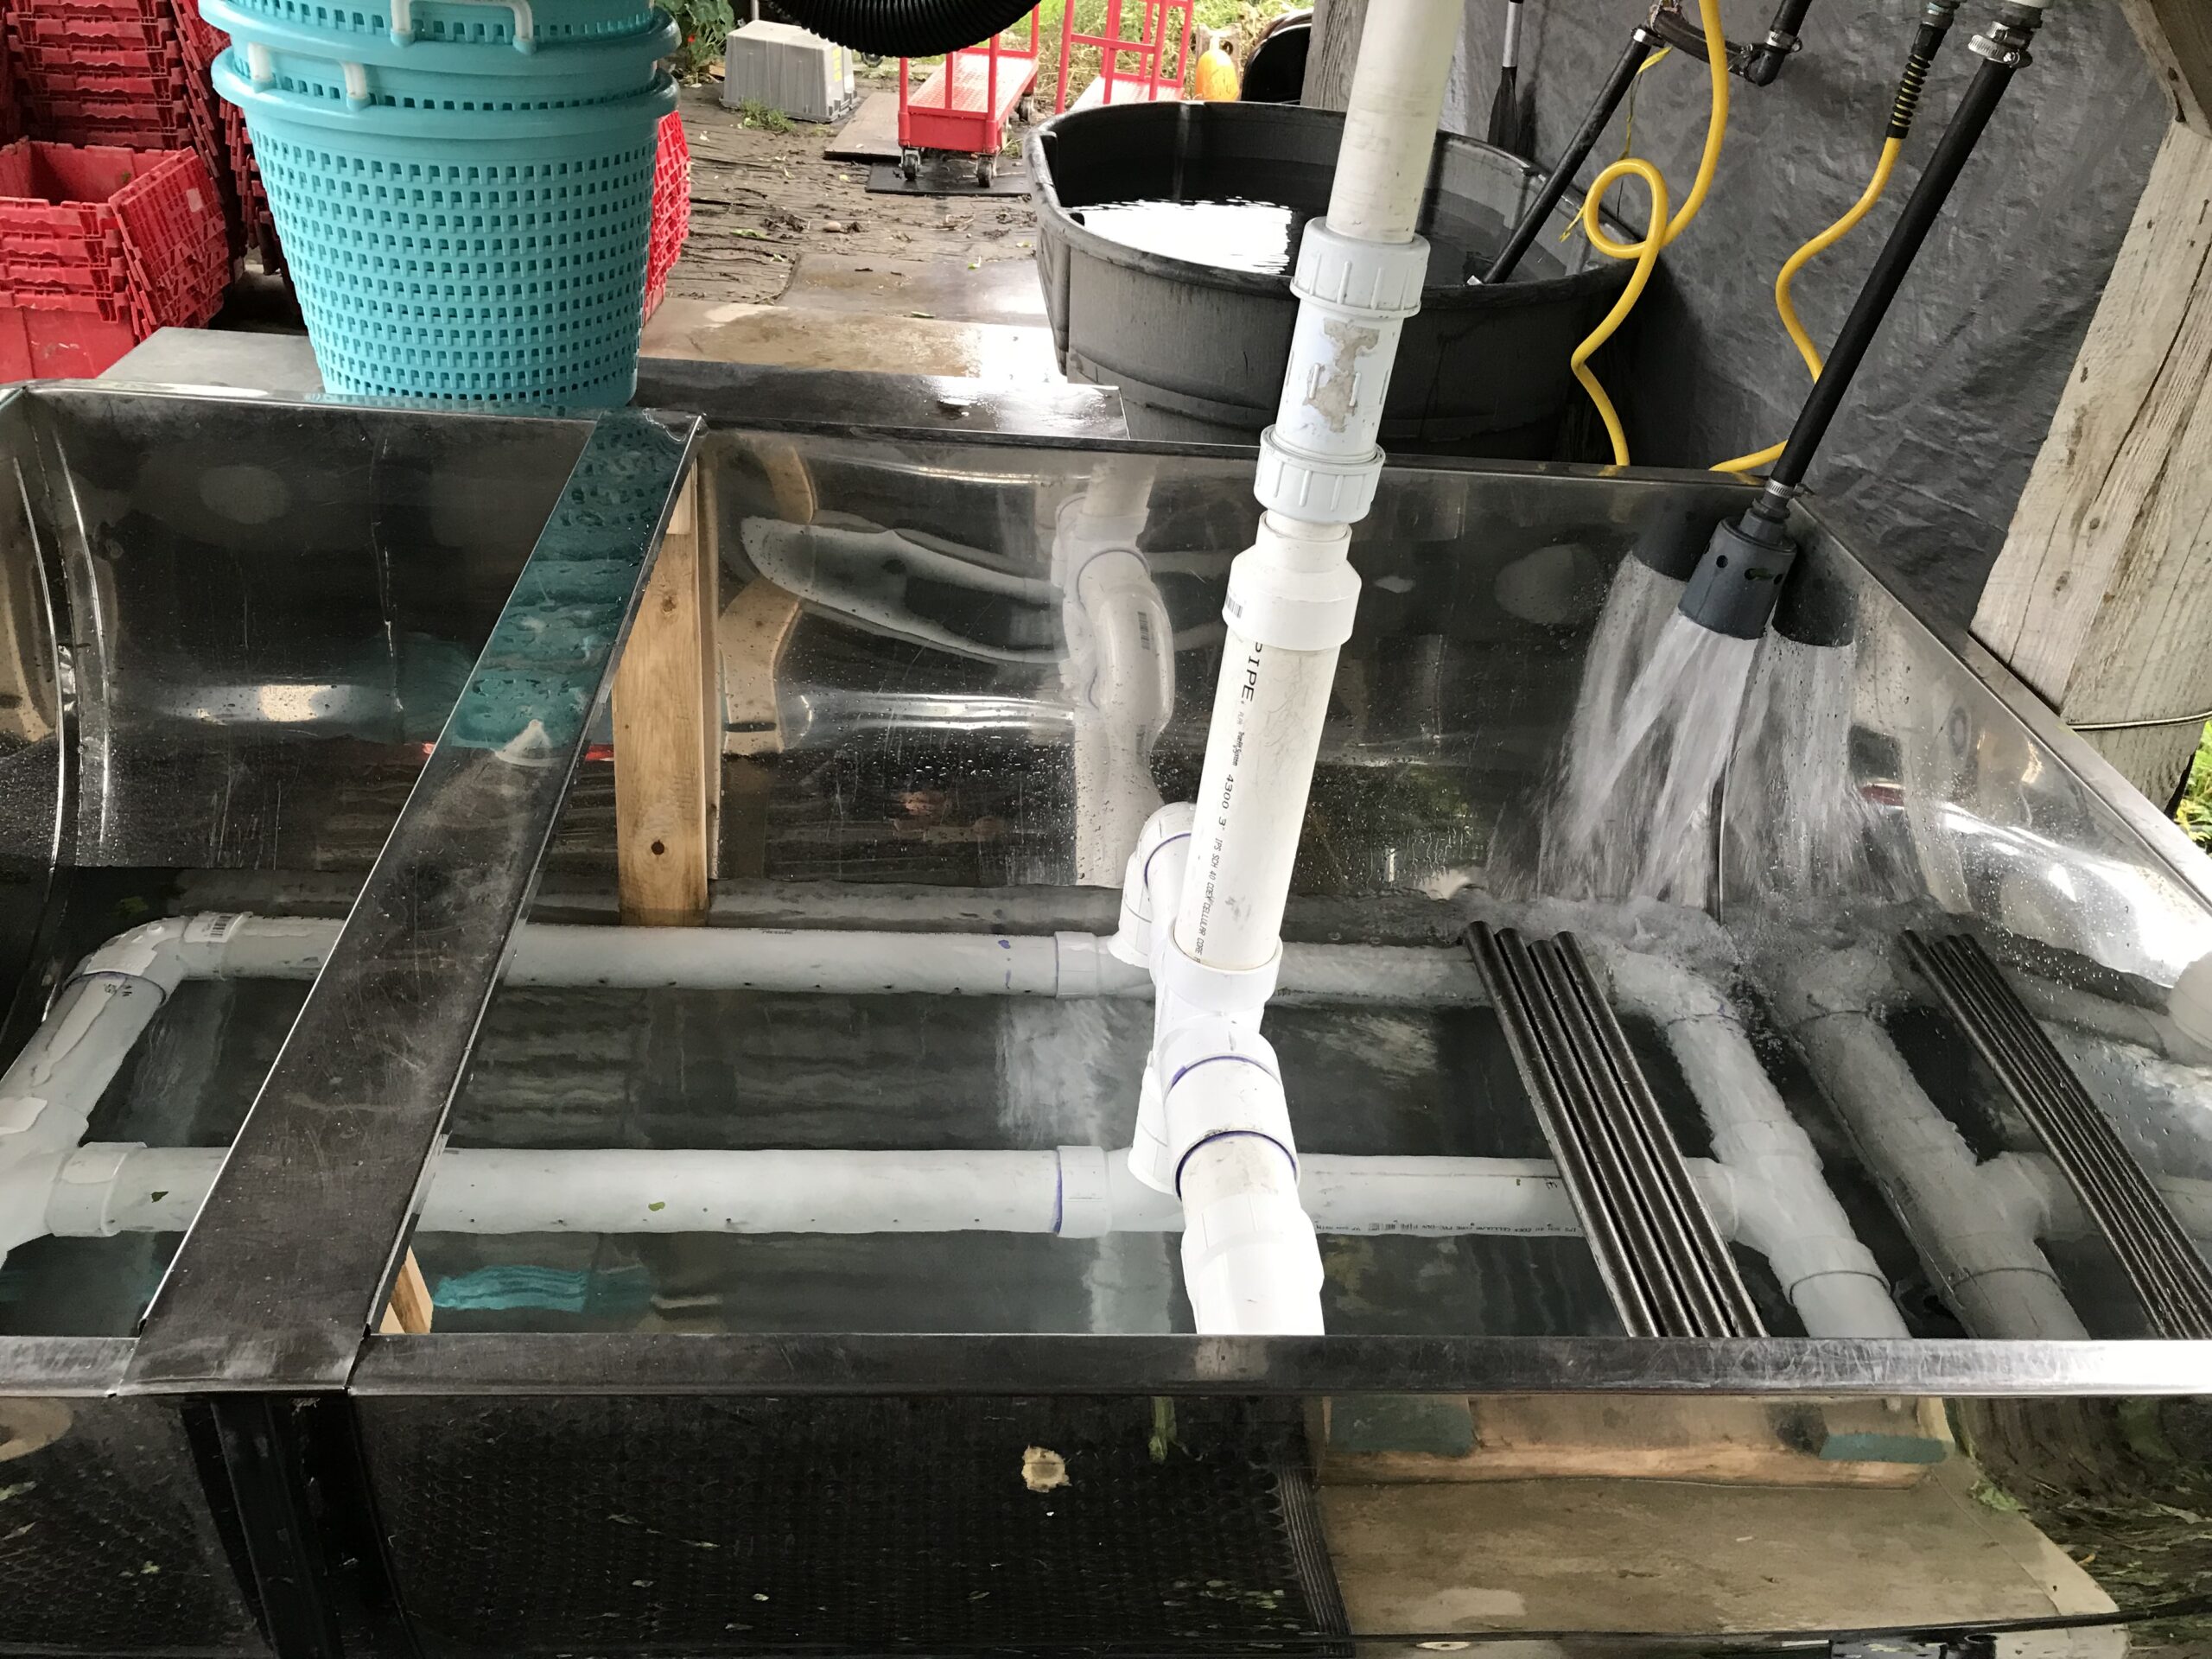
Build the PVC air manifold and supply lines as sub-assemblies that can be disassembled and cleaned easily with a pipe brush or other cleaning tool.
Glue the short end pieces to the elbows. This helps to secure the longer runs of pipe when dry fit. Make sure this sub assembly of a manifold can be cleaned with a flexible brush.
Consider using camlock fittings such as Banjo or Gatorlock to help make assembly and disassembly easier for improved cleanability without tools or hard to clean threaded fittings.
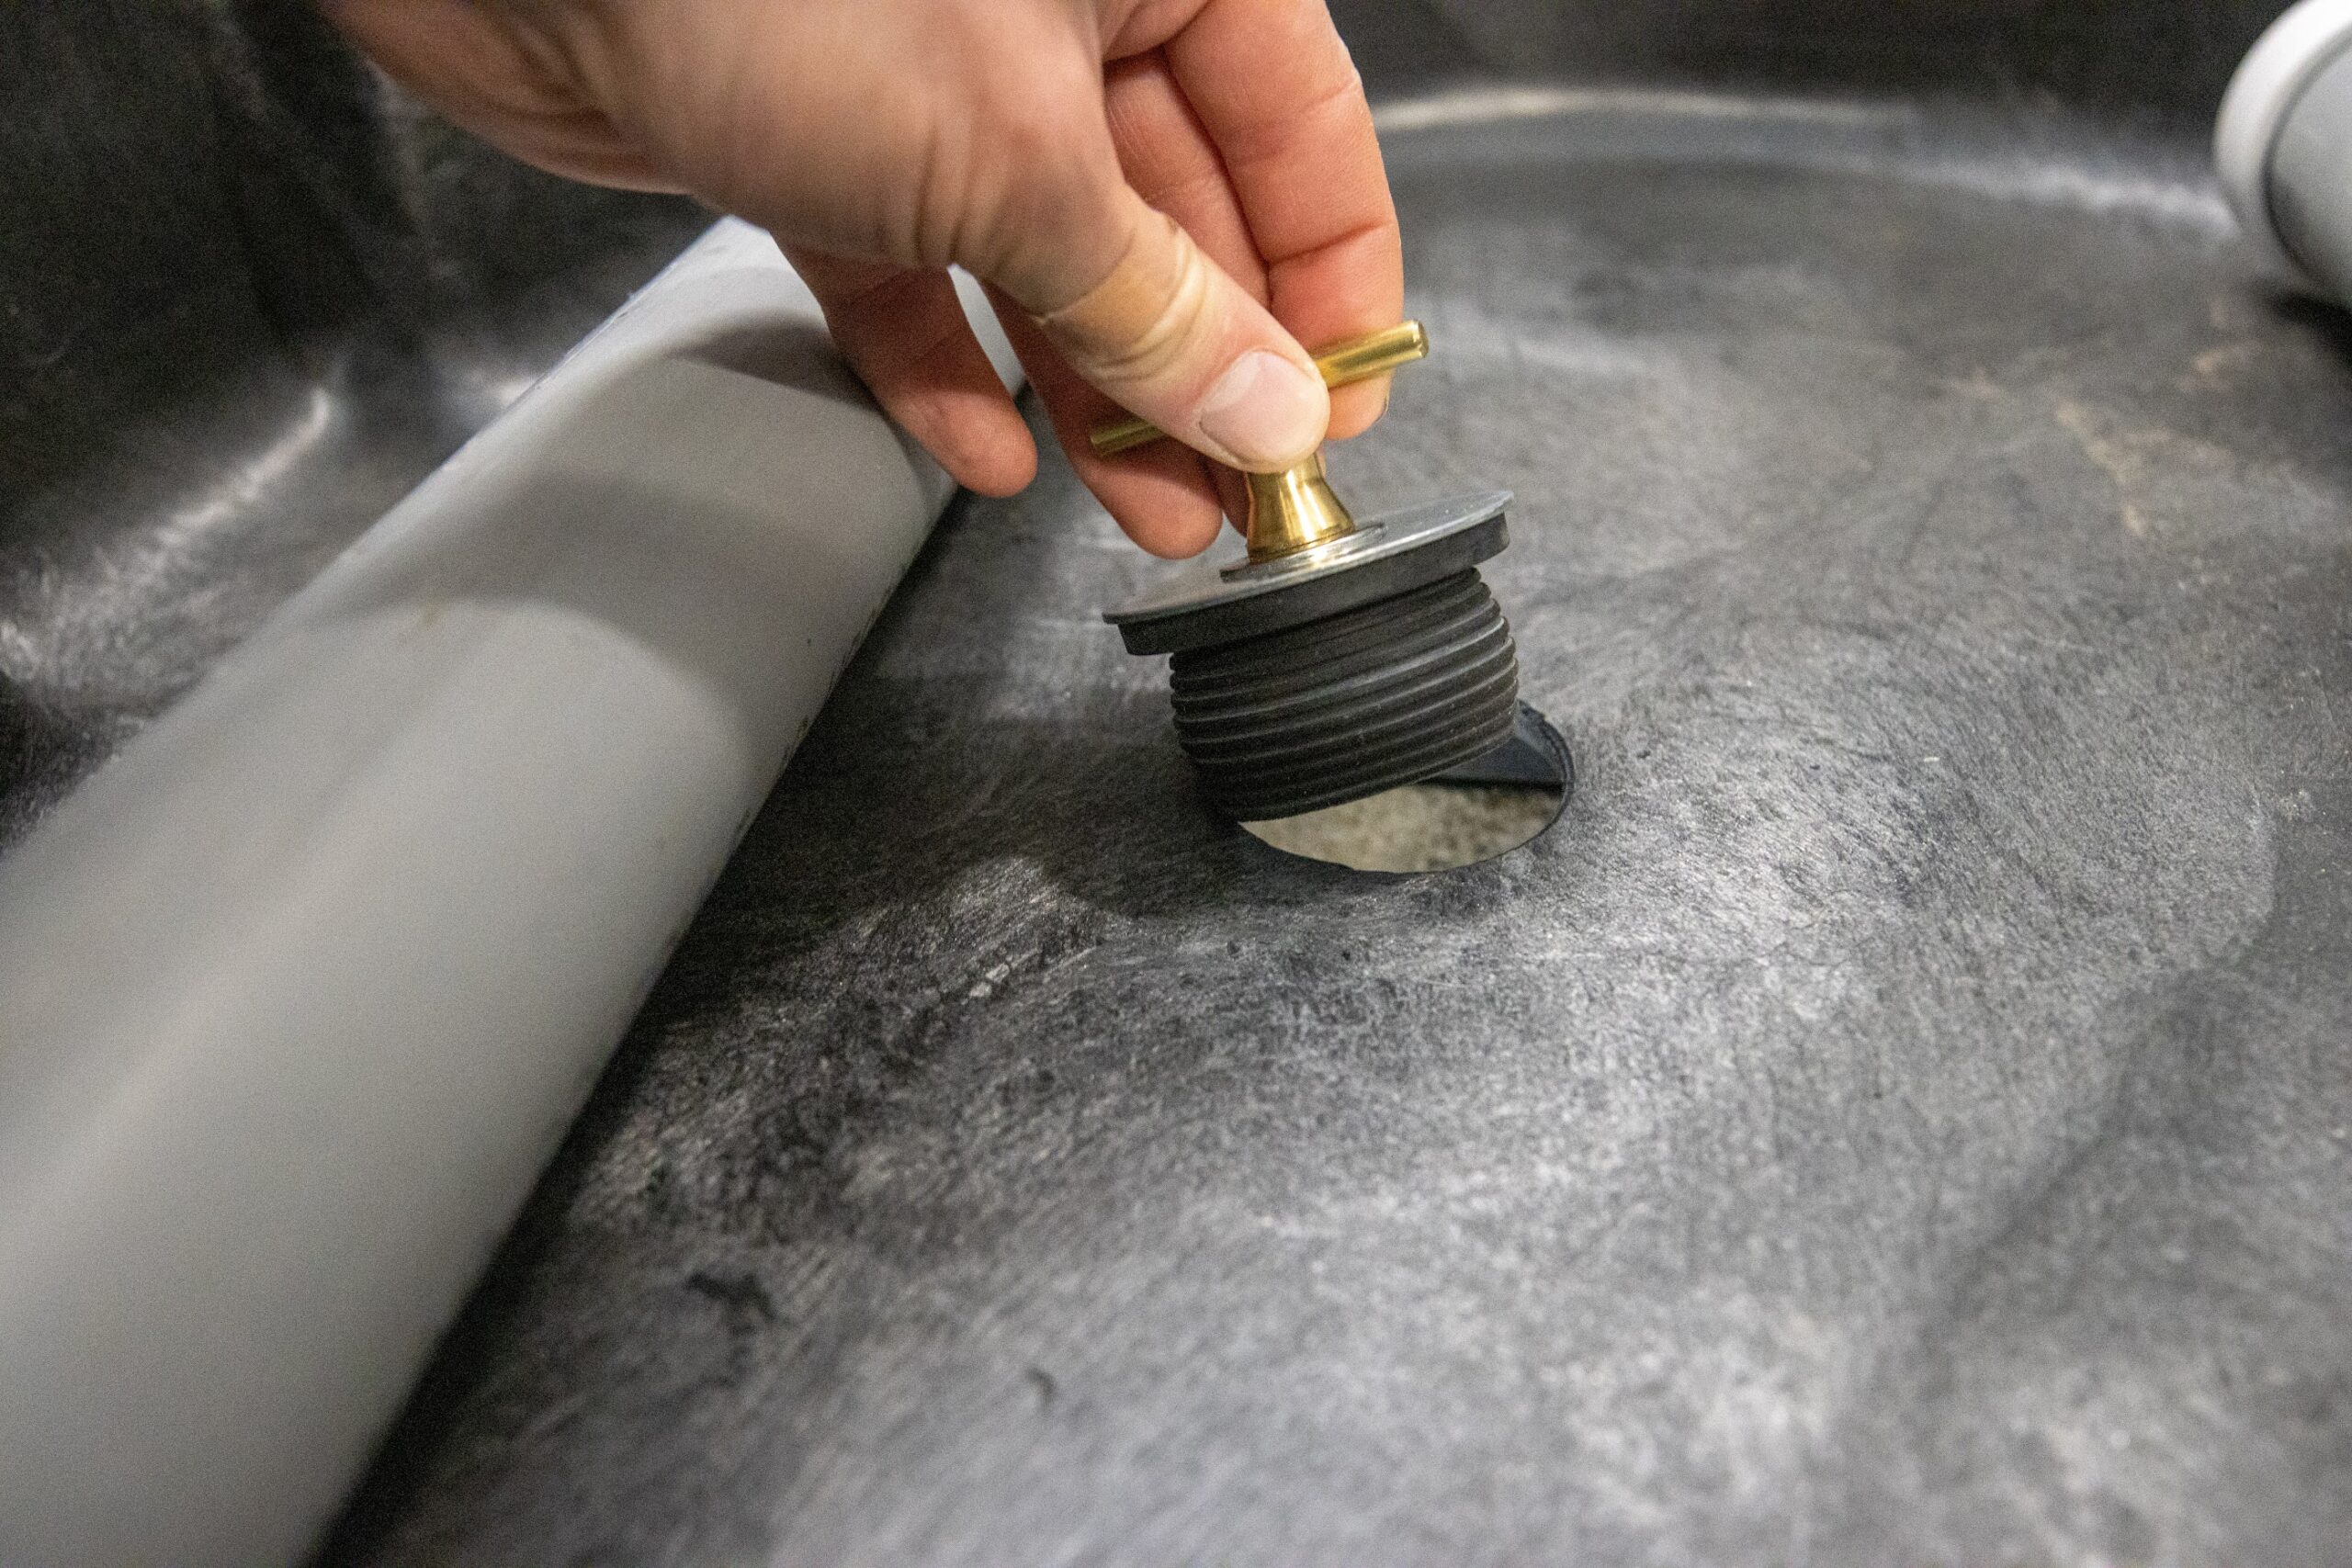
Avoid permanently fastening of the air manifold into the tank. Instead, use a sealed section of PVC piping with clean gravel or stone inside to weight the assembly down when in use. We found we could get 12lbs of sand in a 24” section of 2 inch PVC pipe which worked for a 100 gallon stock tank. This can be laid on top of the manifold without fastening to keep it in place during use. It can be easily removed and cleaned on the outside along with the rest of the manifold between uses.
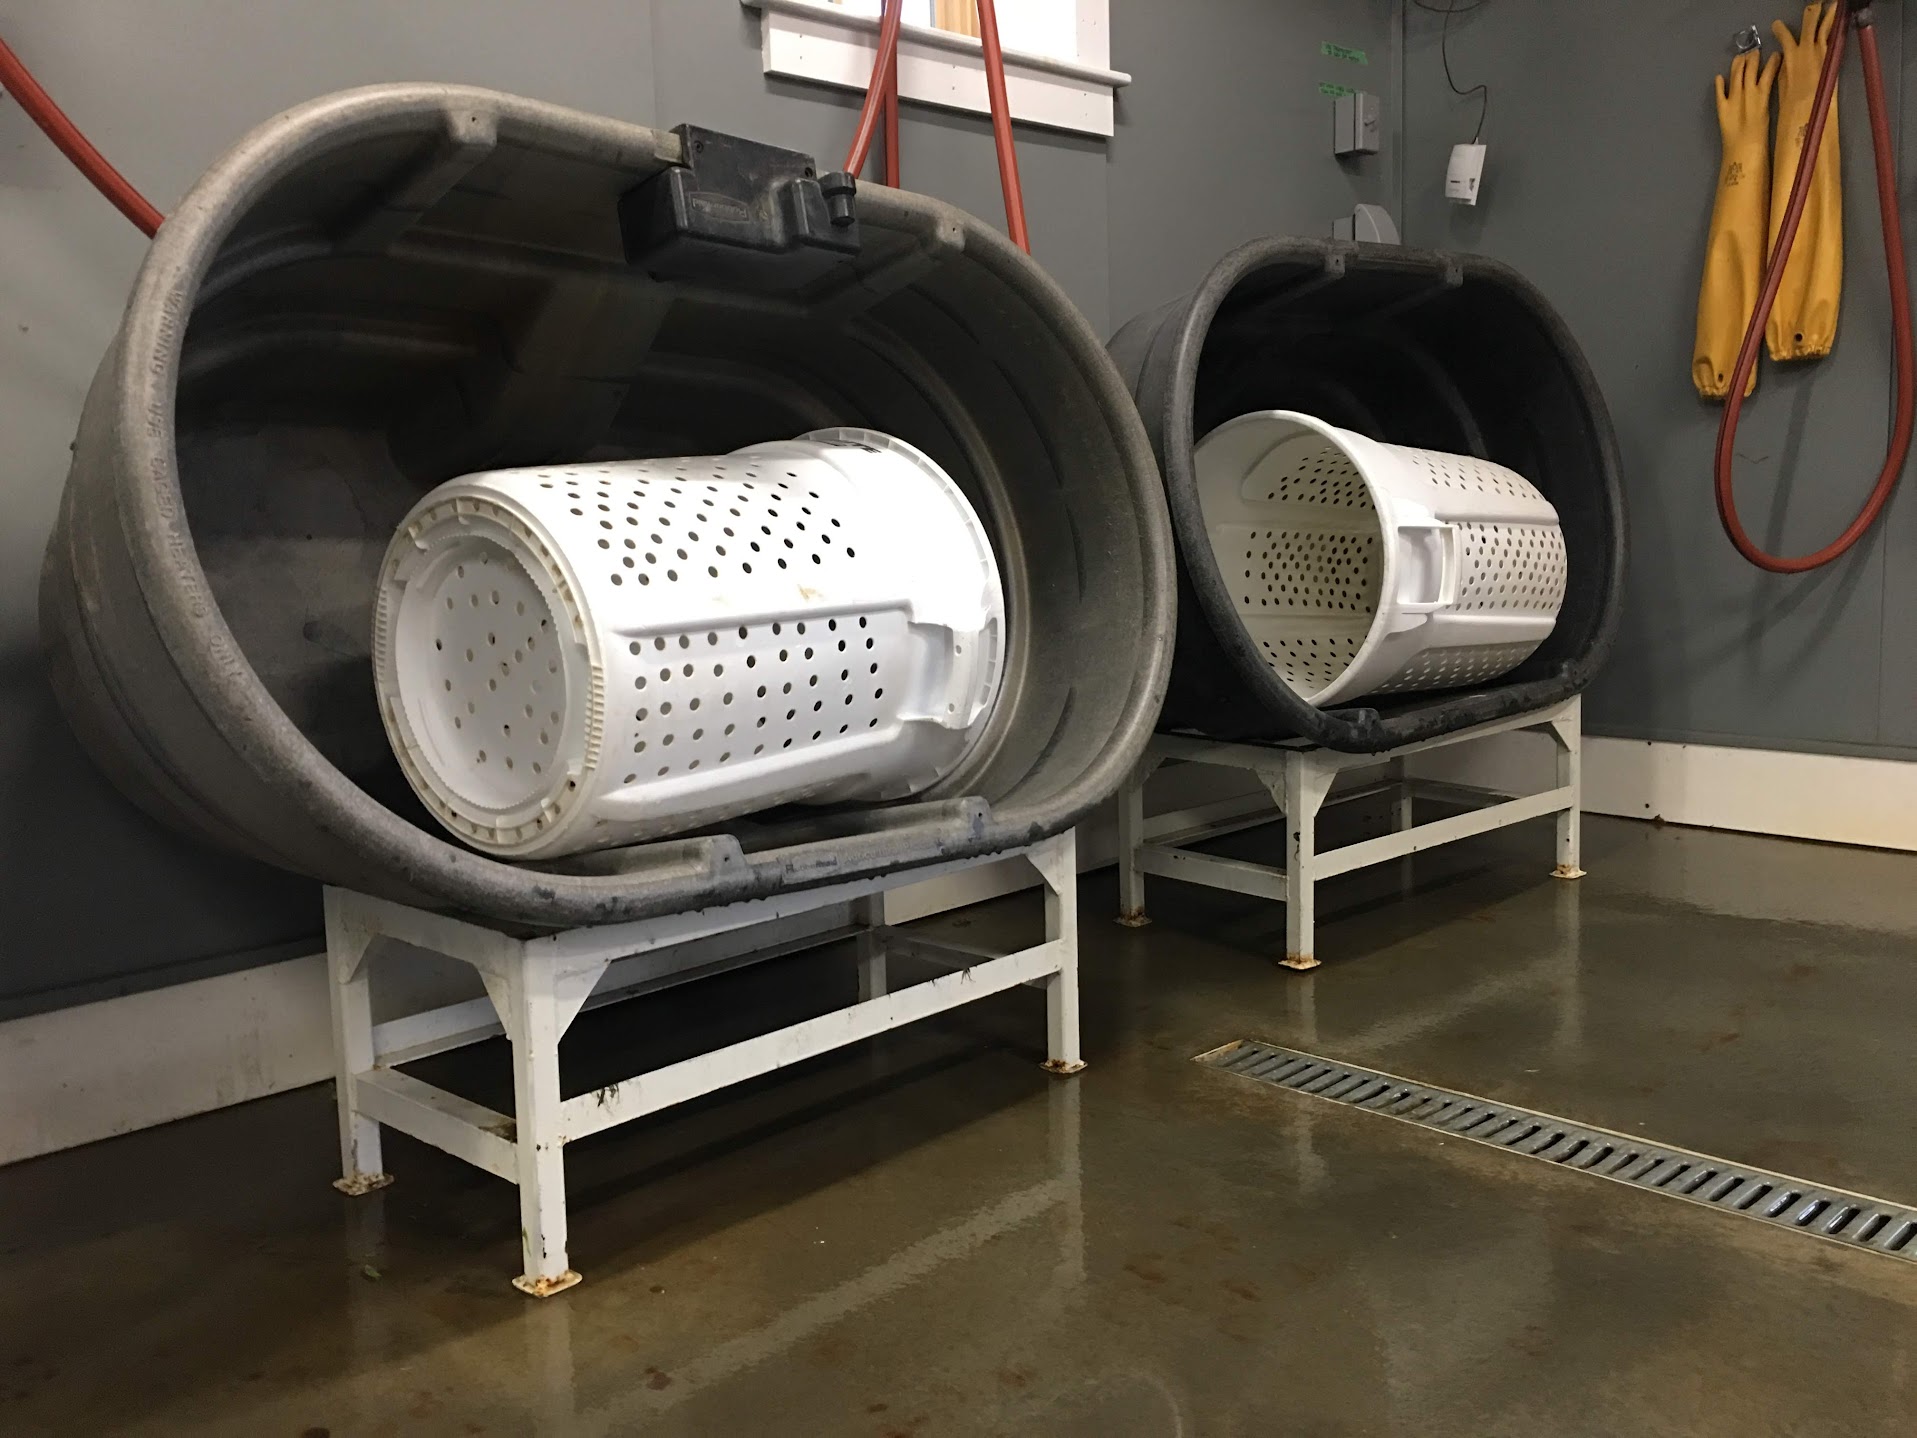
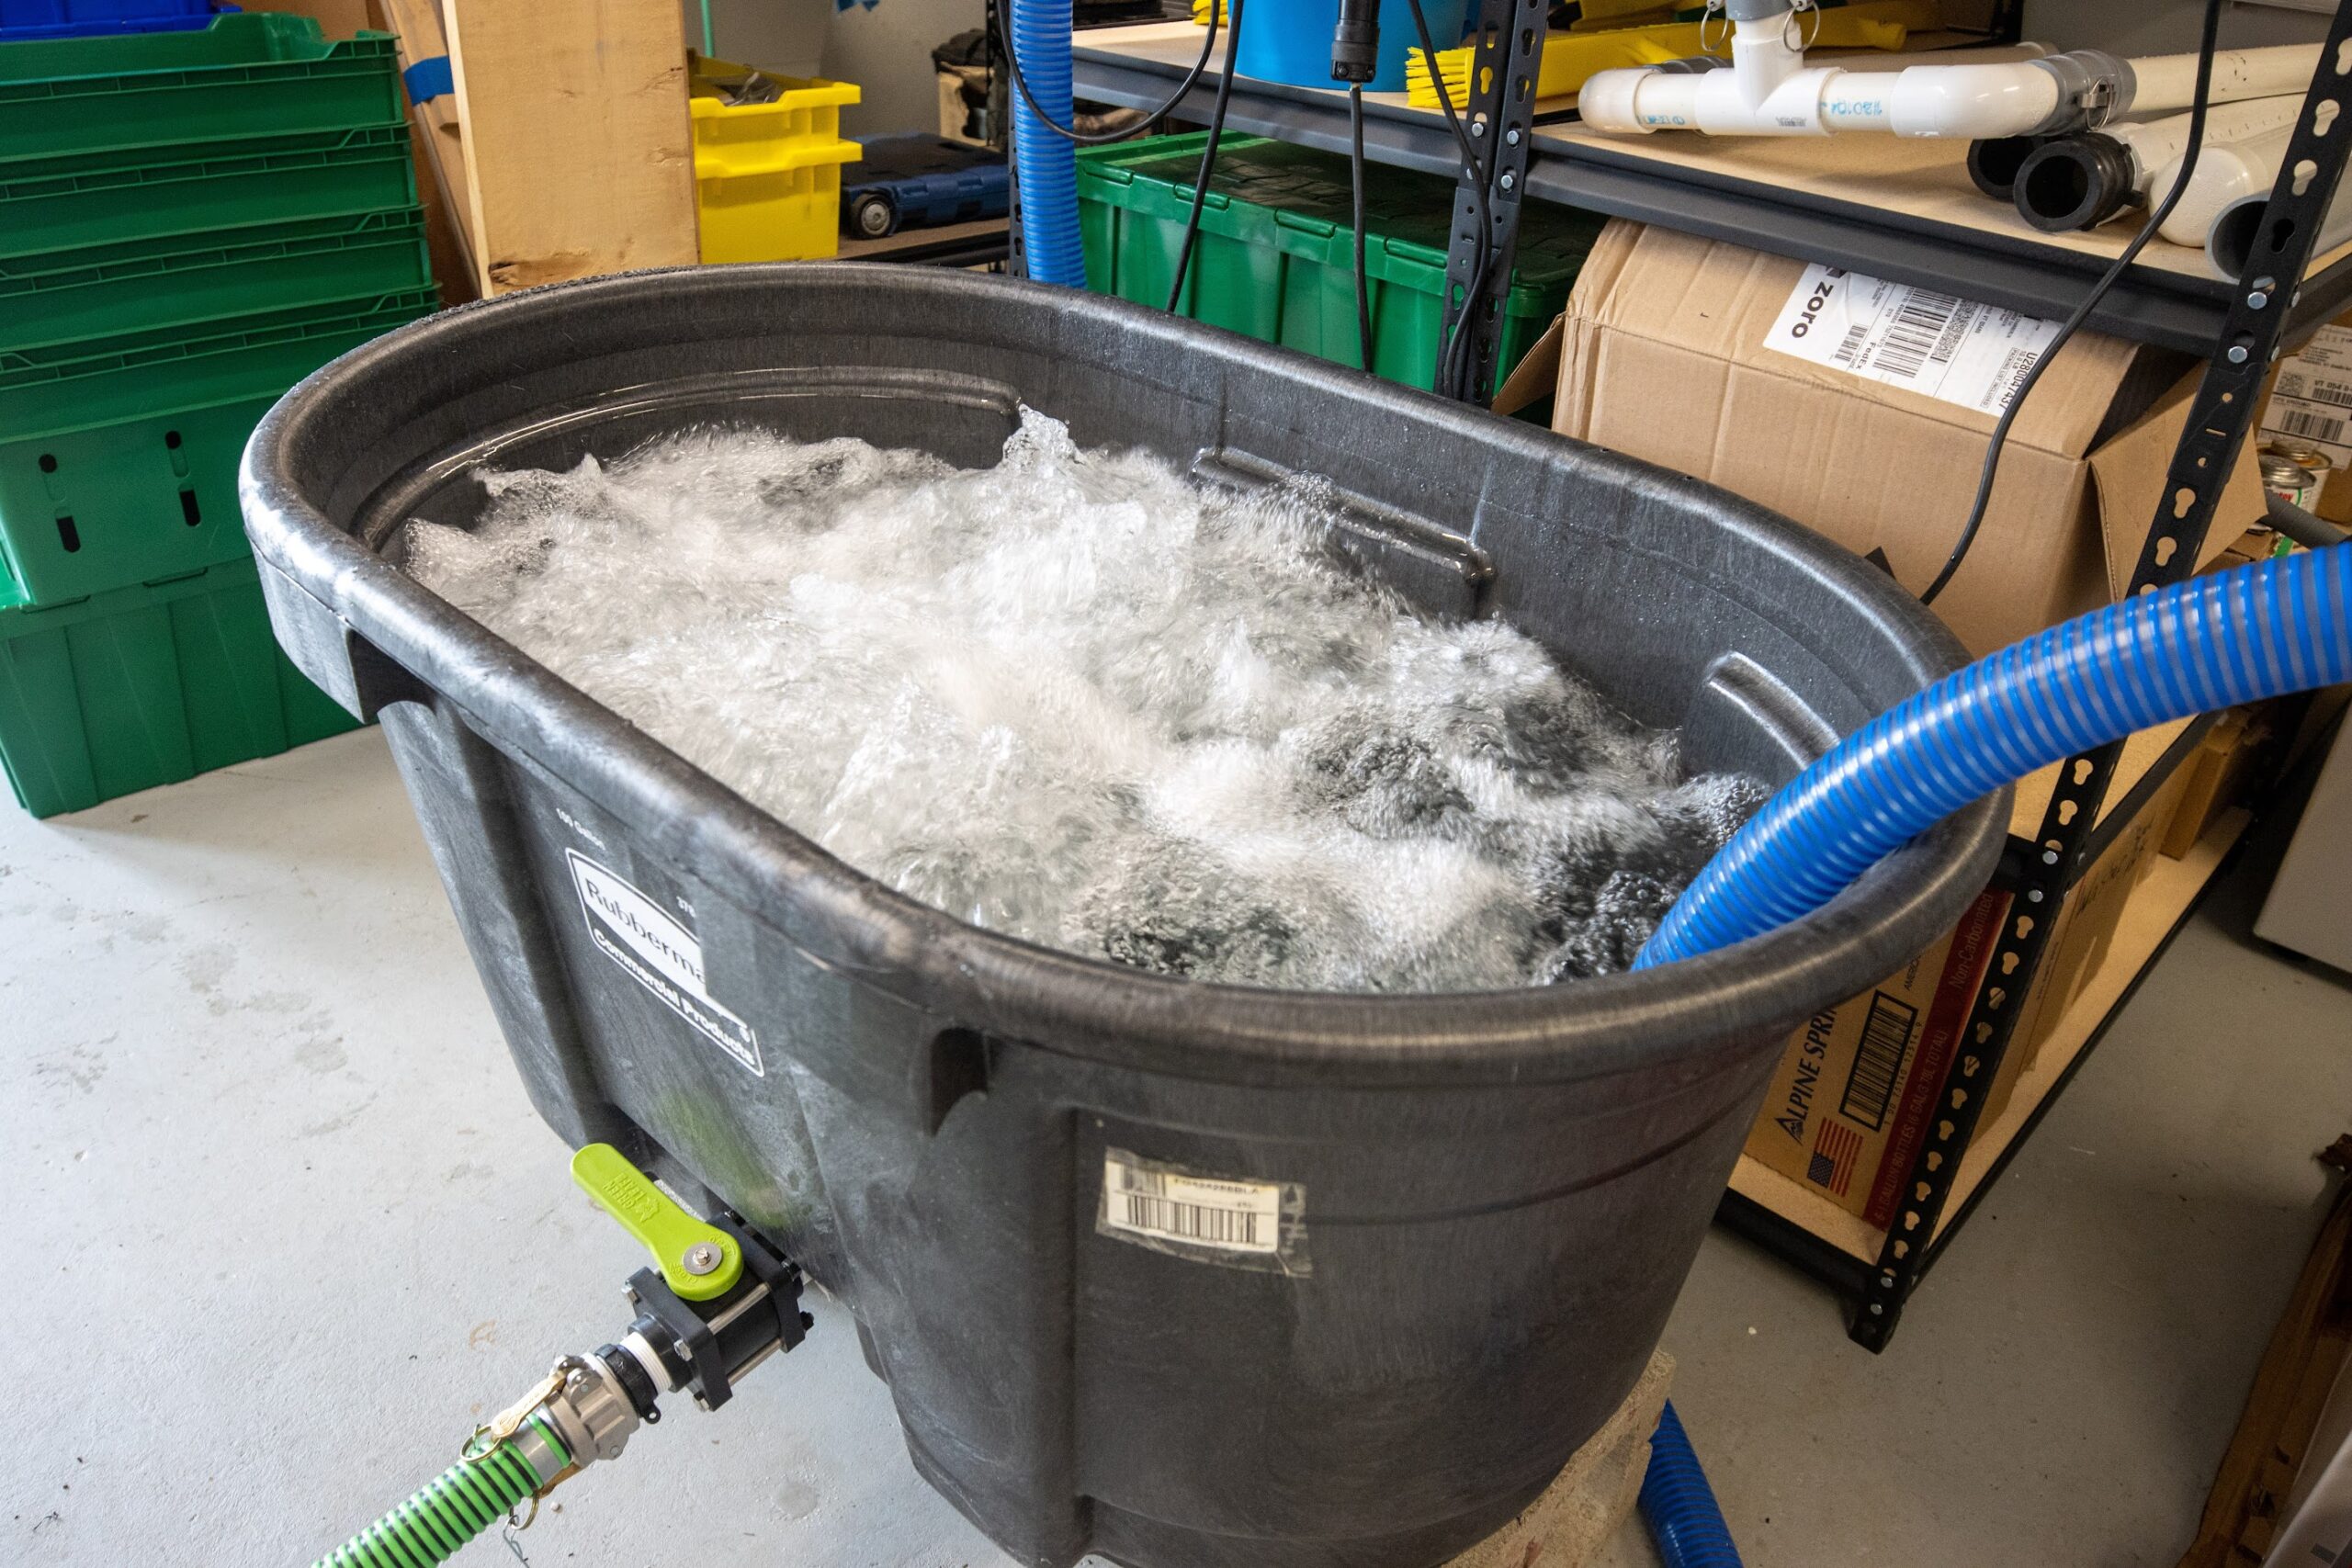
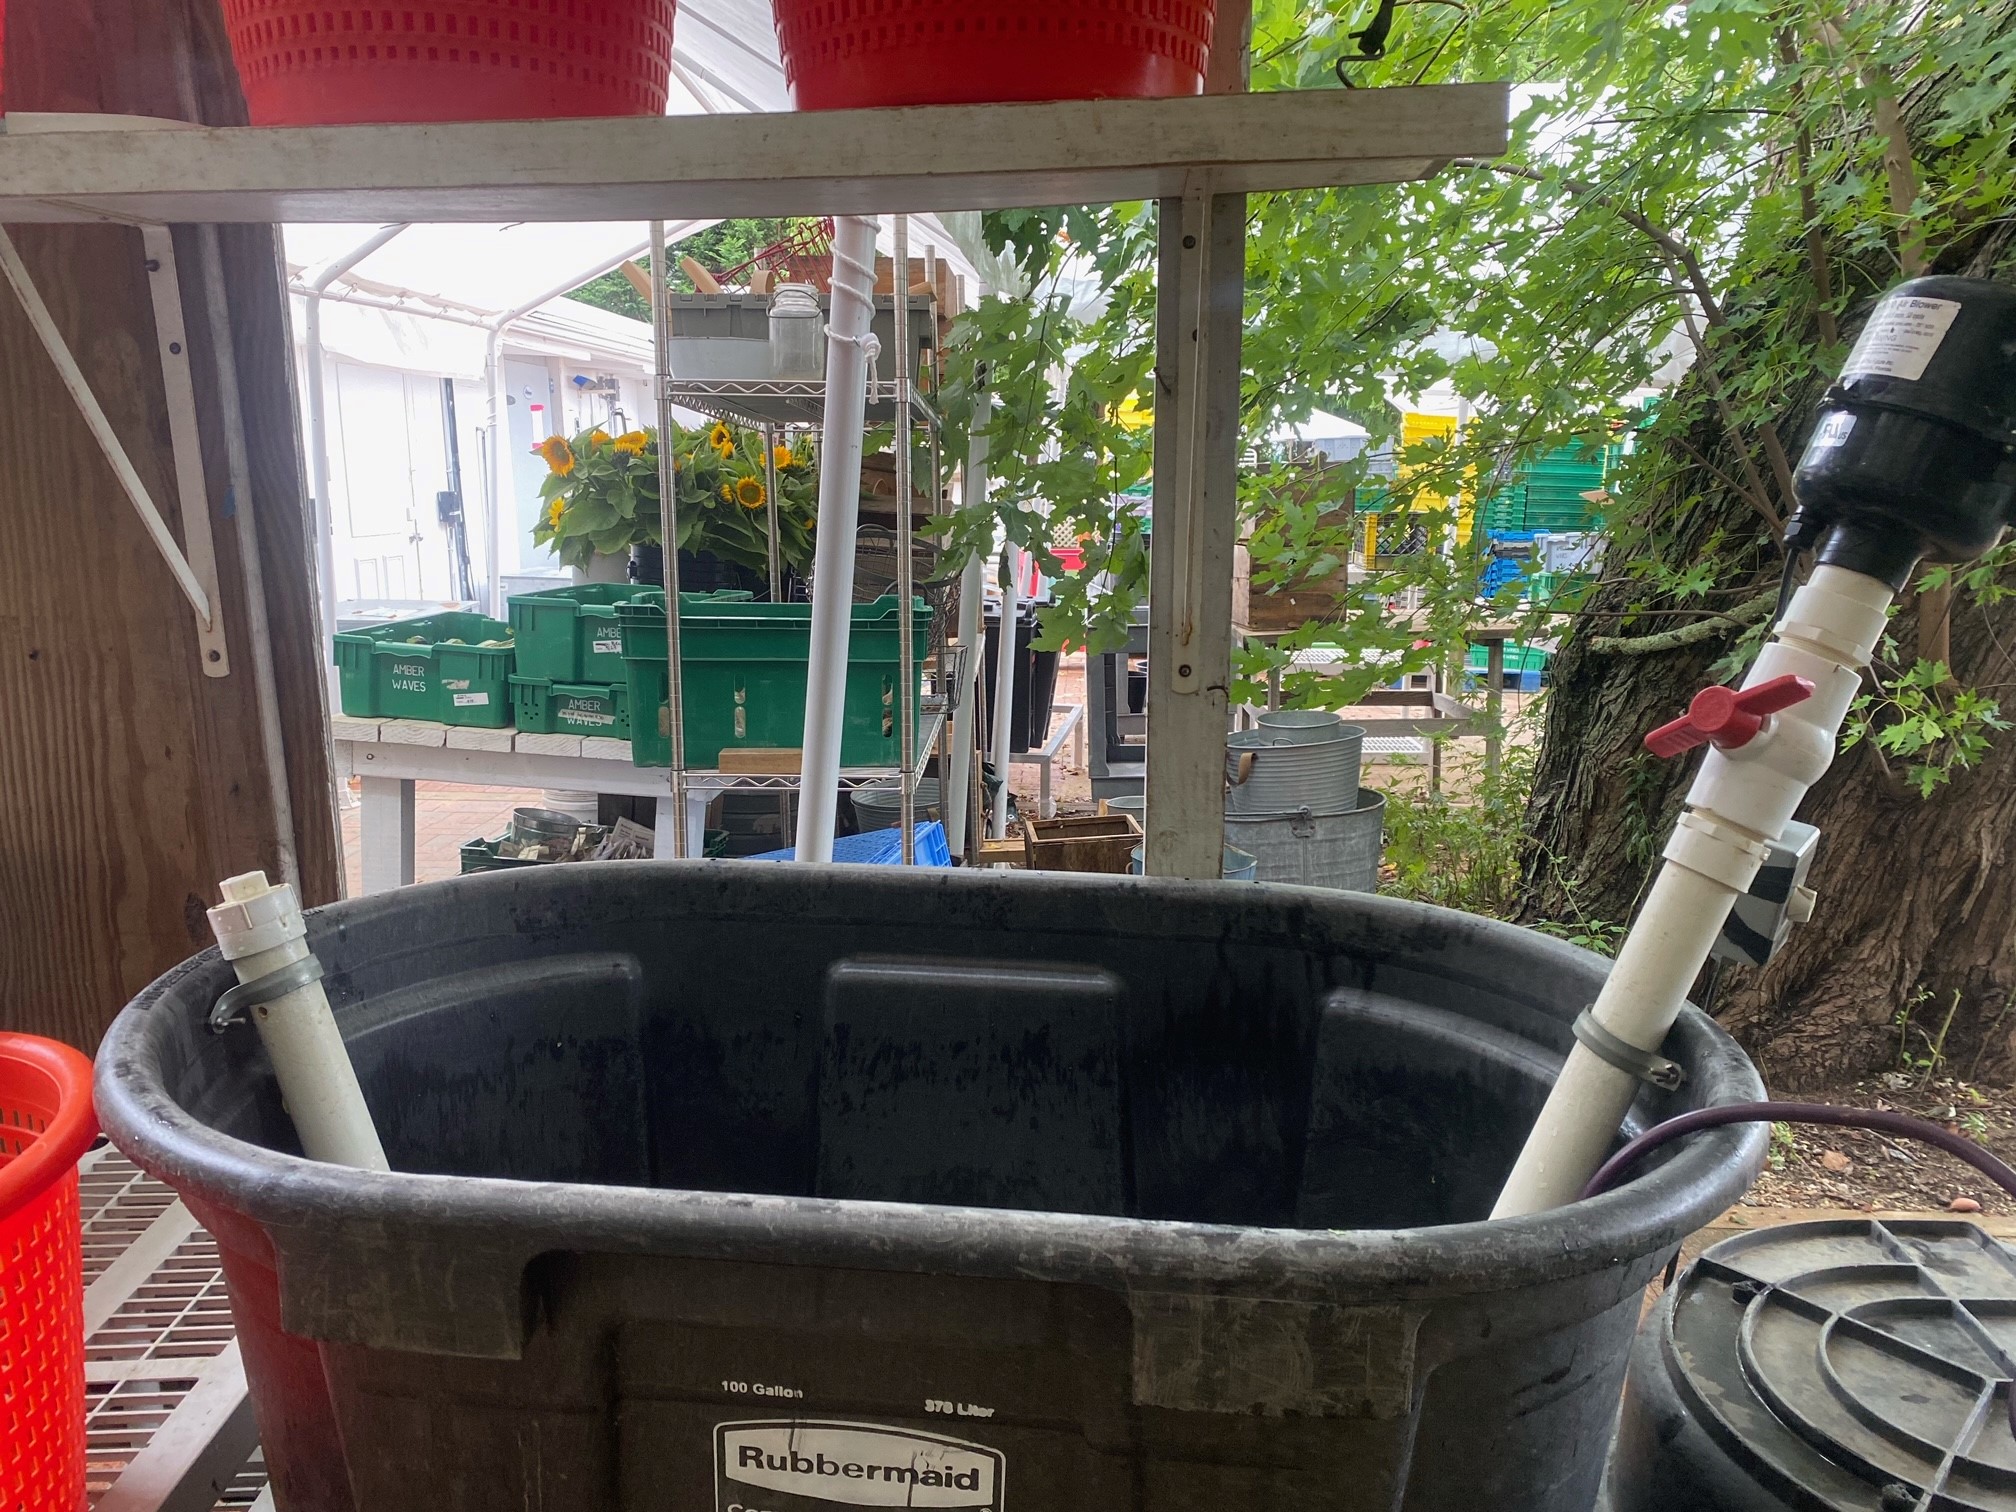
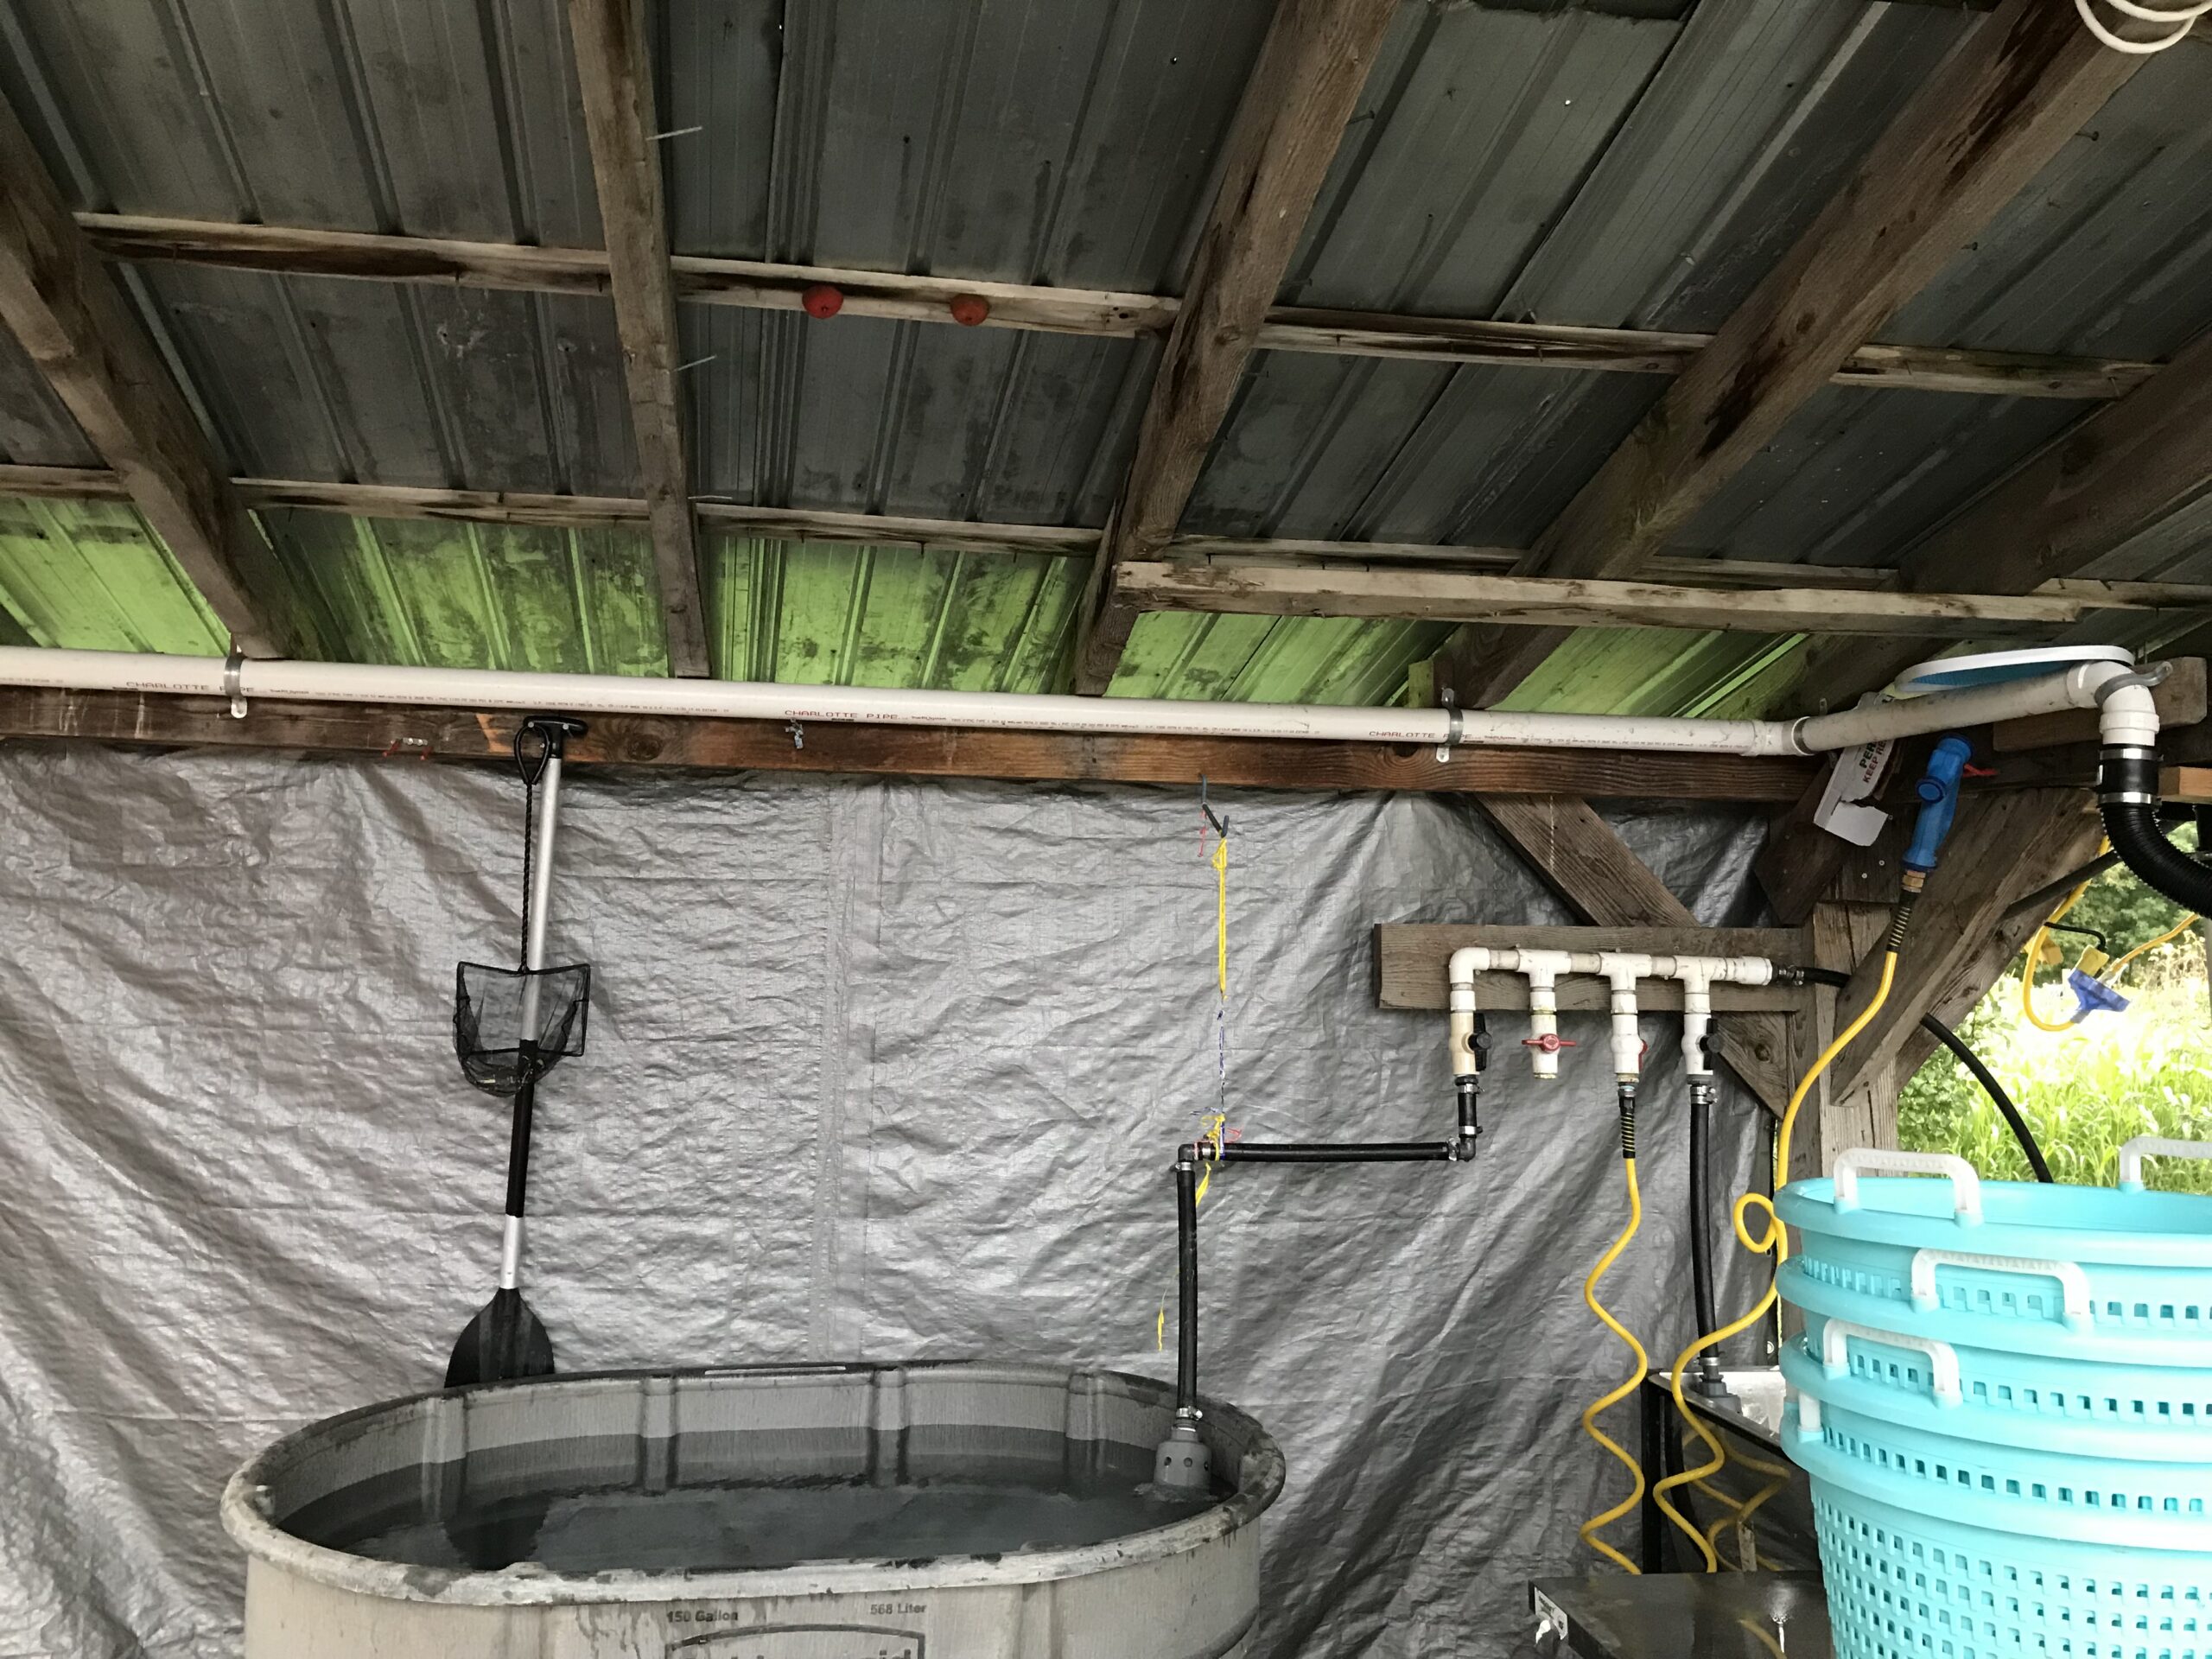
Designate a cleaning, sanitizing and drying location for the tank, the manifold, the weight section, and the cleaning tools which will allow for complete draining and drying between uses. Some growers use stands under their tanks for easier movement and to provide a “drying rack” between uses. Also note the use of an automatic fill valve.
Create a standard operating procedure for the setup, use, breakdown, cleaning/sanitizing/drying of the bubbler, train your crew on it and make it readily available to everyone. A sample SOP to get you started can be downloaded here (link coming soon).
Build Guidance
Key Features Video
Important Updates & Upgrades
Pumps & Blowers
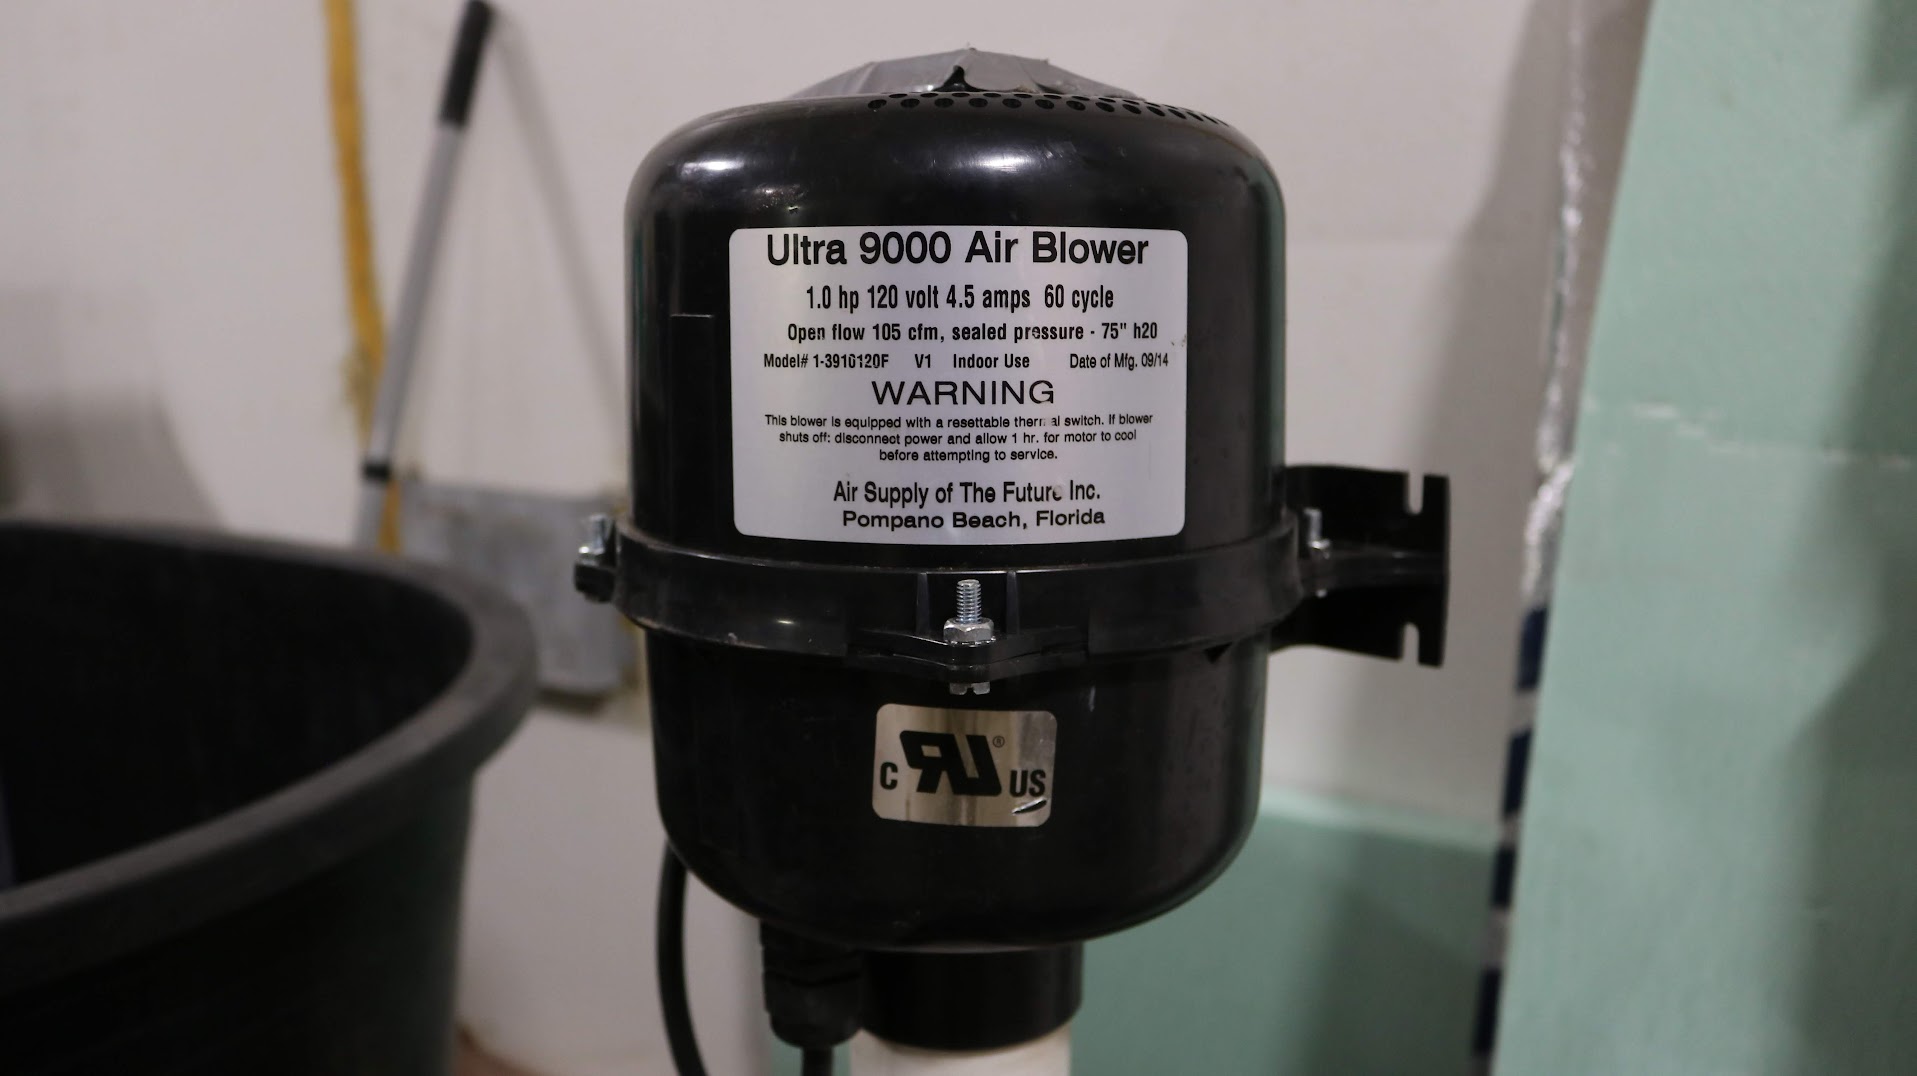
The most common blowers used in bubblers are jacuzzi “air pumps” available from Amazon or pool and hot tub supply stores. Some growers choose to use a ShopVac due to their convenient availability locally. Electric leaf blowers would also supply enough airflow at the right pressure to get the job done, but modifying their output chute to connect with PVC would take additional modifications.
Use of air compressors is not recommended. Compressors are not energy efficient for this application since they provide low air flow rates at high pressure and bubblers need high air flow rates at relatively low pressure. Compressors simply aren’t designed for this use. Air from compressors can also contain small amounts of lubricating oil and should not be used directly in a food application setting unless specifically designed for it.
Camlock Fittings
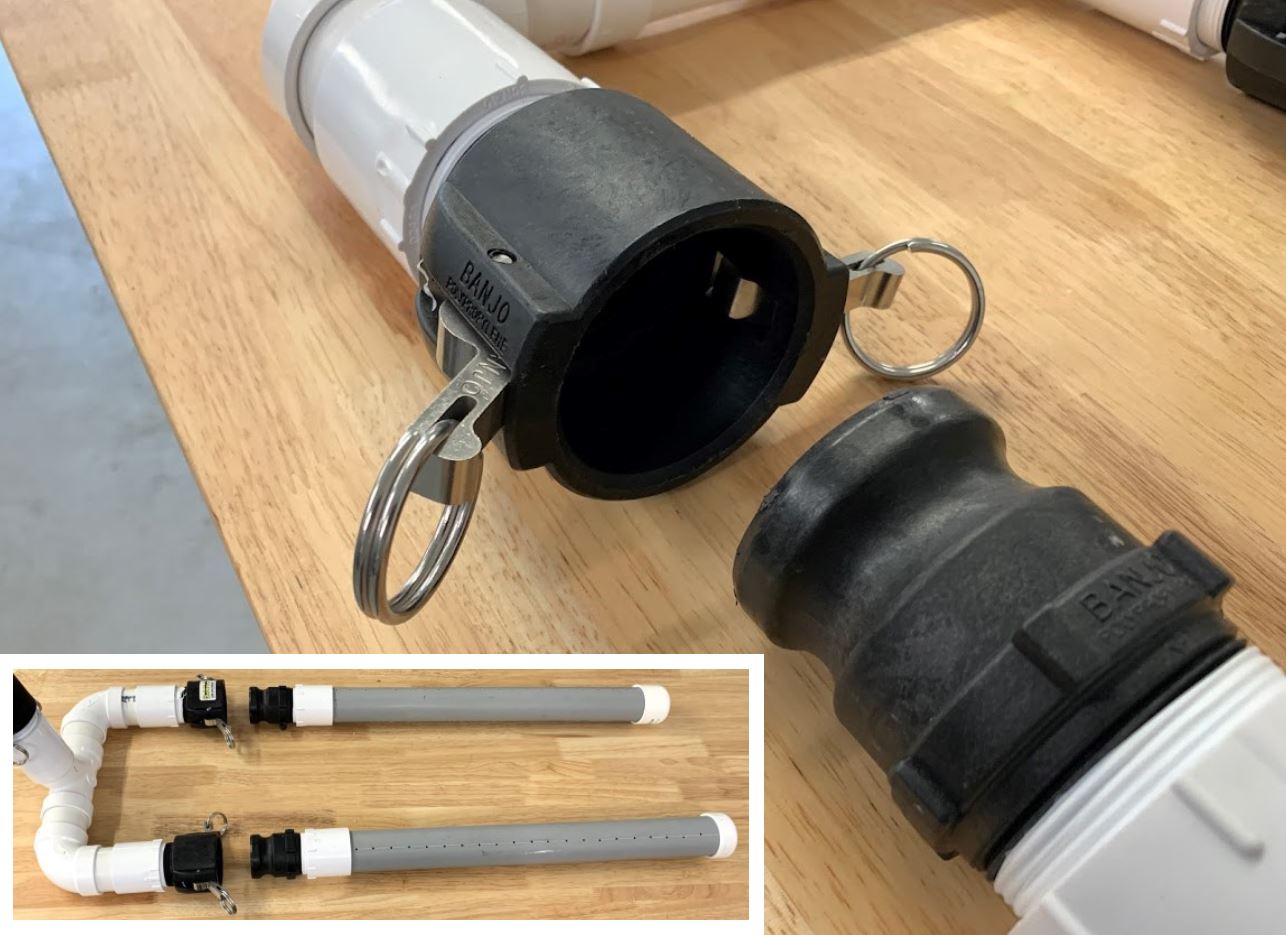
Camlock fittings provide an tool less assembly and disassembly option and making cleaning easier and more effective. they are available in a variety of sizes and male/female thread combinations to match up to the assemblies you are designing. They can be ordered online from places like Zoro under brands like Banjo or Gatorlock, but can also be found locally at Tractor Supply or farm and garden type of stores as they are often used for irrigation, maple sap, or livestock water handling purposes.
Wiring Guidance
Consider hiring or consulting with an electrician for the electrical wiring. Follow good electrical safety practices and wear proper personnel protective equipment (PPE).
The wiring diagram below is provided for guidance. This circuit will provide a variable speed, timed bubbler. The typical jacuzzi blower has a 120 VAC 1 hp motor. This translates to about 10 Amps of current. Make sure your power supply circuit, switches, wiring, and connections are all rated for at least that much current.
Wire the timer switch ahead of the dimmer switch since the dimmer switch output may impact the function of the timer. Rubberized power cable is flexible and somewhat easier to clean than standard electrical cable. It also makes it easier to use weather proof fittings and plugs.
Electrical Diagram
Download the PDF of this electrical diagram here.
Bill of Materials
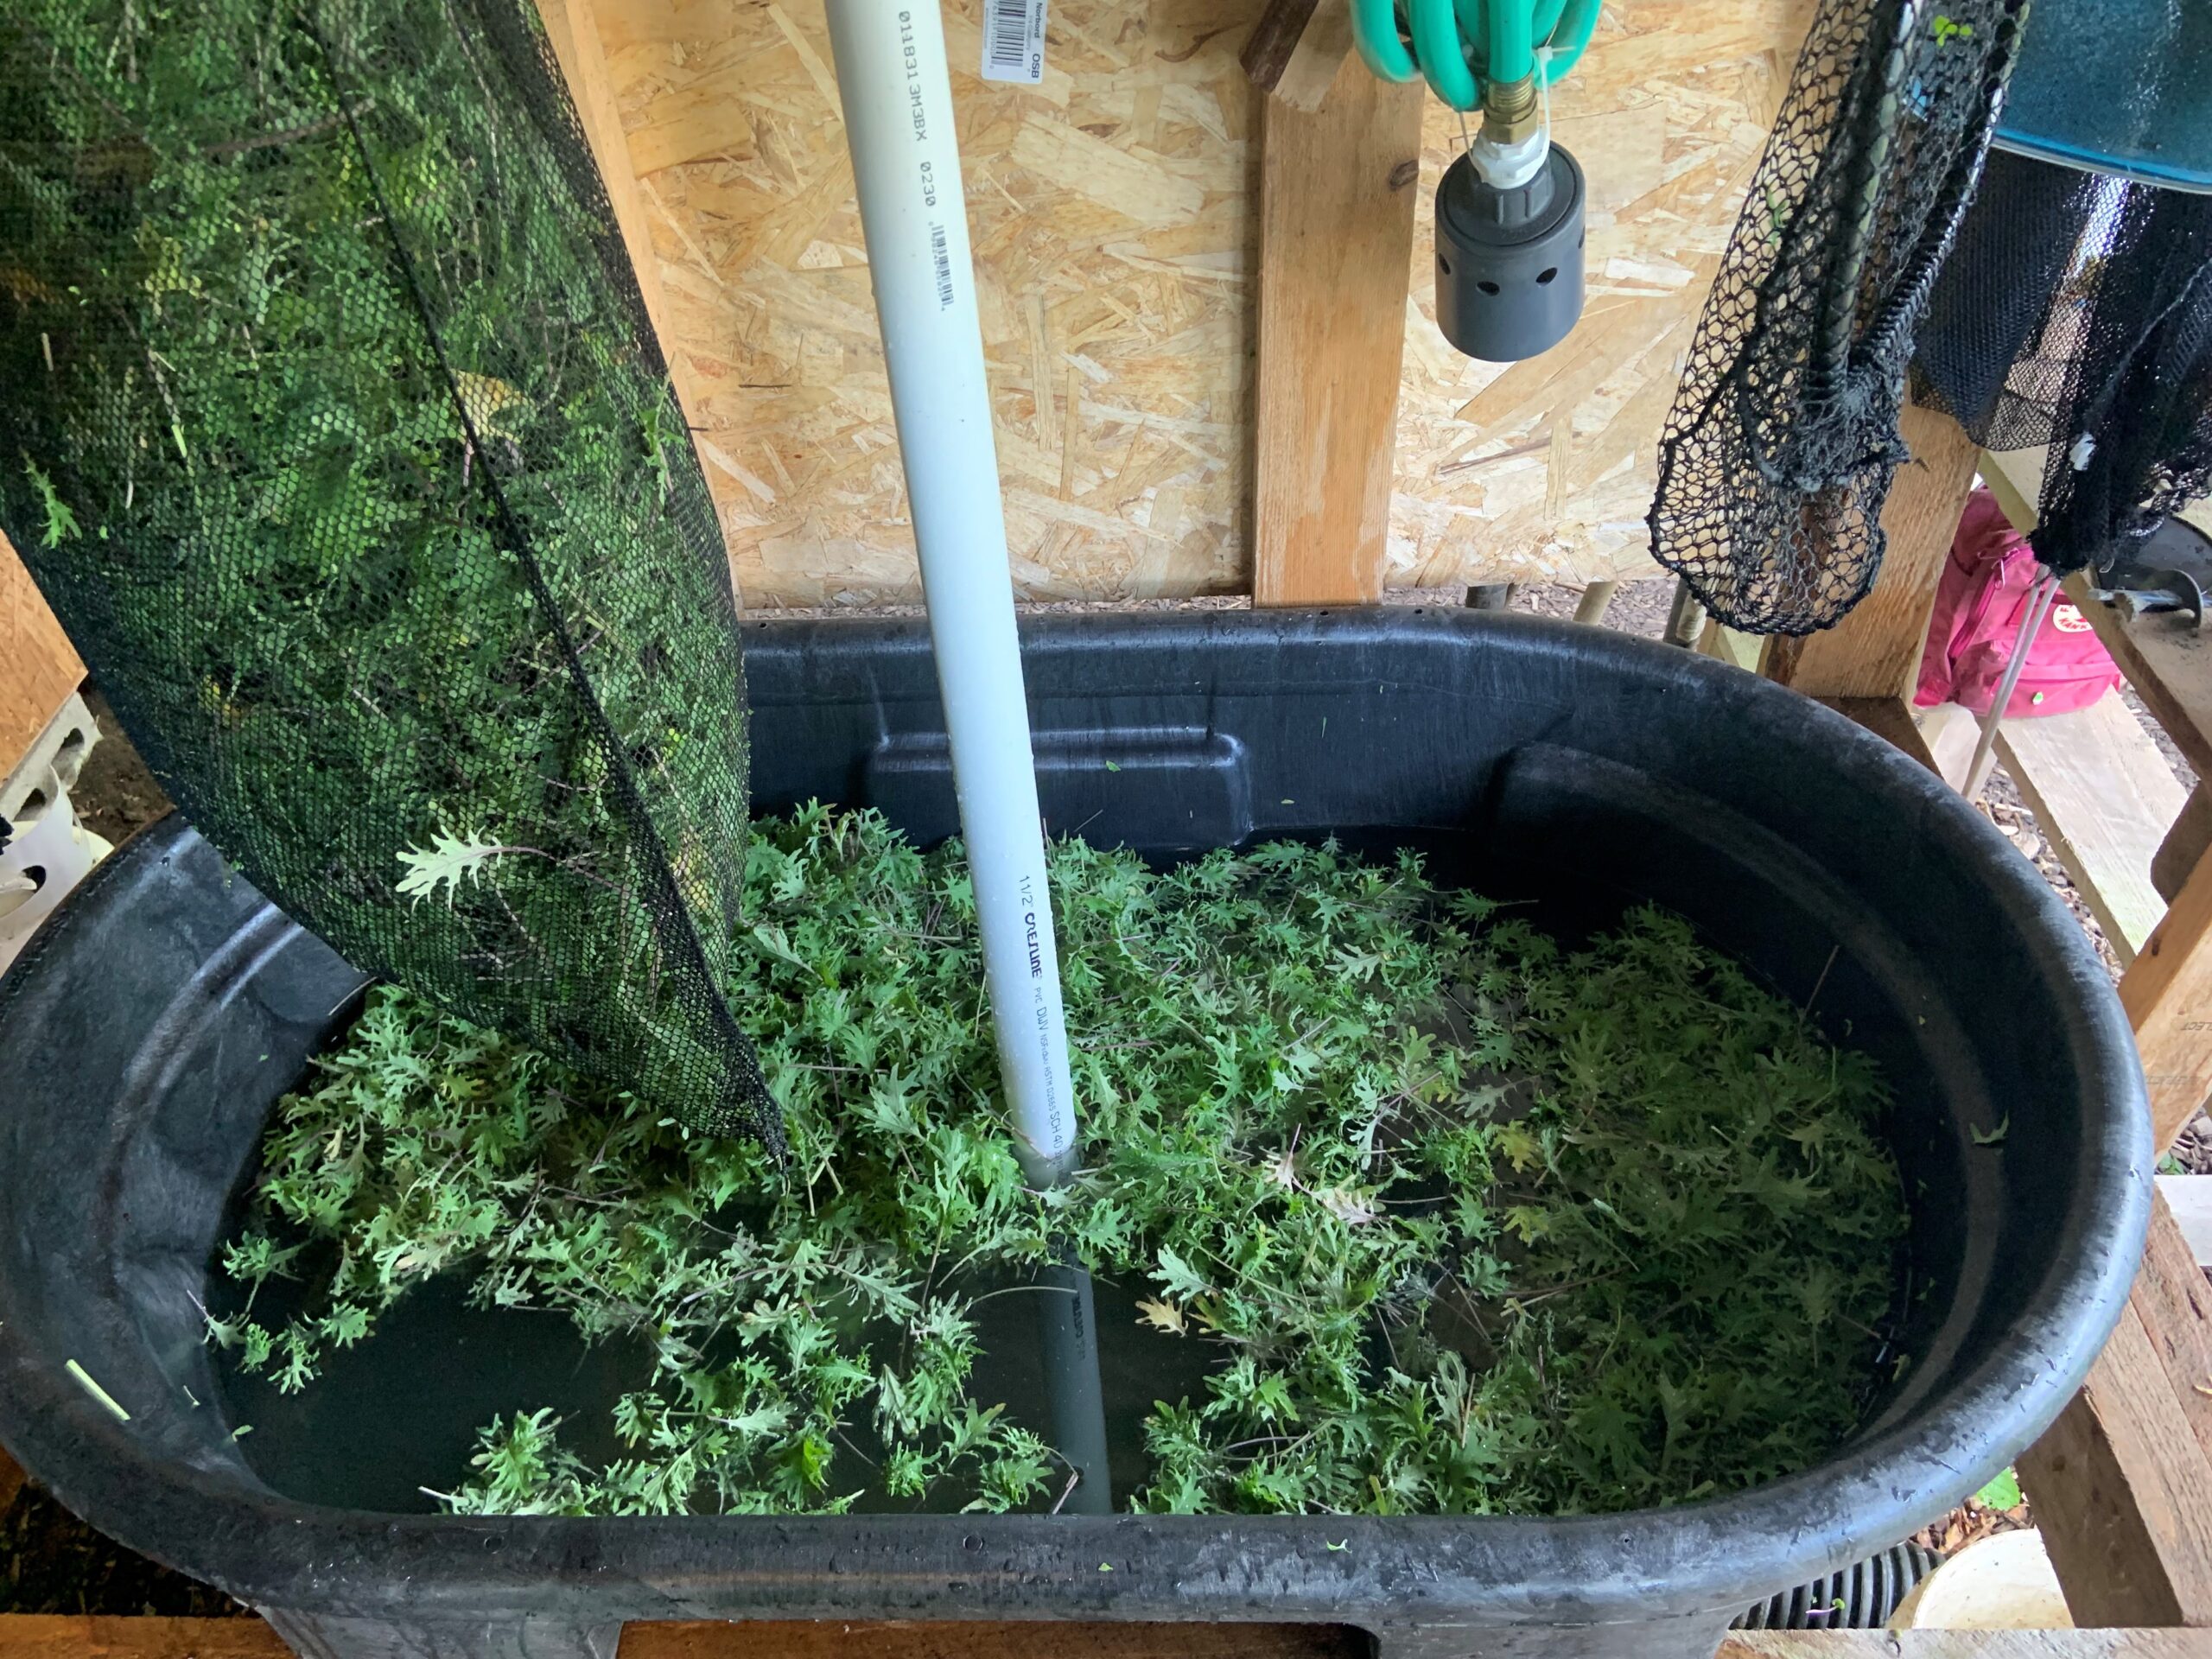
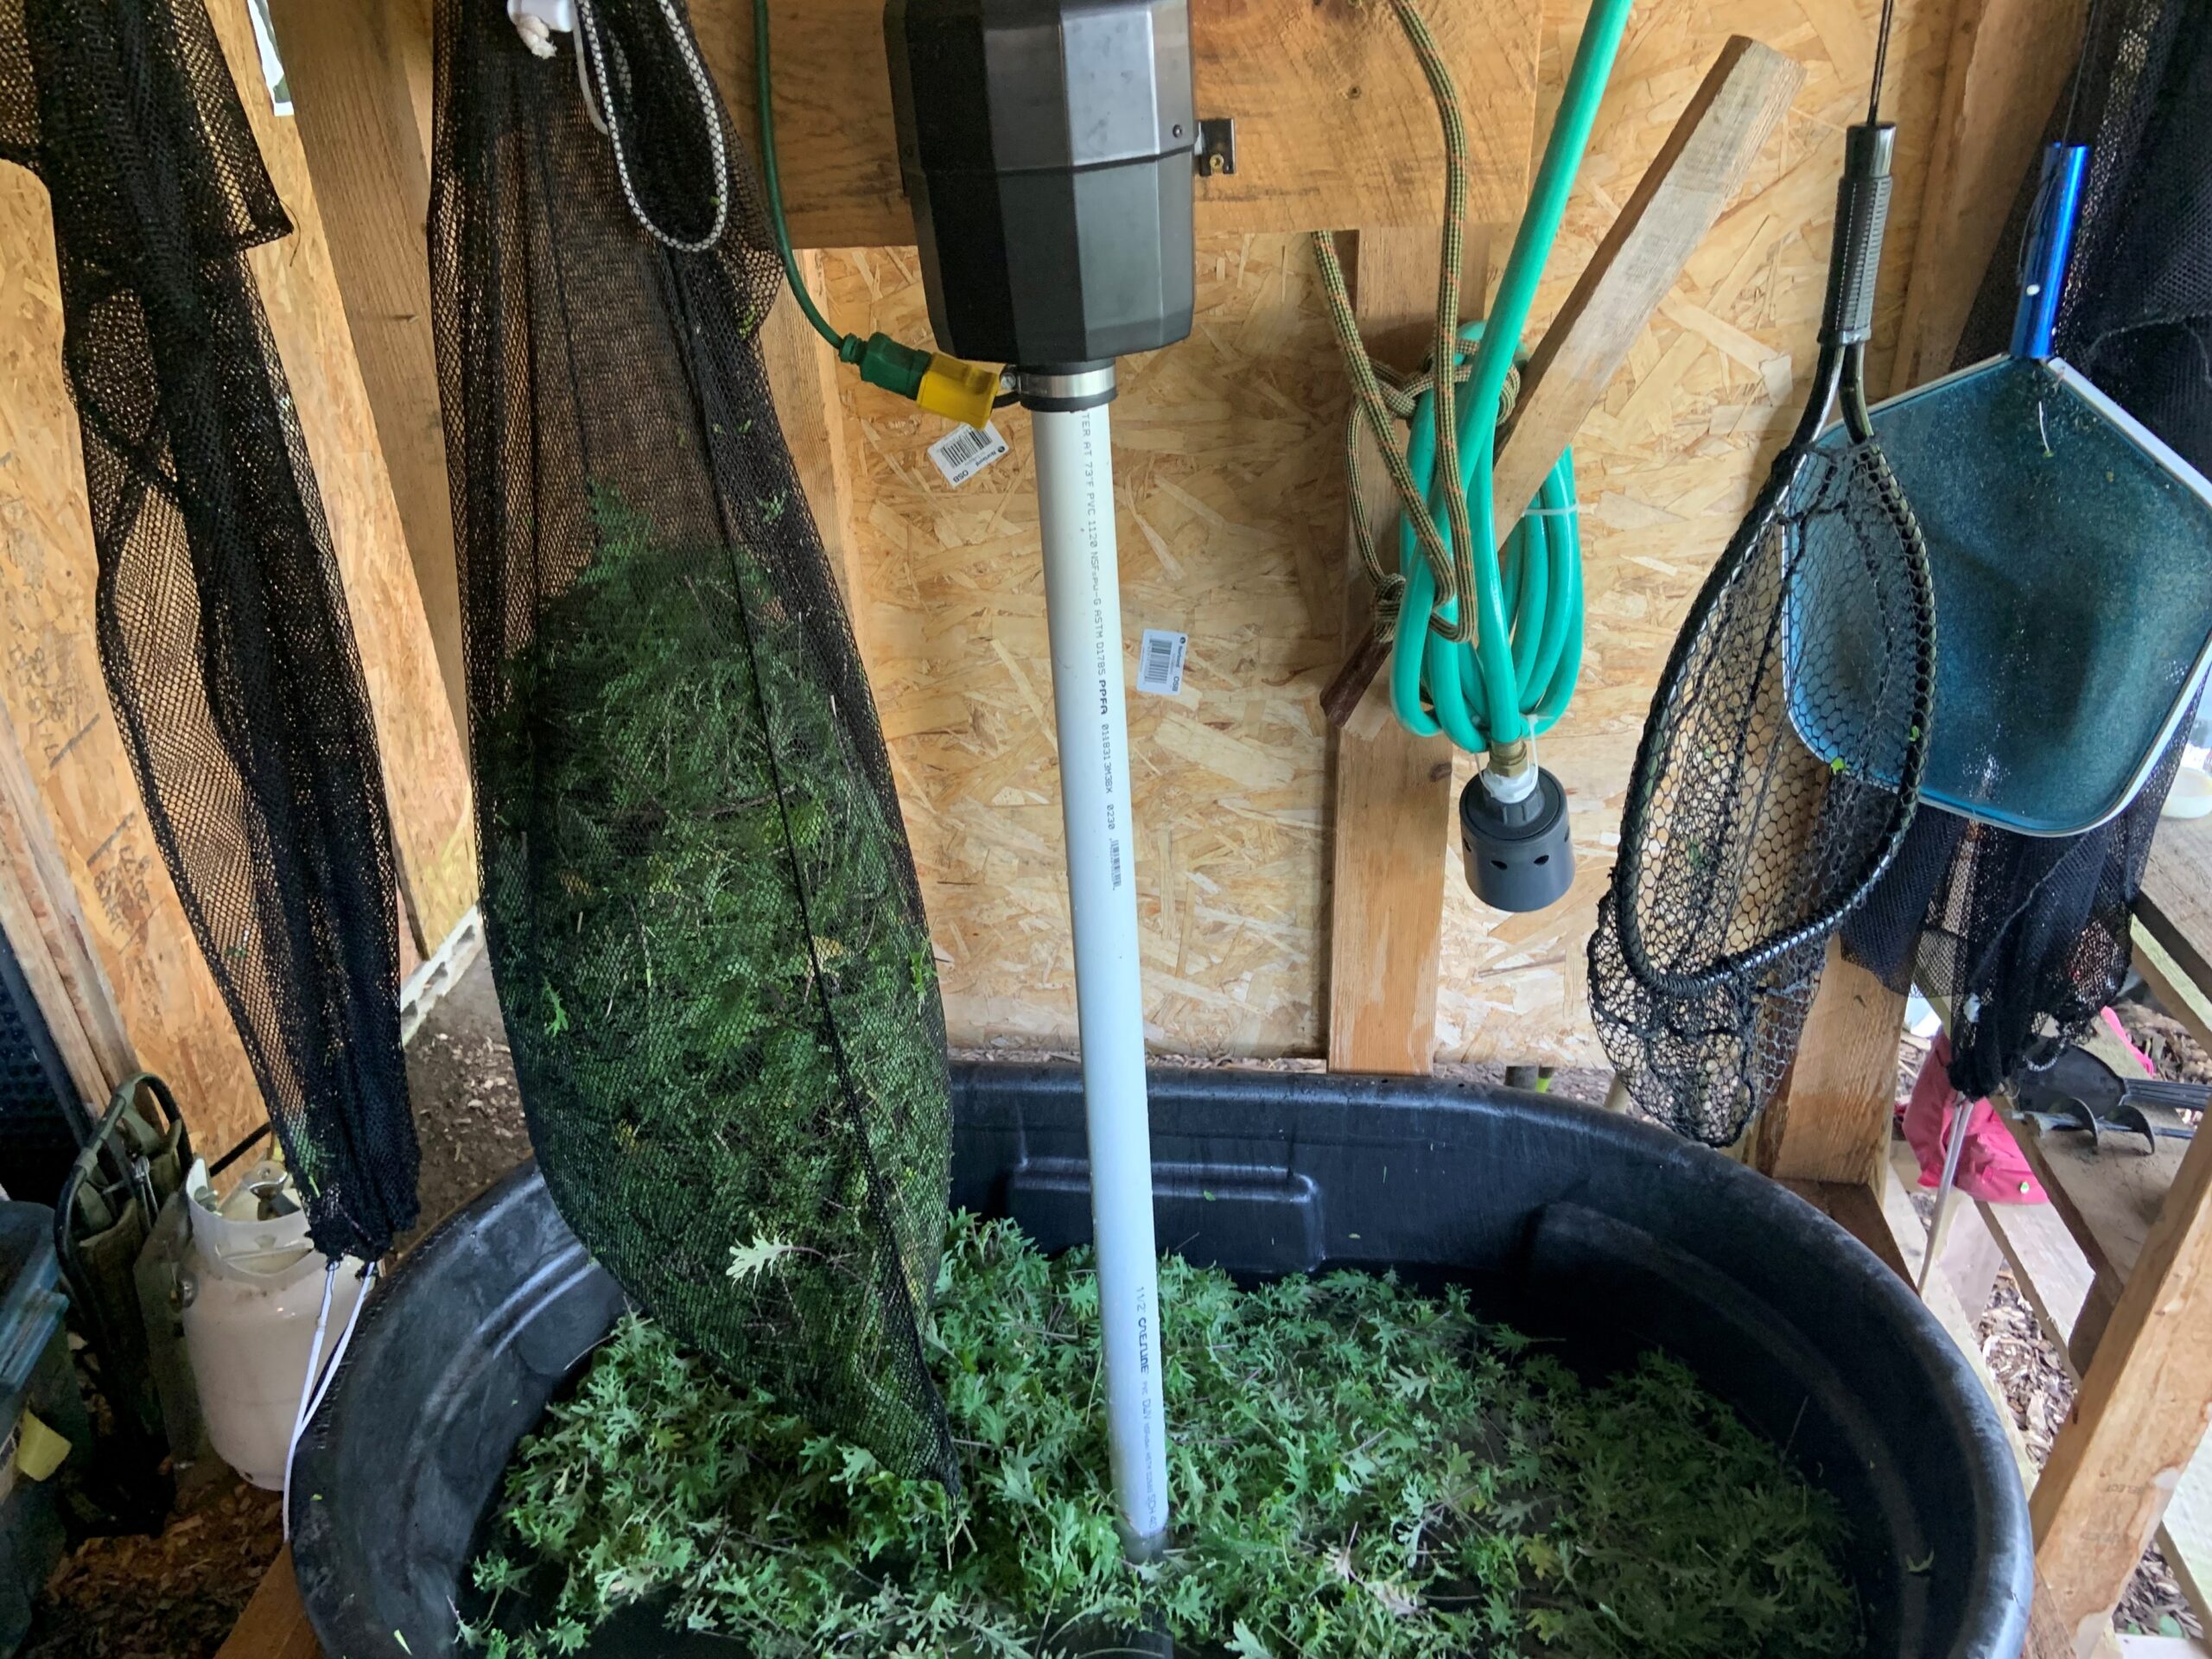
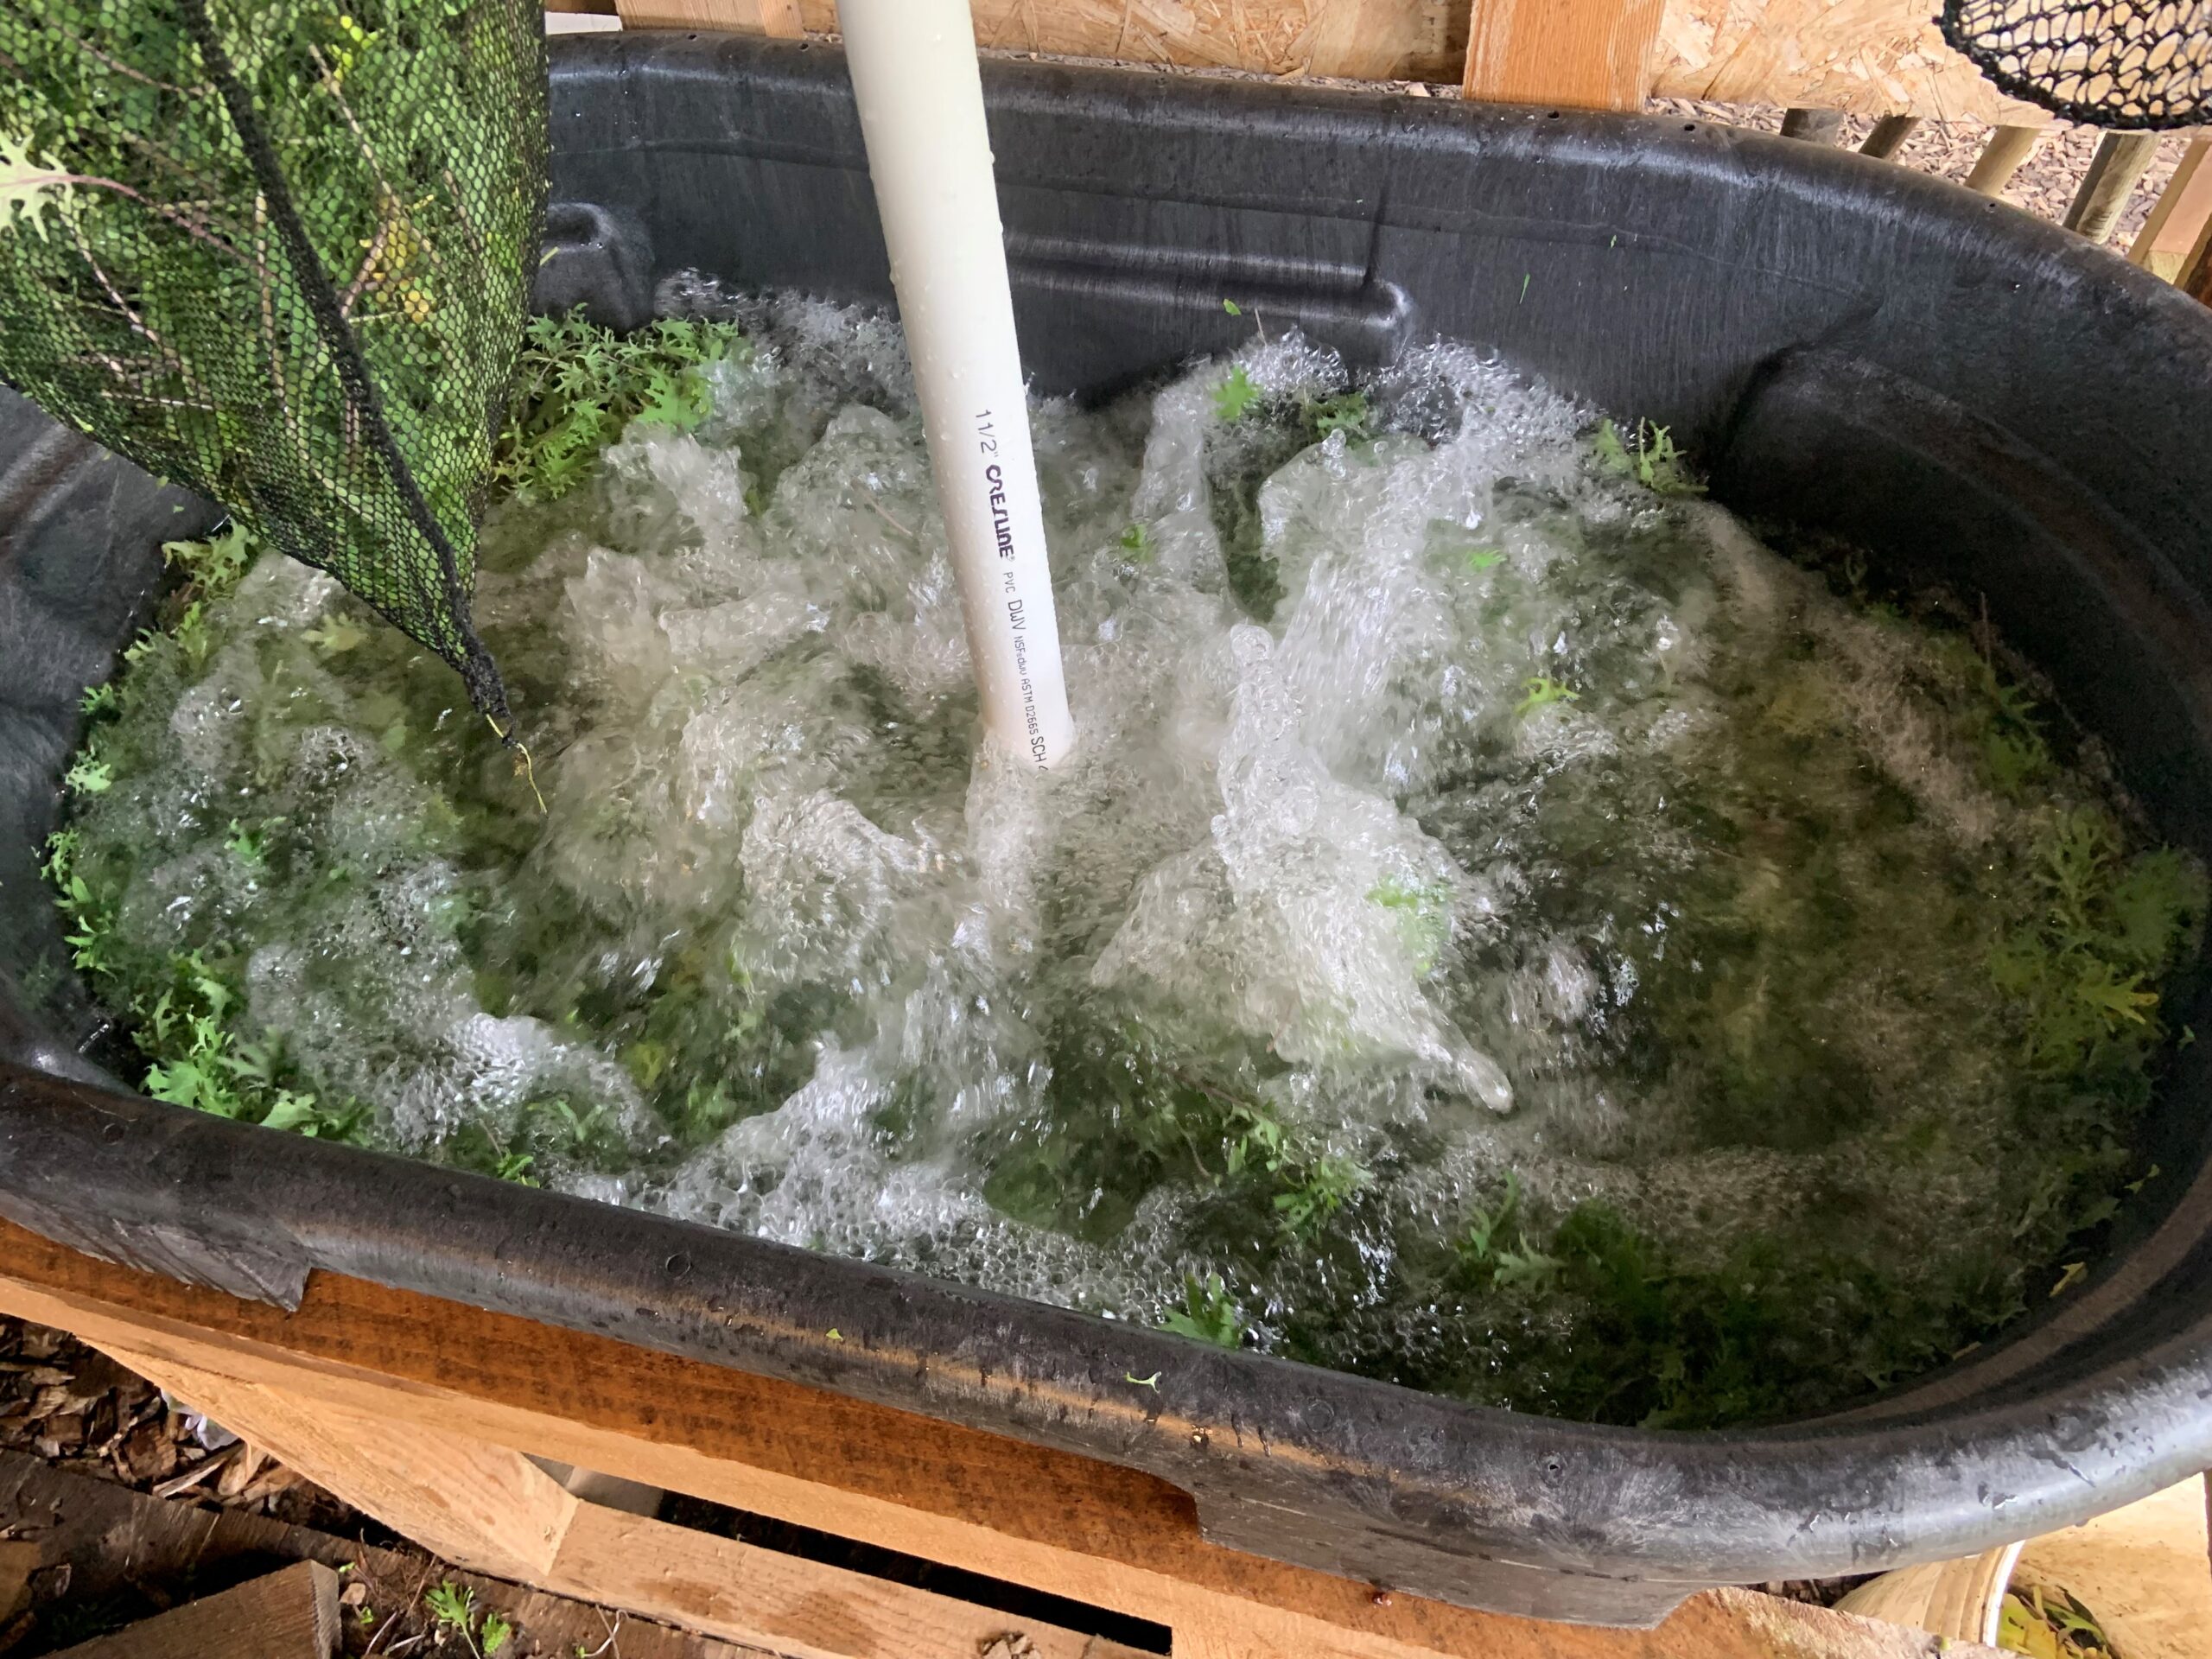
Build Gallery
(click on the photos to view full screen)

Farmer Bubbler Examples
Queen City Acres (Burlington, VT)
Tank: 100 Gallon Stock Tank Crops: All leafy greens & some microgreens including radish & sunflower shoots
Batch Size: 25lbs
Blower: 1hp Blower
Run Time: 2 Minutes, too much bubbling bruises the greens so we do a short cycle and some hand agitation to move the greens that get caught on the edge.
Features: Only glued some of the underwater parts for easy cleaning. Use a Hudson shut off valve so they don’t have to babysit the tank while it’s being filled.
Tamarack Hollow Farm (Barre, VT)
Tank: 195 Gallon Leader Evaporator Sap Tank, mounted on a frame with wheels custom welded by a friend.
Batch Size: 180 Gallons of water (~6” from the top) and can wash 32# of greens, 4 flip-top totes at a time for1.5-2.5 minutes depending on the crop.
Cycle Time: 100lbs of greens/hr with 1 person. The bottleneck is having a single greens spinner (Electrolux Greens Machine). Wash/pack and bagging together takes 2 man hours to do a 100lbs batch. It takes about 20minutes to wash the 6-8 baskets of greens that only takes 2 minutes to wash.
Scoop: Pool leaf rake to remove them from the tank
Sanitizer: Tsunami 100 from Ecolab
Cost: ~$1,000 including tank, blower, PVC and frame. Plus $60-75 on baskets.
Notes: A bigger tank could do a larger batch but being approx 3×4’ you can reach most of the way across the tank. We used Air Supply of the Future and their customer service was helpful. The tank bulges when full of water and getting the apparatus to stay down and in place is a challenge.
Work Song Farm (Hopkinton, NH)
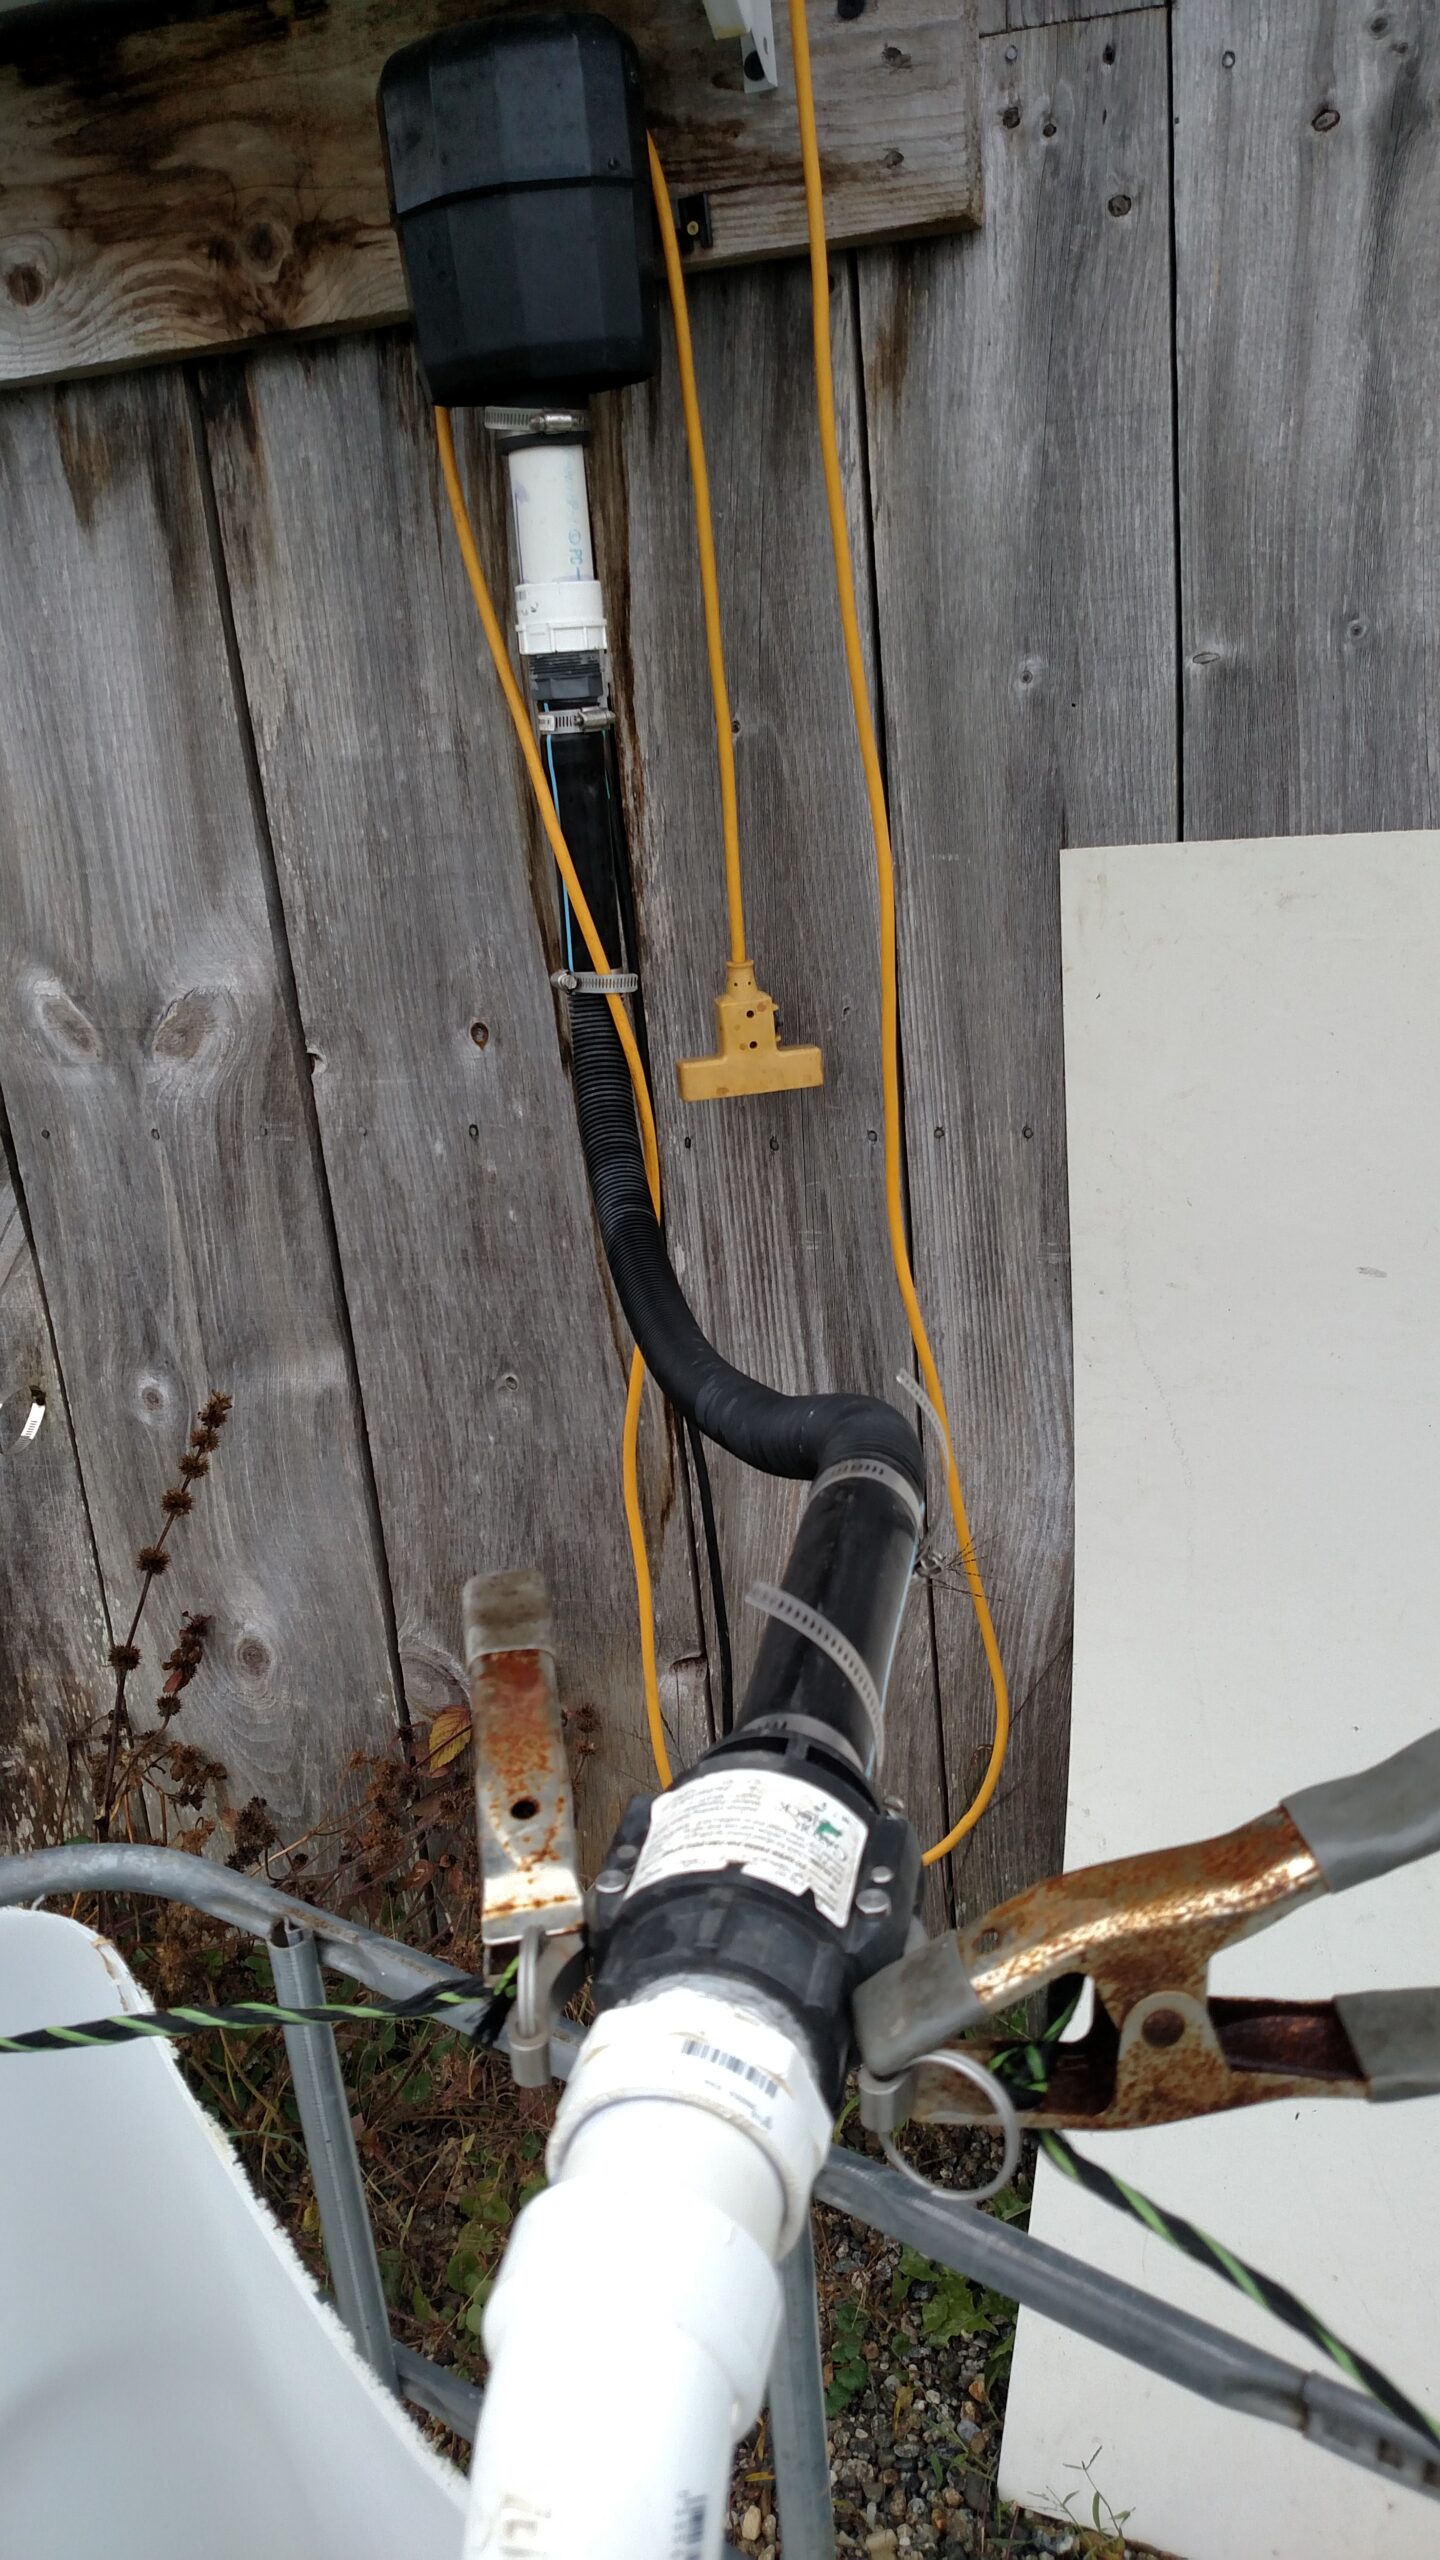
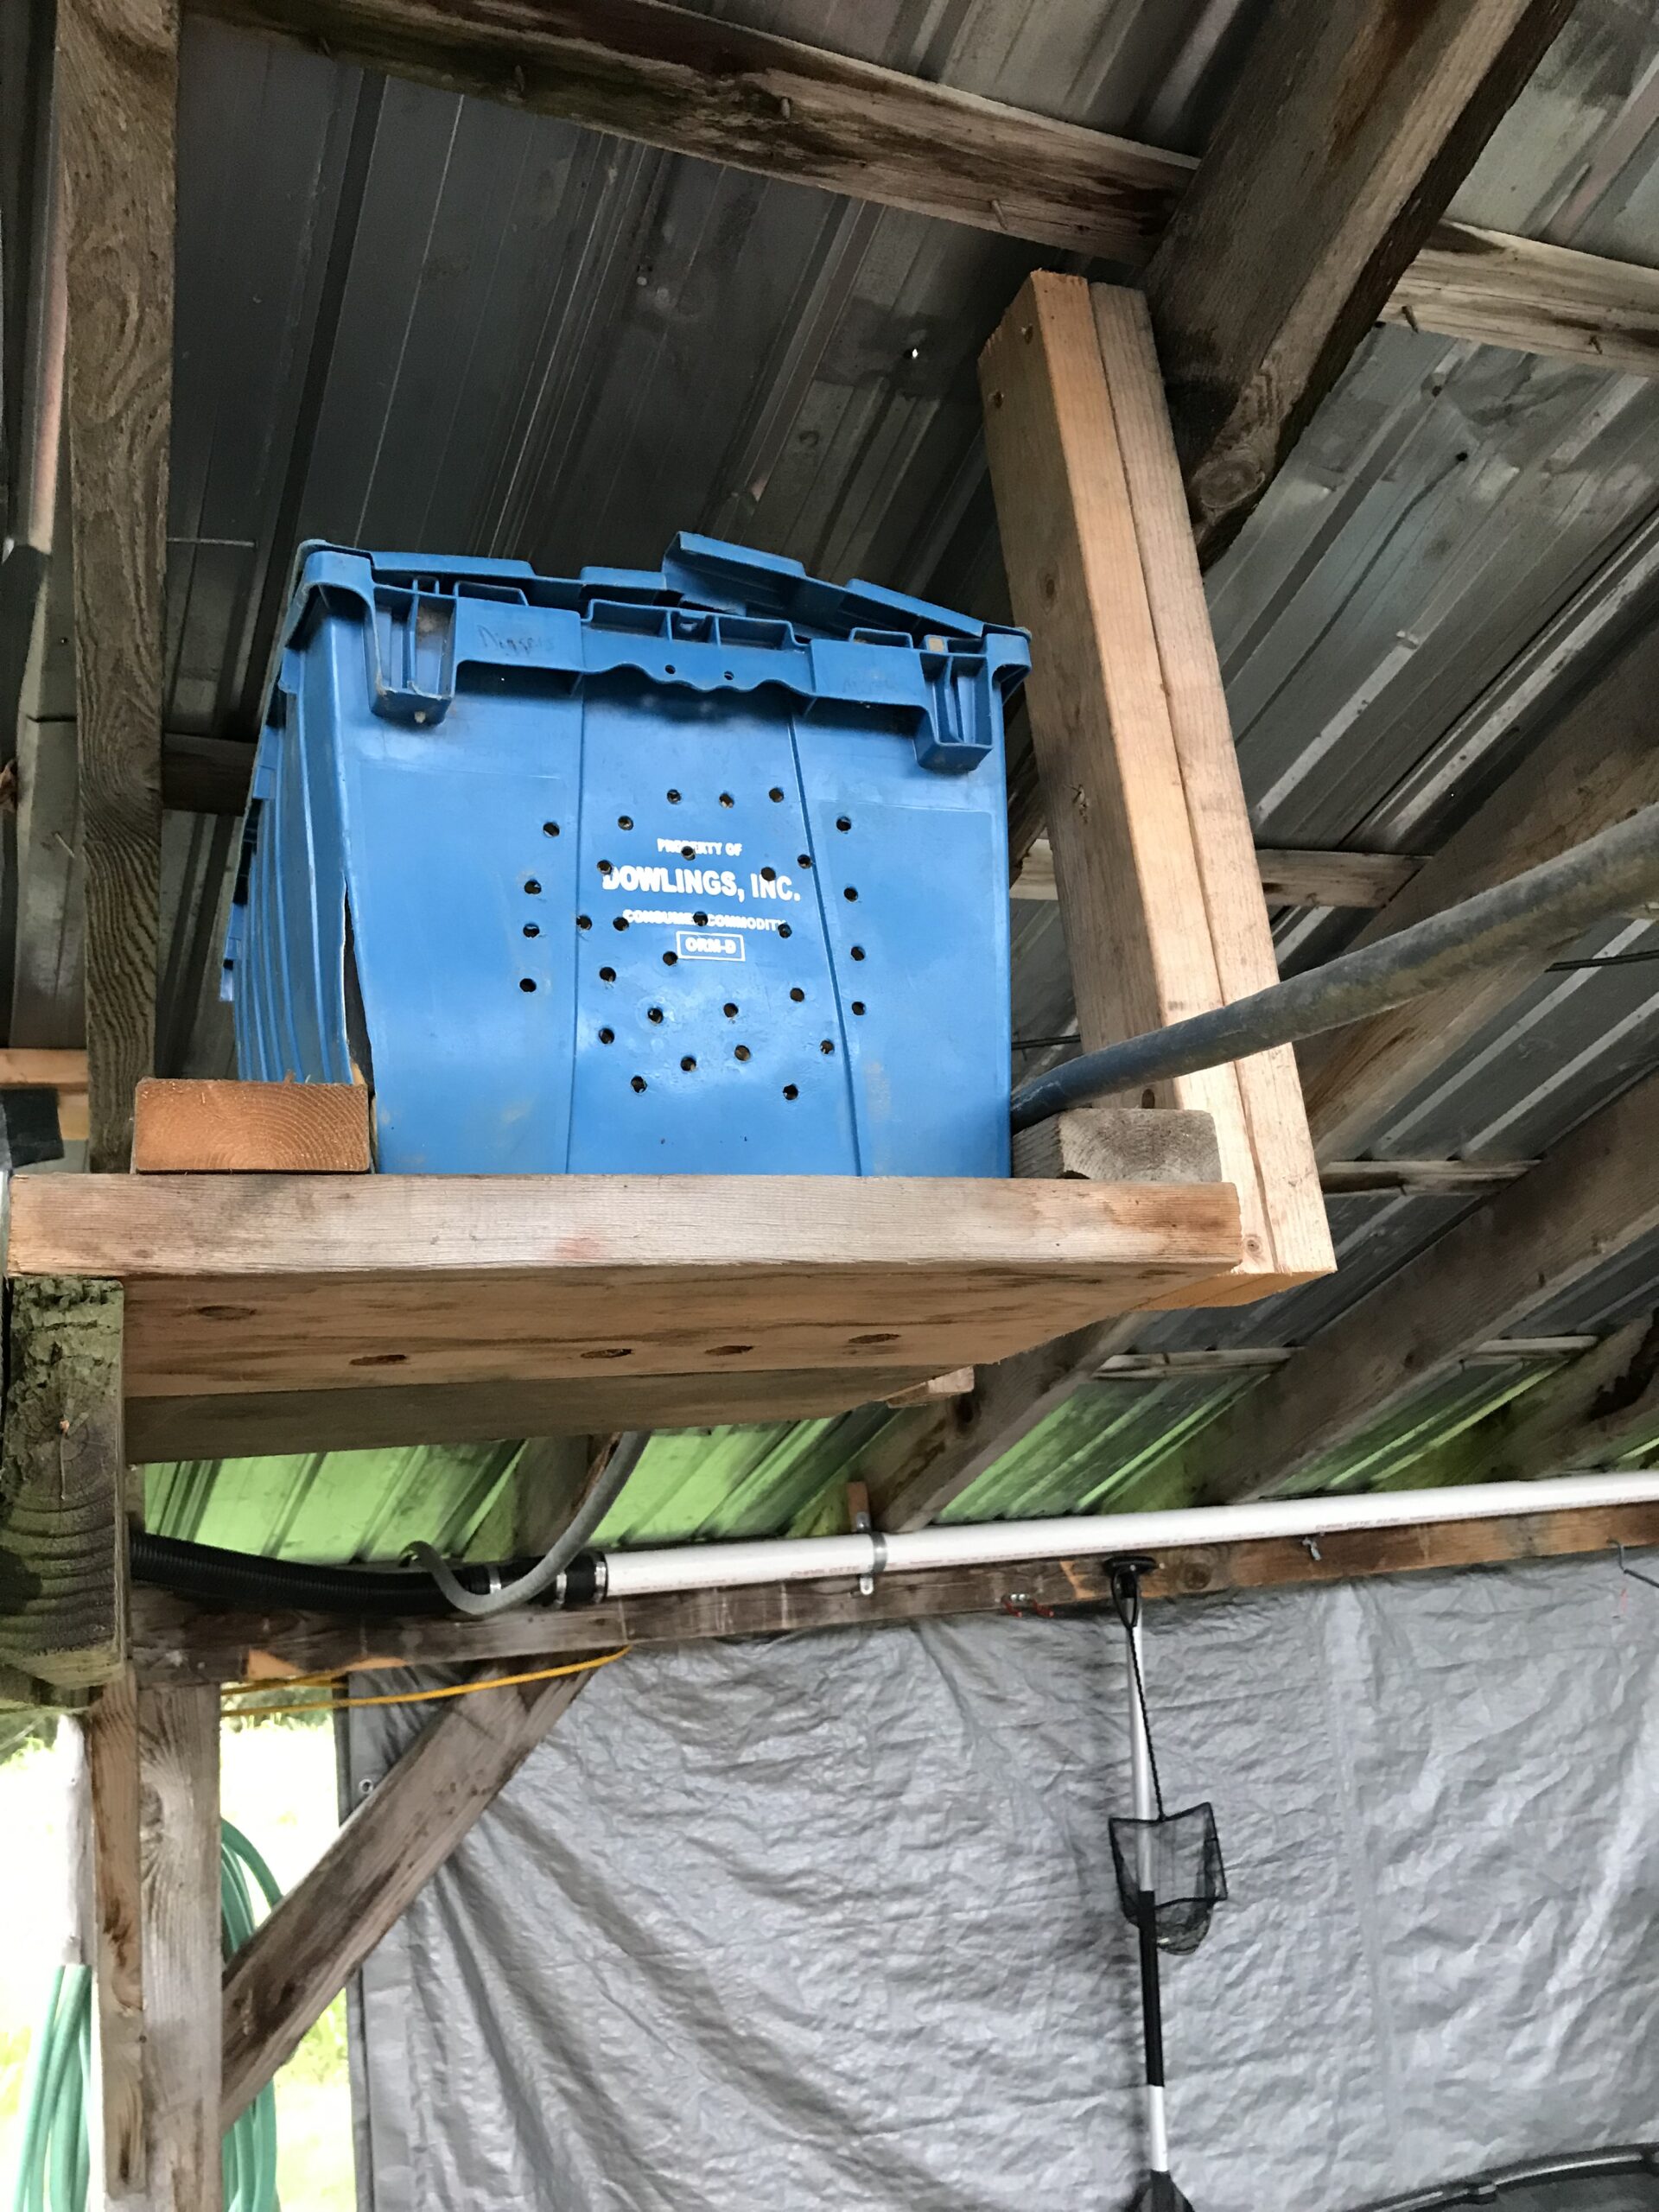
Tank: Bulk liquid tank–Poly cube on a pallet enclosed in a metal cage (known as an intermediate bulk container (IBC) with top cut off.. Holds 200 gallons water. Lightweight, easy to move around and tip on side to rinse. Would prefer stainless steel, but used what we had. Bottom valve with quick connect fitting allows draining, also fast filling if you hook up to 2″ pipe. If filling from the hose, a stock tank float valve keeps it from overfilling while you’re off harvesting. We’ve even hooked the blower line up through the bottom valve (though we no longer do this). A 1.5″ insert fitting connects pipes on the inside of the tank.
Blower motor: 1 hp Easy-Air portable spa blower from Spa Depot. The 1.5 hp model is only $5 more, but we found it too powerful. Even 1hp can be a bit powerful. A valve on the inlet could help, or more/bigger holes in the air pipe. We mount the blower to the wall (don’t want it falling in the tank) and connect it to the air pipe with a flexible washing machine discharge hose and a quick connect.
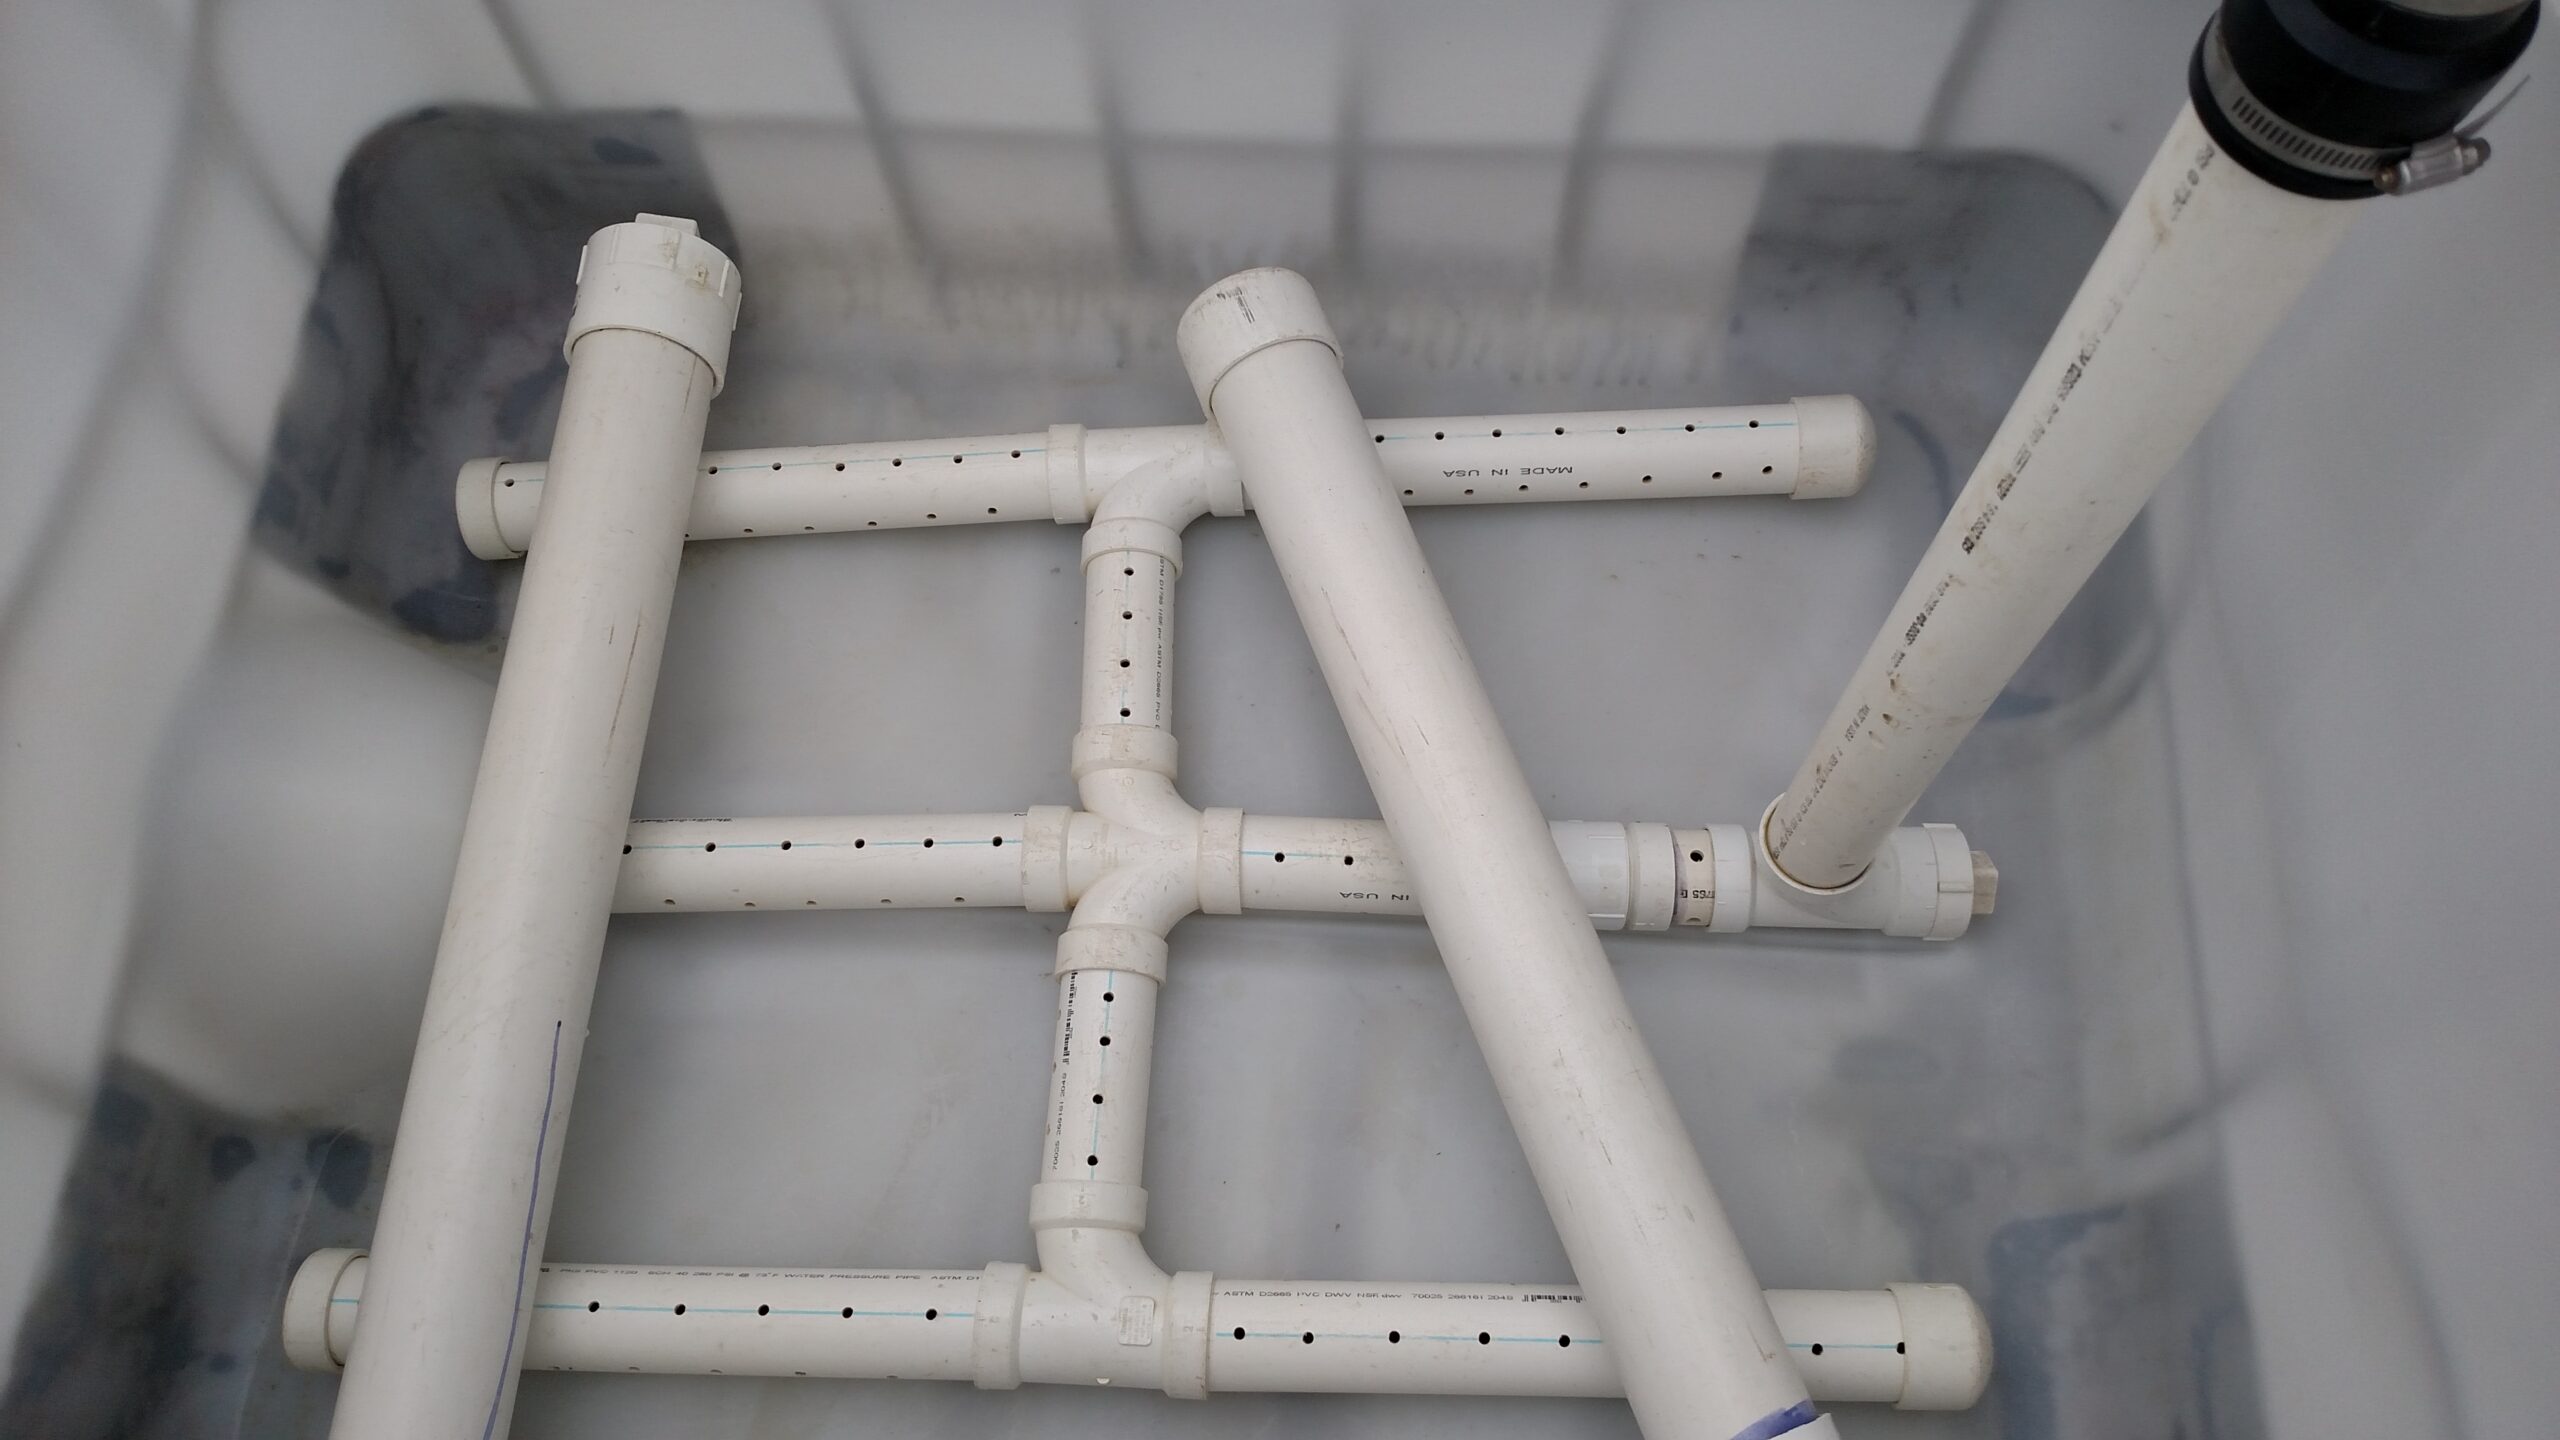
Air Pipe: 2″ PVC, drilled 3 rows of 1/4″ holes along top and sides. Connected in H-I pattern along bottom of tank, with caps at ends. Unglued, so you can pull apart to clean. Again I would prefer stainless. Bottle brush helps to scrub out the pieces. Held down with two pieces of capped, sand-filled 3″ PVC. Otherwise the pipe floats and comes apart.
Crops: We wash in the order of cleanest (greens) to the dirtiest (radishes, etc). Bubble for 1-3 minutes, depending on the crop. Greens mix goes into mesh bags first. Easier to remove. We also use for head lettuce, kale, chard, some herbs, radishes. Cabbage and broccoli — it gets off most caterpillars and droppings. If bunched items fall apart we’ll dunk them in a bulb crate with an empty crate on top to hold in. Use a pool skimmer removes floating debris.

CAPÉ Autoconstruction (Québec, Canada)
Video in action
Amber Waves Farm (Amagansett, NY)
Crops Washed: Baby kale, spinach, arugula etc.
Run Time: 2 minutes
Material Handling: Pool skimmers into orange baskets
Spinner: Converted washing machine


Diggers Mirth (Burlington, VT)
Blower: Ultra Air 9000, mounted 15’ away for noise reduction
Tank: 4×6’ 385 Gallon sap tank
Scoop: Fish baskets
Apparatus: 3” PVC, but it’s bulky and would rather it be 2″
Batch: 30-40lbs at a time, run for 3 minutes. Stirred by an oar if needed.
Features: Hudson float valve for filling, gate valve on the drain, heavy duty casters on the frame of the tank. The cross member would be nice to remove, but it’s used to hold the pipes down which is essential.
Ananda Gardens (Middlesex, VT)
No longer uses a bubbler. They had a set-up using a sap tank, and still uses that as a single dunk, but they have refined their greens growing and harvesting processes to keep their greens relatively clean and don’t need this level of agitation.
How to Clean a Bubbler
View this Bubbler Cleaning Factsheet
One of the best tools for cleaning a bubbler is a standard operating procedure (SOP). You can use the template available online as a start and customize it to suit your needs.
Some of the cleaning highlights for bubblers include:
- Always use water that is from a known safe source. The FSMA Produce Safety Rule requires this water to be “safe and of sanitary quality for its intended use” (§ 112.41) and have “no detectable generic Escherichia coli (E. Coli) in 100 milliliters (mL)” of water when used to contact food contact surfaces such as the bubbler tank surface and air tubes (§ 112.44).
- Disassemble the bubbler pieces to ensure complete access for cleaning and sanitizing.
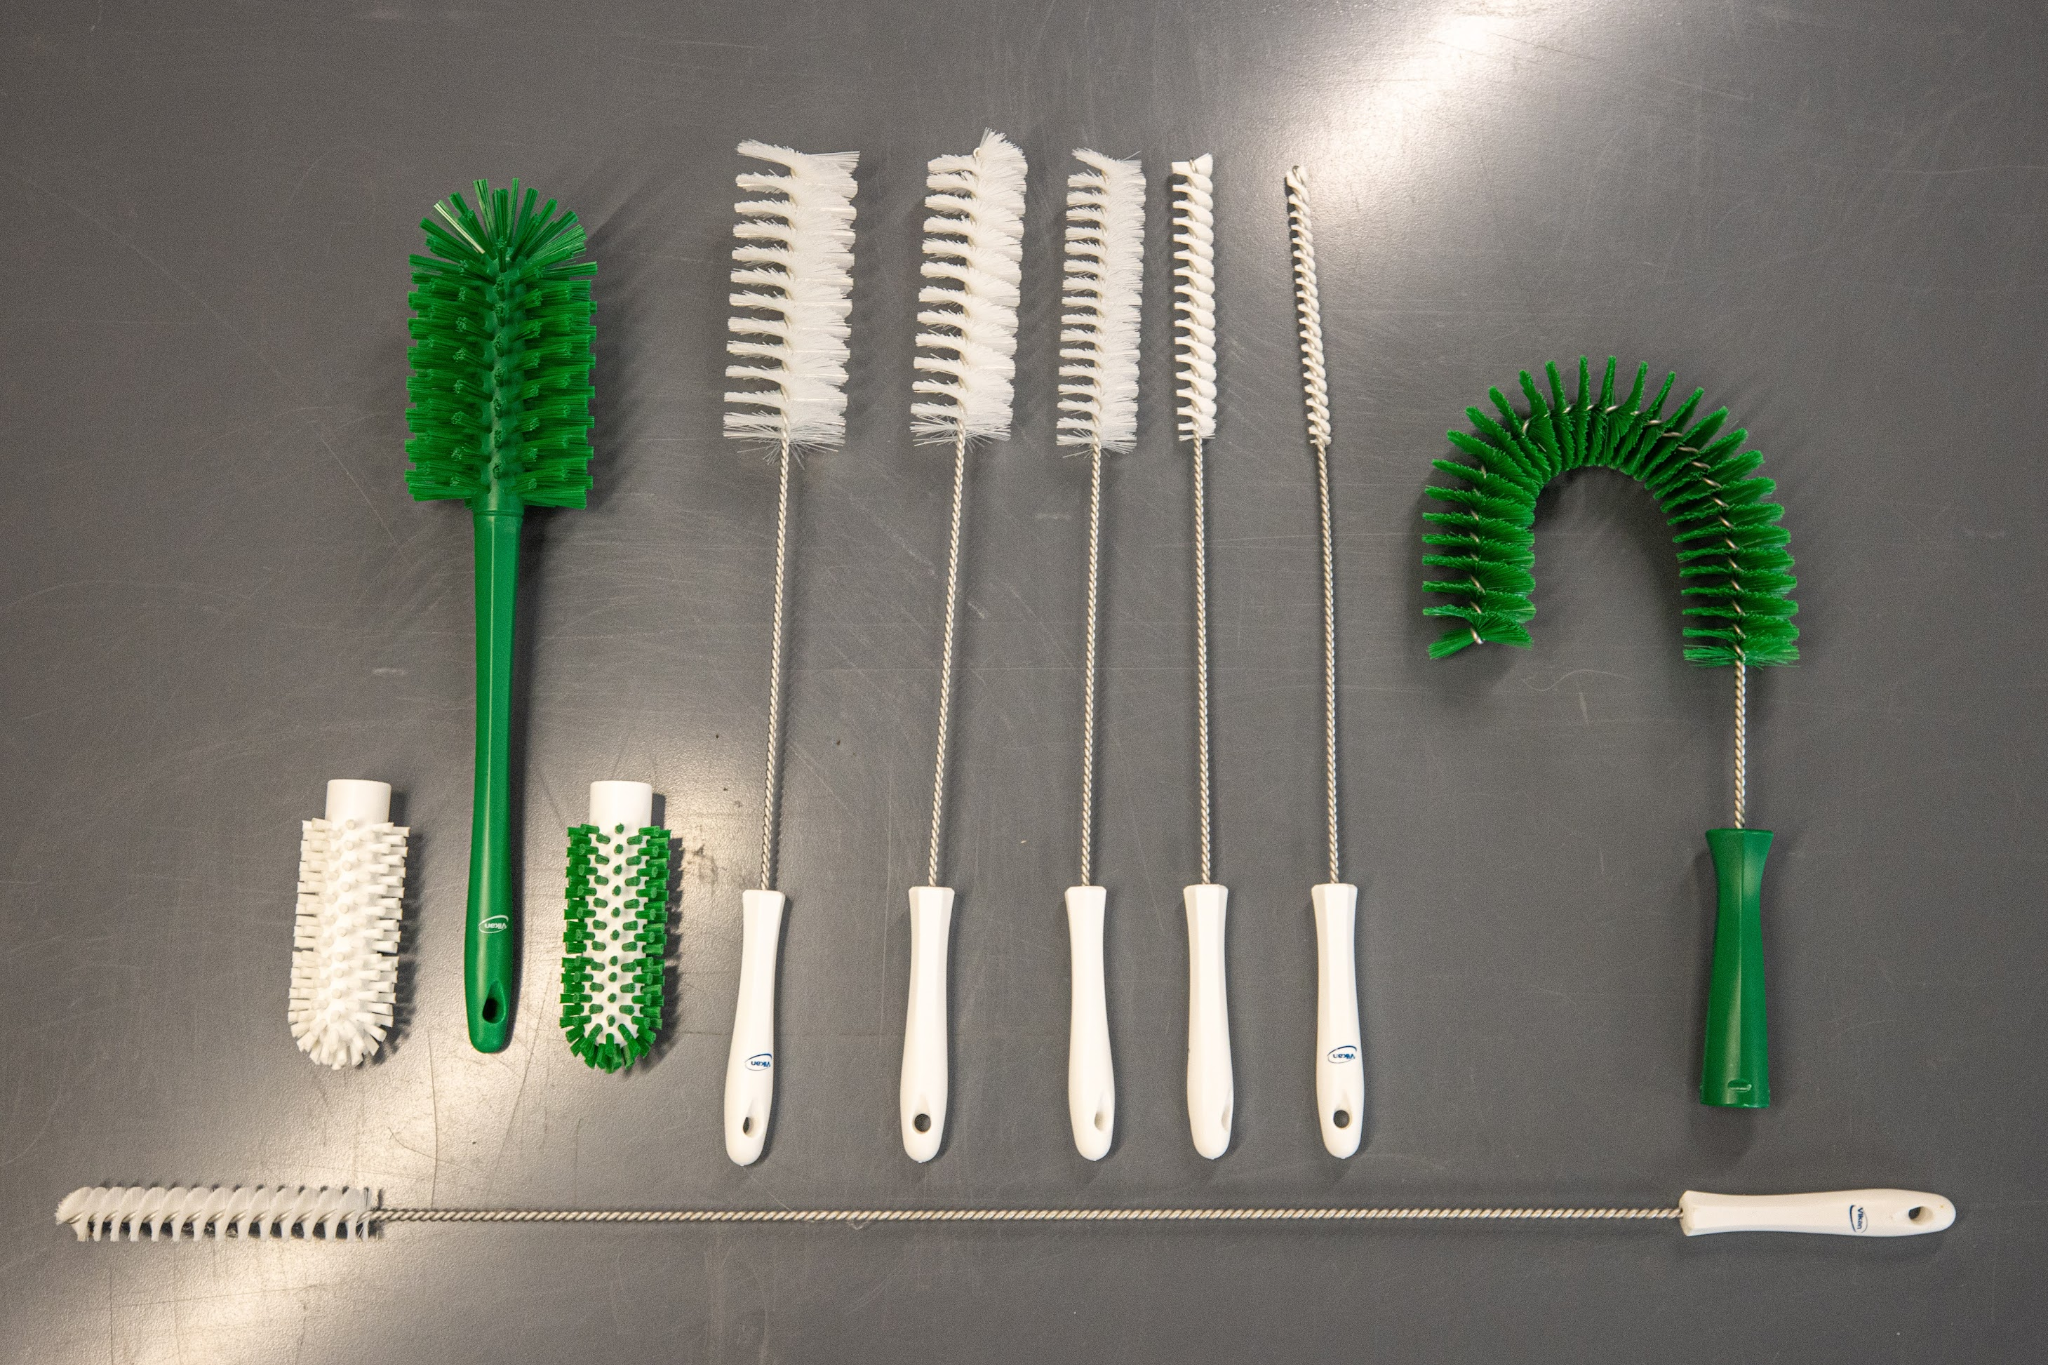
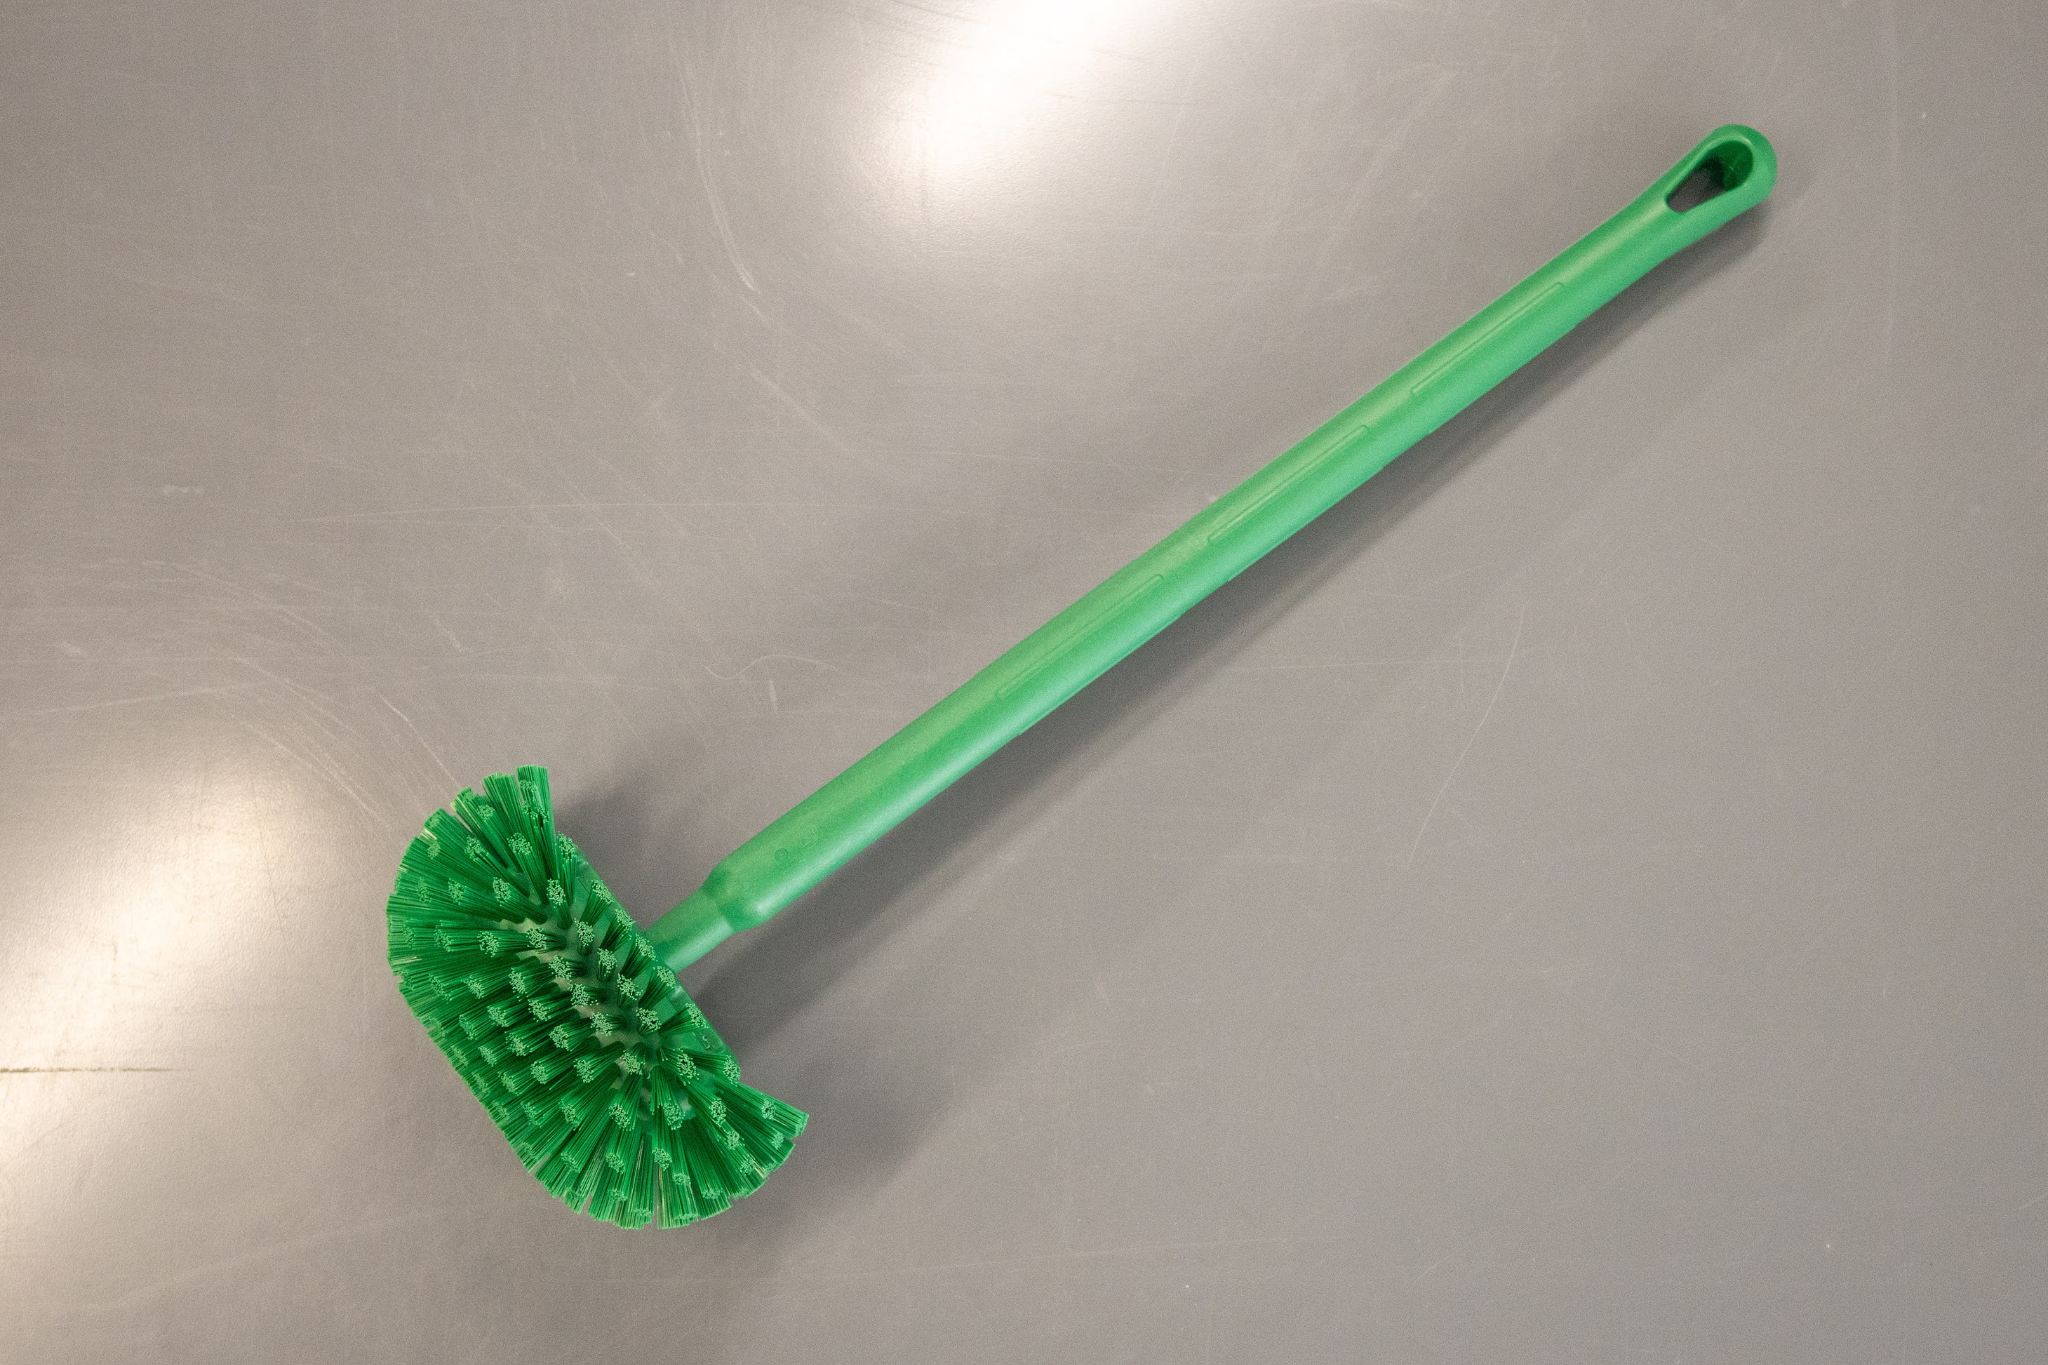
- Use a detergent and scrub brush to remove soil and to breakup algae and biofilms. Be sure to clean all surfaces that come into contact with the water in the bubbler. The water contacts the greens and therefore, anything in contact with the water also contacts the greens. The inside surface of the bubbler, the air tubes, the weights or fasteners used to hold the air tubes in place, any fill valve or hoses, and the drain connections should all be cleaned. Some examples of brushes for this job are noted below. More information is available in the resource, Cleaning Tools for Produce Farms.
- Rinse the clean surfaces well with low pressure, high volume water flow ensuring the water is drained away from the work area, other food contact surfaces, and any produce.
- Apply a sanitizer labeled for control of human pathogens in accordance with its label.
- Tip the tanks up side down to dry resting them on a clean support that prevents them from contacting the ground.
- Also allow the air tubes to dry completely by hanging and resting on a drying rack.
- Provide airflow in the drying area to help ensure complete drying.
Produce safety tip: Always drain and tip the tank and piping to dry at the end of the day. Standing water will promote biofilms, algae and bacterial growth increasing produce safety risk and making it more challenging to clean.
Caring For Your Bubbler
Good maintenance is important for longevity of the bubbler, quality of the greens, and protection of your crew. Make sure everyone using the bubbler knows what it should look like, sound like and feel like. If anyone notices something different, be sure they know to raise the issue with the rest of the team. A regular inspection of the parts and assemblies, perhaps during cleaning, is a good time to look carefully at all the details. This also will provide time for repair prior to the next use.
This guide is meant to provide some pointers for building a more cleanable bubbler that will last a very long time and make your greens washing easier. Enjoy!
Watch the Webinar
Share this post!
You can use this short link to share our blog post: go.uvm.edu/bubblers
Acknowledgements
This resource was developed as part of the Food Safety Outreach Program under grant number 2020-70020-33003 from the USDA National Institute of Food and Agriculture and also funded, in part, by the USDA Northeast Sustainable Agriculture Research and Education program through award LNE19-375 and by the Food and Drug Administration through The Vermont Agency of Agriculture Food and Markets via the Integrated Extension Educational Programming in Support of the VAAFM Produce Program Grant 02200-FSMA-2018-01. The views expressed in the publication do not necessarily reflect the official policies of the U.S. Department of Agriculture, the U.S. Department of Health and Human Services or the Vermont Agency of Agriculture; nor does any mention of trade names, commercial practices, or organization imply endorsement by the United States Government or the State of Vermont. It is offered without regard to race, color, religion, sex, sexual orientation, gender identity, national origin, disability, protected veteran status, or any other category legally protected by federal or state law.”