
A video guide on this topic is available here.
A printable PDF version of this guide is available here.
Introduction
Concrete slab floors, ramps, steps, and loading docks make it easier to move produce and produce handling equipment using wheels. The smooth surfaces also allow for easier clean up and wash down at the end of the shift by providing an easy surface to sweep and hose down with good drainage (Callahan, Bihn, & Chamberlin, 2020).
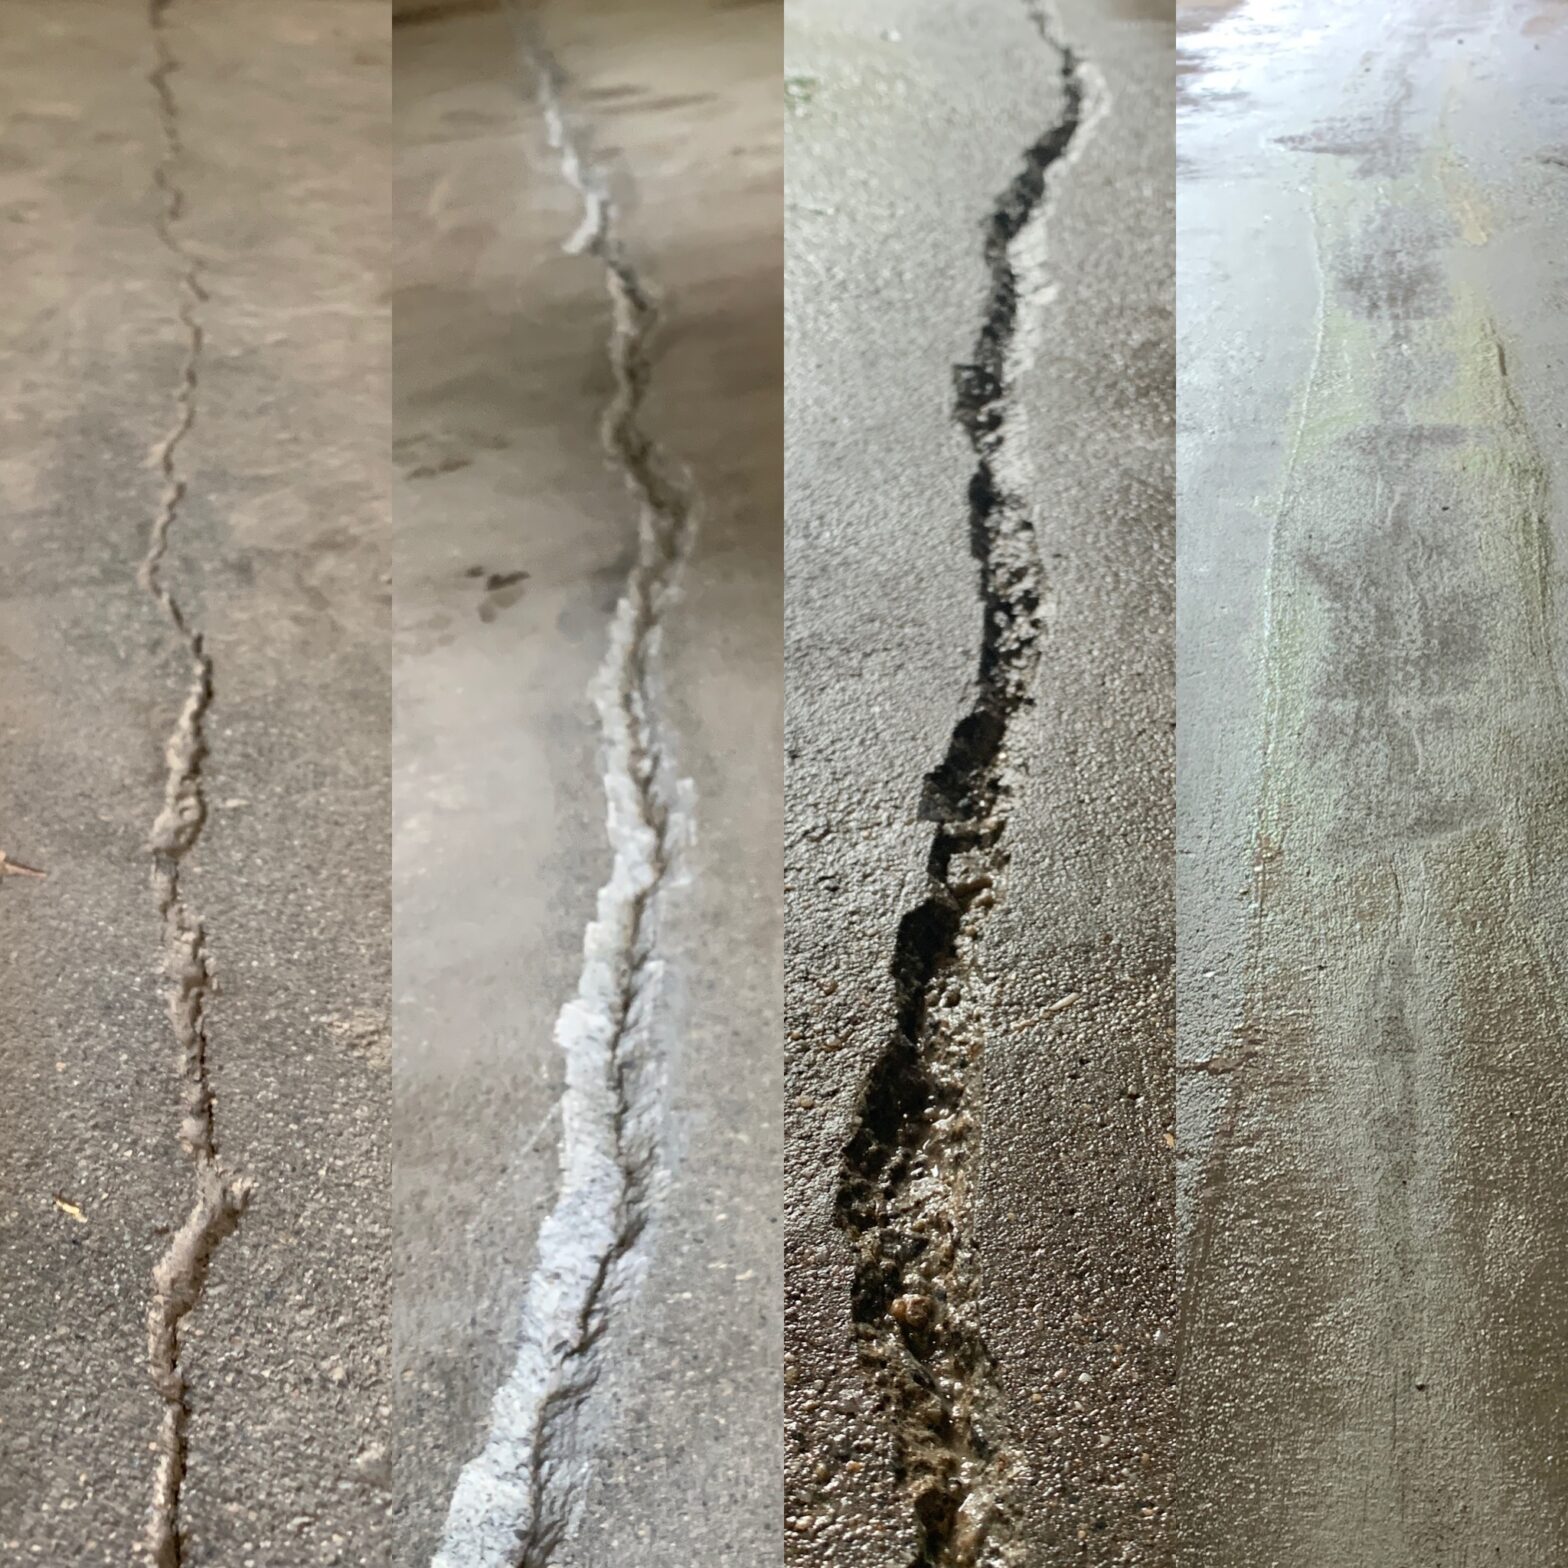
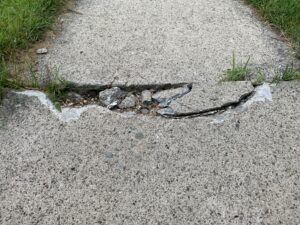
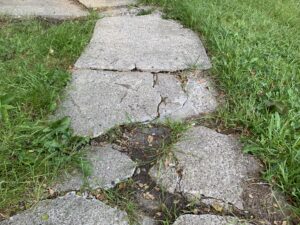
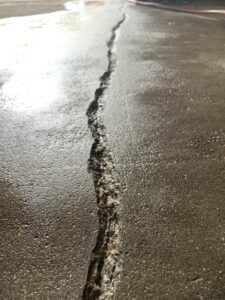
Concrete is sturdy and hard once cured. It holds up to heavy loads in compression. But it is brittle which causes it to chip. It often fails in tension which causes cracks to appear. Concrete is also prone to pitting if exposed to acidic liquids such as can drip from bins of apples and other fruit. When concrete fails in the form of a crack or pitting it gets in the way of smooth operation and can also pose a personnel risk in the form of a trip hazard or uneven floor which could put rolling loads out of balance.
Cracks and pitting in concrete floors in food handling, washing, and storage areas can also pose a food safety risk (Ingram 2015, United Fresh 2018). The Food Safety Modernization Act’s Produce Safety Rule highlights the need for design, maintenance, and cleaning of floors to provide sanitary conditions in §112.126 (FDA 2016, FDA 2018).
Cracks and pits prevent adequate drainage. Water, soil, and food build up cracks and pits during wash down and drying is inhibited. Water can accumulate in pits and cracks resulting in standing water. This can result in harborage points for human pathogens. In addition to human pathogens, plant pathogens may also find harborage in these locations resulting in increased product loss in storage.
If your produce or its container is placed on the floor, the floor can become a food contact surface increasing the need for attention to its cleaning and sanitization. Even if you are careful about keeping containers off the floor on pallets, splashing water from the floor can be a source of contamination. So, keeping a floor in good condition so it can be kept clean is important.
Repair Approach Decision
Not all cracks and pits are easily repaired, and some may require cutting and re-pouring if they are significant. How do you know how to proceed? Use the following guidance:
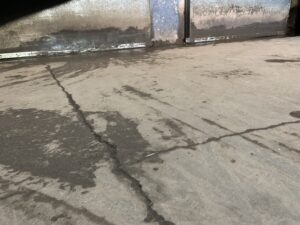
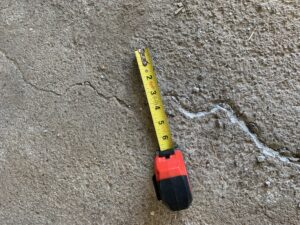
- Are the cracks large (>2 inches on average with offset edges like a cliff)?: Cutting and re-pouring is likely the best option. Contact a mason. Smaller cracks (2 inches wide on average or smaller) can be repaired using the methods described below.
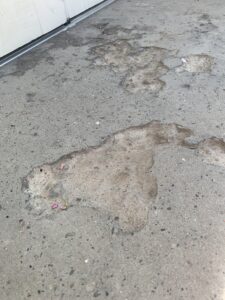
- Are the pits deep (>2 inches deep)? Cutting and re-pouring may be your best option. More shallow pits can be repaired using the methods described below.
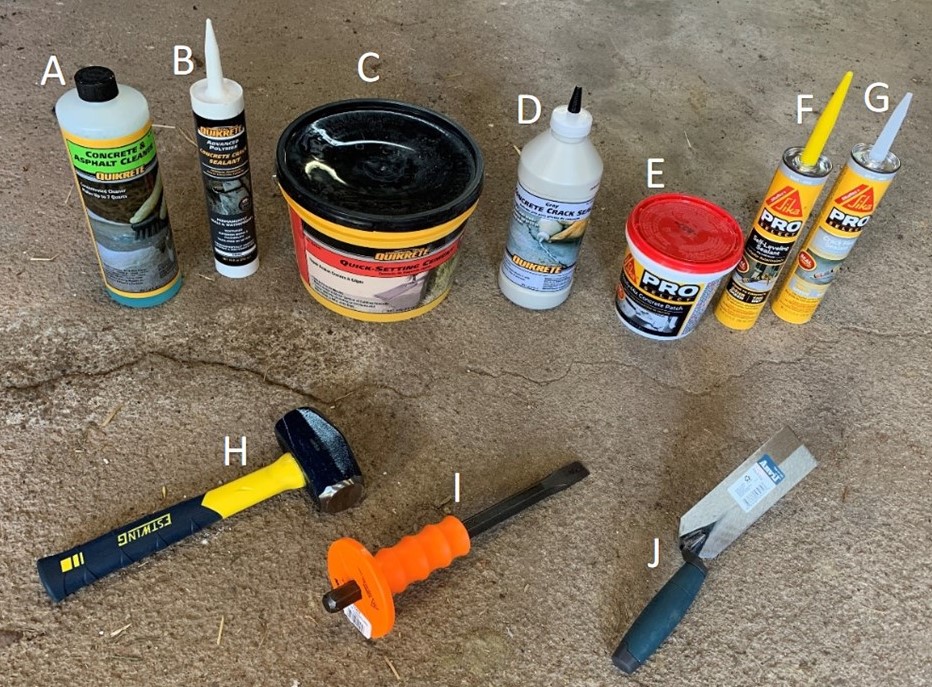
Repair Material Decision
- Are the sides of the crack moving relative to each other seasonally? Use a flexible sealant which will allow some movement (not covered in this document). Do note that if there is movement, there may be a more significant structural issue that needs attention. Repairing a crack with significant dislocation and movement over time is not a long-term solution.
- Is the damaged area relatively stable and not moving? Is it in a traffic or heavy load area? Use Fast Setting Repair Mortar or Quick Setting Cement. Repair mortar and cement will cure to provide high strength in compression which will stand up to typical loads.
Repairing Cracks
For cracks up to 2 inches wide the repair steps are demonstrated in a series of 5 videos and outlined below.
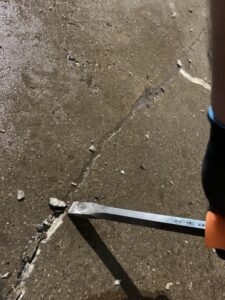
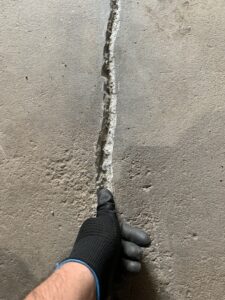
1. Expose
It is important to expose a fresh face of concrete along the damaged area using a hand sledge and mason chisel or an angle grinder with a masonry wheel. This step is meant to remove any weak or brittle material that wouldn’t support a strong new bond, don’t hold back. If you do not break it off, it will break off on its own after your attempts to repair it. If you find that material breaks off very easily with one strike, that is a clue that you may have to take more off in that location. Aim for about finger or thumb width when making the new V-shaped version of the crack. You will develop a feel for it.
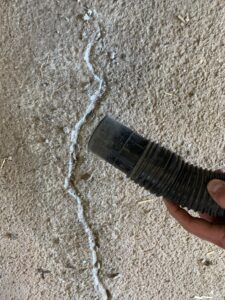
2. Clear
Vacuum up the debris and loose material after exposing the fresh face of concrete. A stiff bristled broom or wire brush is helpful here and the masonry chisel will help loosen stubborn bits. The wire brush is especially important if the crack of pit has existed for some time. This longer-term exposure weakens the surface and continues to slowly erode the material. Brushing removes this weakened material. Some more hand sledge and chisel work may be needed to get some of it out. Vacuum out all the loose material, this will help your cleaner go further and do a better job.
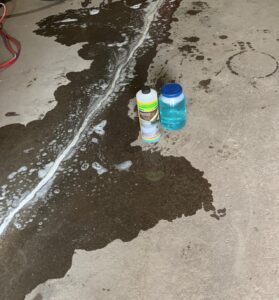
3. Clean
Wet the surface with clean and safe water and apply masonry cleaner in accordance with the label of the repair material you plan to use. Use a stiff bristled brush or a wire brush to work the cleaner into the crack and clean the surface. In some instances, multiple applications and rinses may be required. If the cleaning solution becomes brown and greasy, you have got more work to do. The final cleaning should result in a relatively white and frothy or bubbly appearance.
4. Wait
Concrete cleaner is designed to work over time. Typically, 1-5 minutes is recommended. Consult the label for your application. Hydrate and give your back a stretch, the next steps require attention.
5. Vacuum
Use a wet/dry vacuum to clear up the bulk cleaner and any debris that wire brushing has loosened. It is important to have a clean work area for the next step. Once we start applying mortar, we want to be sure we can “float” or smooth it without having pebbles getting in the mix. Vacuum not only the crack and pit, but the area surrounding them also. You will end up applying mortar to an area wider than the crack or pit so you can smooth it properly.
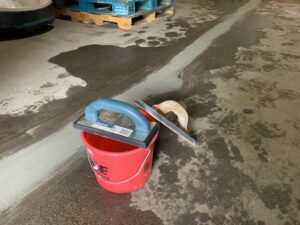
6. Prepare Repair Material
It is best to use either Fast Setting Repair Mortar or Quick Setting Cement for these repairs. Follow the product label for mixing and preparing.
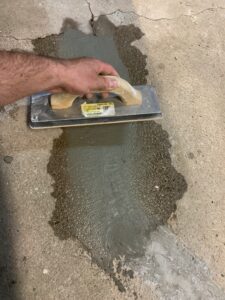
7. Apply Repair Material
It is generally best to use a 6”x2” margin trowel for applying the repair material, smoothing it initially with the wider edge. Apply more than you think you need, spread it with the margin trowel ensuring that the material is driven into the crack.
Smooth the repair by “floating” with a rubber grout trowel.
8. Cure
Allowing the repaired area to dry naturally. Divert traffic away from the repair.
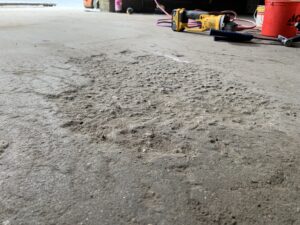
Repairing Pits
For pitting the approach is quite similar. There are two main differences.
1. Expose
The pit has largely been exposed for some time, so exposure in this case is about
- angling the cliff edge around the pit and getting to solid material and
- getting rid of any loose or weak material within the pit that may prevent a solid bond when filled.
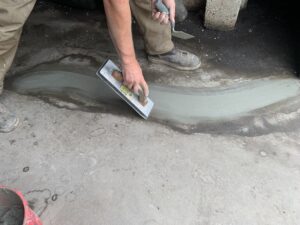
2. Apply Repair Material
This can be a real trick. Remember that we are aiming for “better” and don’t let perfect be the enemy of good enough. You will reach a point where you want to go back and float it some more and you just add more problems. That said, a longer floating trowel is helpful for floating these areas. A magnesium float (mag float) can be nice for the centers of these repairs in larger pits, though they work best on large fresh pours of concrete. The existing hard surfaces on the sides of these pits tend to make them less helpful in repair work.
Conclusion
Concrete floors are a popular choice for both new and renovated packing house and cooler floors. Like any floor they require maintenance and cleaning. The information provided is meant to help growers ensure the integrity of their floors so that their cleaning and sanitization procedures can be most effective.
References
Ingram, D. (2015). Final Qualitative Assessment of Risk to Public Health from On-Farm Contamination of Produce. https://www.fda.gov/media/116766/download
Standards for the Growing, Harvesting, Packing, and Holding of Produce for Human Consumption. (2016). US FDA. https://www.regulations.gov/document/FDA-2011-N-0921-18558
Draft Guidance for Industry: Standards for the Growing, Harvesting, Packing, and Holding of Produce for Human Consumption. (2018). US FDA. https://www.fda.gov/media/117414/download
United Fresh Food Safety & Technology Council (2018) Guidance on Environmental Monitoring and Control of Listeria for the Fresh Produce Industry. https://www.unitedfresh.org/content/uploads/2019/03/FINAL-UFPA-Listeria-Guidance.pdf
Callahan, E. Bihn, and A. Chamberlin. (2020) Hygienic Design for Produce Farms. Fact Sheet and Evaluation Checklist. http://go.uvm.edu/hygienicdesign.
Callahan and A. Chamberlin. (2018) Floor Design for Vegetable Wash, Pack and Storage Areas. http://go.uvm.edu/floors.
Share this resource!
A short link to this web page is: go.uvm.edu/concreterepair
Acknowledgements
UVM Extension helps individuals and communities put research-based knowledge to work. Issued in furtherance of Cooperative Extension work, Acts of May 8 and June 30, 1914, in cooperation with the United States Department of Agriculture. University of Vermont Extension, Burlington, VT. University of Vermont Extension, and U.S. Department of Agriculture, cooperating, offer education and employment to everyone without regard to race, color, national origin, gender, religion, age, disability, political beliefs, sexual orientation, and marital or familial status.
Funding for this statement, publication, press release, etc. was made possible, in part, by the Food and Drug Administration through grant PAR-16-137, by grant number 2020-70020-33003 from the USDA National Institute of Food and Agriculture, and by the National Institute of Food and Agriculture, U.S. Department of Agriculture, through the Northeast Sustainable Agriculture Research and Education program under subaward number LNE-19-375. It is offered without regard to race, color, religion, sex, sexual orientation, gender identity, national origin, disability, protected veteran status, or any other category legally protected by federal or state law. The views expressed in the written materials or publications and by speakers and moderators do not necessarily reflect the official policies of the U.S. Department of Health and Human Services or the U.S. Department of Agriculture; nor does any mention of trade names, commercial practices, or organization imply endorsement by the United States Government.